Resize images at the command line
 Jim Hall
I like to include screenshots in my articles. I find that a visual element helps the reader to understand what I’m describing. When showing how to do something in an app, I try to include full-size screenshots where I can. For example, in my article about how to format a book interior in LibreOffice, I used lots of full-size screenshots.
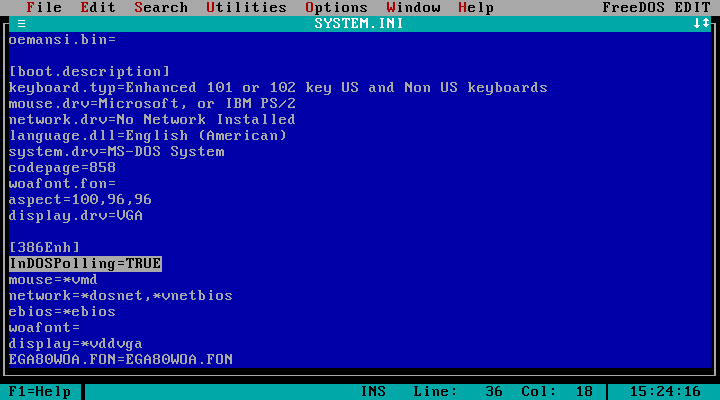
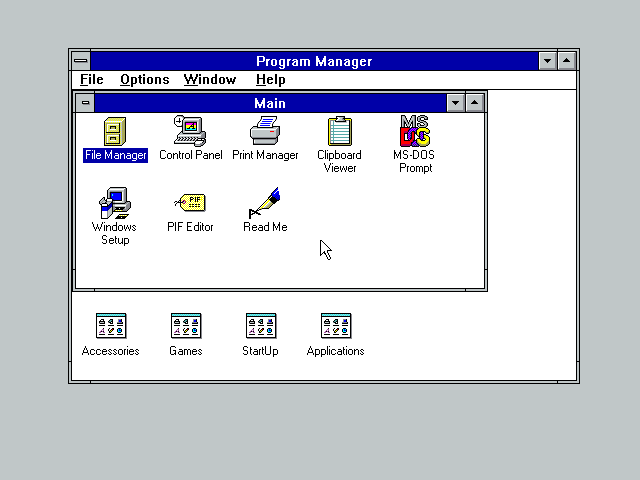
But sometimes, I need to adjust a screenshot. One common example for my writing is when I make a screenshot of a DOS application, such as one running on FreeDOS. My other article about using the FED editor on FreeDOS included several screenshots of the editor, running in a QEMU virtual machine. This is where I run into a problem: QEMU always represents pixels as square. This works well for graphics like the screenshots of Windows 3.11 running on FreeDOS, but doesn’t work well for plain text windows—like the “console mode” screenshots in the same article.
Classic PCs in the 1980s and 1990s used monitors with a 4:3 aspect ratio. Pixels were not square, so text mode did not use square pixels. Instead, the monitor would have displayed “console mode” text in the 4:3 aspect ratio. To make these screenshots look right for the 1980s and 1990s, I prefer to resize “console mode” screenshots to use the correct aspect ratio.
Resizing with ImageMagick
If I have a lot of screenshots to work with, I prefer to use a command line tool like ImageMagick to resize my images. ImageMagick should be available for every Linux distribution; if it is not installed on your system by default, you can install it using your system’s package manager, like this for Fedora-based systems:
$ sudo dnf install imagemagickUsing the command line is just faster when I might have a dozen or more screenshots. But for this example, I’ll use just two images: one “console mode” screenshot and one that is from graphics mode.
The identify subcommand
Older versions of ImageMagick provided separate commands for each action, such as convert or identify, but newer versions provide just one command name (magick) and the actions are usually subcommands. Let’s start with the identify subcommand to see the size of each screenshot.
$ ls -1 *.png
screenshot1.png
screenshot2.png

$ magick identify screenshot*.png
screenshot1.png PNG 720x400 720x400+0+0 8-bit sRGB 9497B 0.000u 0:00.000
screenshot2.png PNG 640x480 640x480+0+0 8-bit sRGB 8295B 0.000u 0:00.000
The “console mode” screenshot uses 720×400 size, and the graphics mode screenshot is 640×480 (a standard VGA resolution).
The -resize action
You might wonder about the 720×400 size. This is because VGA fonts used 9×16 glyphs, so each character was 9 pixels wide and 16 pixels tall. DOS “console mode” screens were typically 80×25, so 80 columns and 25 lines. If you do the math, 9×80 = 720 and 16×25 = 400.
But original VGA monitors only displayed video in 4:3 aspect ratio. That means I need to resize the “console mode” screenshot to display it in its original 4:3 aspect ratio. If I don’t want to lose the y resolution (400) I only need to resize the x dimension. Doing a little more math, that means the x size needs to be 400×4/3 = 533 pixels.
I can use the -resize action to change the dimensions of an image. However, by default this will only resize the image to fit within a certain size. If I try to resize the screenshot1.png image to fit in a 533×400 size, the image will actually be too small:
$ magick screenshot1.png -resize '533x400' new.png

$ magick identify new.png
new.png PNG 533x296 533x296+0+0 8-bit sRGB 59859B 0.000u 0:00.000
To force the new image to be exactly a certain size, I need to append an exclamation point to the end of the resized dimension:
$ magick screenshot1.png -resize '533x400!' new.png

$ magick identify new.png
new.png PNG 533x400 533x400+0+0 8-bit sRGB 38046B 0.000u 0:00.000
Converting a set of images
If I only have a few images to convert to the new size, I might run that command separately for each image. In that case, using identify to check the size and the -resize action to change the size for a few “console mode” screenshots is not too much trouble. But when I make screenshots for an article, I usually capture more than a dozen screenshots, and sort through them later. Converting these one at a time is too much work for me; I’d rather automate that.
To automate a set of images, I start with a feature of the identify subcommand to display certain image characteristics using fields. For example, %w and %h will show the width and height of an image. Use these fields in a -format action to print just the dimensions:
$ magick identify -format '%wX%h' new.png
533X400
Or, if I wanted to automate that for a set of screenshots, I could use Bash shell expansion with $( ) to save the output of the identify subcommand in a variable, so I can use it later:
$ for f in screenshot*.png; do dim=$(magick identify -format '%wX%h' $f); echo $dim $f; done
720X400 screenshot1.png
640X480 screenshot2.png
And that is how I automate resizing a collection of screenshots, but preserving the resolution for graphics mode screenshots while resizing any “console mode” screenshots to use 4:3 aspect ratio. To do this, I use Bash conditional evaluation to compare a variable’s value (like dim) and take action if the variable is (or is not) the 720X400 value. Again, I only have two screenshots in this example, but the process is the same for two images as it would be for a dozen or more:
$ for f in screenshot*.png; do dim=$(magick identify -format '%wX%h' $f); [ $dim = '720X400' ] && magick $f -resize '533x400!' new$f; doneThere’s a lot going on in this (very long) command line, but the only new part is the conditional evaluation:
[ $dim = '720X400' ] && magick $f -resize '533x400!' new$fThis performs a test: is the dim variable equal to the 720X400 value? If it is, then Bash executes the magick command with the -resize action to force the screenshot to the 4:3 aspect ratio. If the image is some other size, nothing happens.
After running this for command on my two screenshots, I actually end up with three images: the two original screenshots, plus one “console mode” screenshot that has been resized to 533×400 resolution:
$ magick identify *screenshot*png
newscreenshot1.png PNG 533x400 533x400+0+0 8-bit sRGB 38046B 0.000u 0:00.000
screenshot1.png PNG 720x400 720x400+0+0 8-bit sRGB 9497B 0.000u 0:00.000
screenshot2.png PNG 640x480 640x480+0+0 8-bit sRGB 8295B 0.000u 0:00.000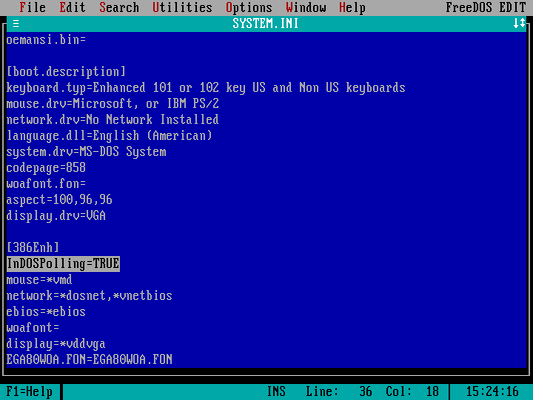
Command line for the win
I could have used an app like GIMP to resize the “console mode” screenshot; this doesn’t take very long, probably a few seconds. And that’s not a big difference for just one or two screenshots.
But if you’re working with a dozen or more screenshots, “a few seconds” for each image quickly adds up to a lot of time. It’s much faster to use the command line for these kinds of “batch” operations.
 Don Watkins