I have a Raspberry Pi 3 that’s sat unused for the last few years. I used to run the Raspberry Pi as a personal “home server,” such as a printer server to share my old “offline” laser printer on my home WiFi. But ever since I bought a new printer a few years ago, I haven’t had a good use for the Raspberry Pi. Until now.
I started a retrocomputing experiment to see if I can still be effective as a technical writer, but doing it without a graphical user interface. I’m doing everything at the command line. To do that, I installed Fedora Minimal on the Raspberri Pi—this gives me only the packages that are necessary to boot the Raspberry Pi. Fedora Minimal doesn’t provide a full desktop environment or even many of the command line tools that I’m used to. If you want to use a command that’s not installed with Fedora Minimal, you have to install the package.
While this might sound restrictive to some folks, I like it because it lets me explore the minimum set of tools that I need to be effective as a writer, without loading a graphical user interface.
Most things are easy
As someone who grew up with computers in the late 1970s and early 1980s, and used DOS from the 1980s into the 1990s, and run Linux since 1993 before graphical desktops were common, I am already comfortable using the command line. I’ll gladly use ls and cd to navigate my filesystem, and less and vi to view and edit content.
I learned how to write text documents with nroff when I was an undergraduate student using our campus computer lab. At the same time, I quickly learned how to use groff and LaTeX on my Linux desktop at home to provide more interesting formatting for other documents, such as equations and charts in my lab reports for physics classes.
These days, I write most of my first drafts in Markdown, then convert to something else to make final edits or to transmit the file to someone else. Writing in Markdown with a plain text editor like vim makes it easy for me to focus on what I’m writing and not how it will appear on the page.
So far, I didn’t need to change how I used Linux at the command line to do my work. I could still use vim to write in Markdown, and pandoc let me convert from Markdown to something else. The only change was that I could only work on one thing at a time—there’s no switching between “windows” when you’re working entirely at the command line.
I also used the experiment as an excuse to format documents using groff with the ms macros. But that’s where I ran into trouble. While groff is a superset of the old nroff and troff formatters, and I could run nroff to format documents as text to view on my terminal, viewing a PDF generated from groff seemed like a major obstacle for doing my work at the console.
Using the framebuffer
Fortunately, that wasn’t the end of my experiment. When booting Linux on real hardware connected to a display, you’re actually at the console, not a terminal. The difference is that a terminal (or terminal emulator, if you’re doing it from a window on your graphical desktop) only provides basic access to the display. You’re going through an emulated layer.
However, the console is different. With the console, you can directly leverage the display hardware on the system. This is usually done through the frame buffer, which is the same way that your Linux desktop puts the system into graphics mode. Except when you’re running entirely in console mode, you can use other tools that take advantage of the frame buffer.
One program is fbi, which is a frame buffer image viewer, available at kraxel’s GitHub. This is actually a collection of programs that can use the frame buffer; displaying images is just one feature.
fbida.x86_64views imagesfbida-fbgs.x86_64displays PostScript files using GhostScriptfbida-fbpdf.x86_64views PDF filesfbida-ida.x86_64uses Motif (not useful for me in console mode)
The feature I was most interested in was fbpdf to display PDF files. You can install fbi using this command line:
$ sudo dnf install fbida fbida-fbgs fbida-fbpdfViewing PDF documents in console mode
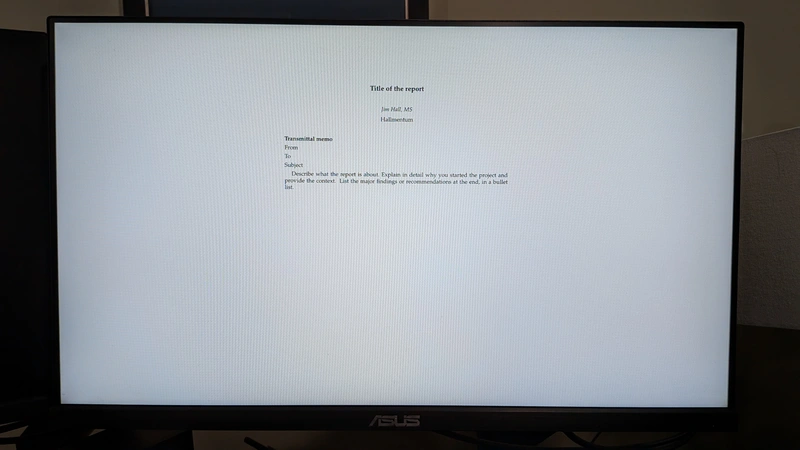
With fbpdf, I am able to view PDF documents using the frame buffer, without having to start a graphical desktop environment. The only issue I had was that fbpdf didn’t know how to access the frame buffer on its own. To view output, I had to tell fbpdf which display device to use. On the Raspberry Pi, this is the /dev/dri/card1 device.
For example, I wrote a sample report using the ms macros, just to demonstrate how I might prepare a document for printing using groff. To process this and generate a PDF file, I can use the pdfroff wrapper to the groff command, which otherwise has the same command line options as troff or groff, but saving to a PDF output file by default:
$ pdfroff -ms report.ms > report.pdf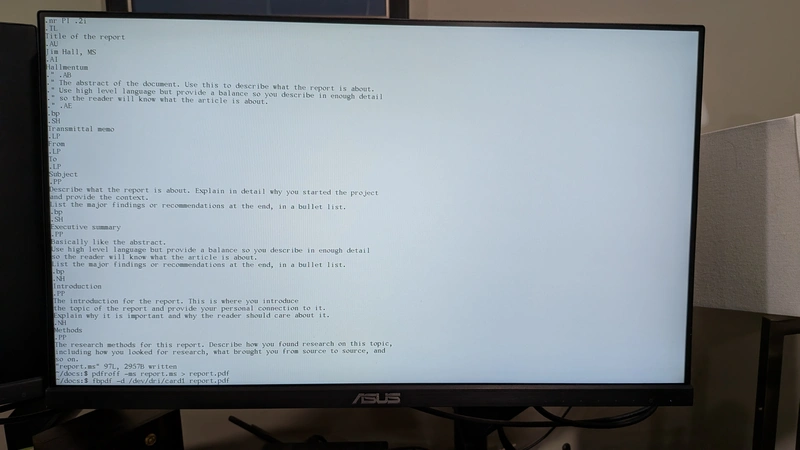
To view the generated PDF document, I can use fbpdf from the command line, specifying the frame buffer device:
$ fbpdf -d /dev/dri/card1 report.pdfYou can navigate the PDF document using the keyboard. fbpdf supports several keyboard shortcuts to control the display, but most of the time I just used PgUp and PgDn to go “up” and “down” through the pages, and Esc to quit.
Working at the console
This retrocomputing experiment is a fun step back in time. But it’s also a reminder that yes, you really can write modern content at the console, you just need to use different tools to get there. Instead of a graphical desktop and point-and-click editor, you need to use a text-mode editor like vi. If you’re like me and you write in a markup system like Markdown or groff, you can still create professional looking documents and save them as PDF; you just need a new tool to preview them.