I decided to look more closely at the Fedora 43 Server Edition after struggling to set up a BtrFS system to a particular set of requirements.
Specifically, I want to place /home on a separate storage device than the operating system itself, and to use EXT4 filesystems on LVM. The /home and / (root) filesystems are usually the 2 most used ones on Linux systems so separating them will extend the lifetimes of both storage devices, especially if they’re SSDs. It also improves the overall storage performance since system and user storage access will be less likely to conflict.
I’m not going to use this system as a server, but I wanted the options for using LVM/EXT4 rather than BtrFS. The Fedora Server Edition is the only installation ISO image that allows this choice.
Note: This article is not a complete step-by-step guide to installing Fedora 43 Server Edition. However, it should provide enough information for experienced users and SysAdmins to do a complete installation.
Getting Started
Booting to the USB drive with the Fedora Server ISO image on it, I was taken to the GRUB menu, where I selected the Install Fedora 43 option. From there the Language menu allows separate choices for both the installation procedure and the final installation. Both default to the local region if the host is connected to the Internet. I continued using the defaults.
The Anaconda Installer seen in Figure 1 was displayed next. This is more like the previous installer on Fedora 42 than the newer version used on all the other Fedora ISO images.
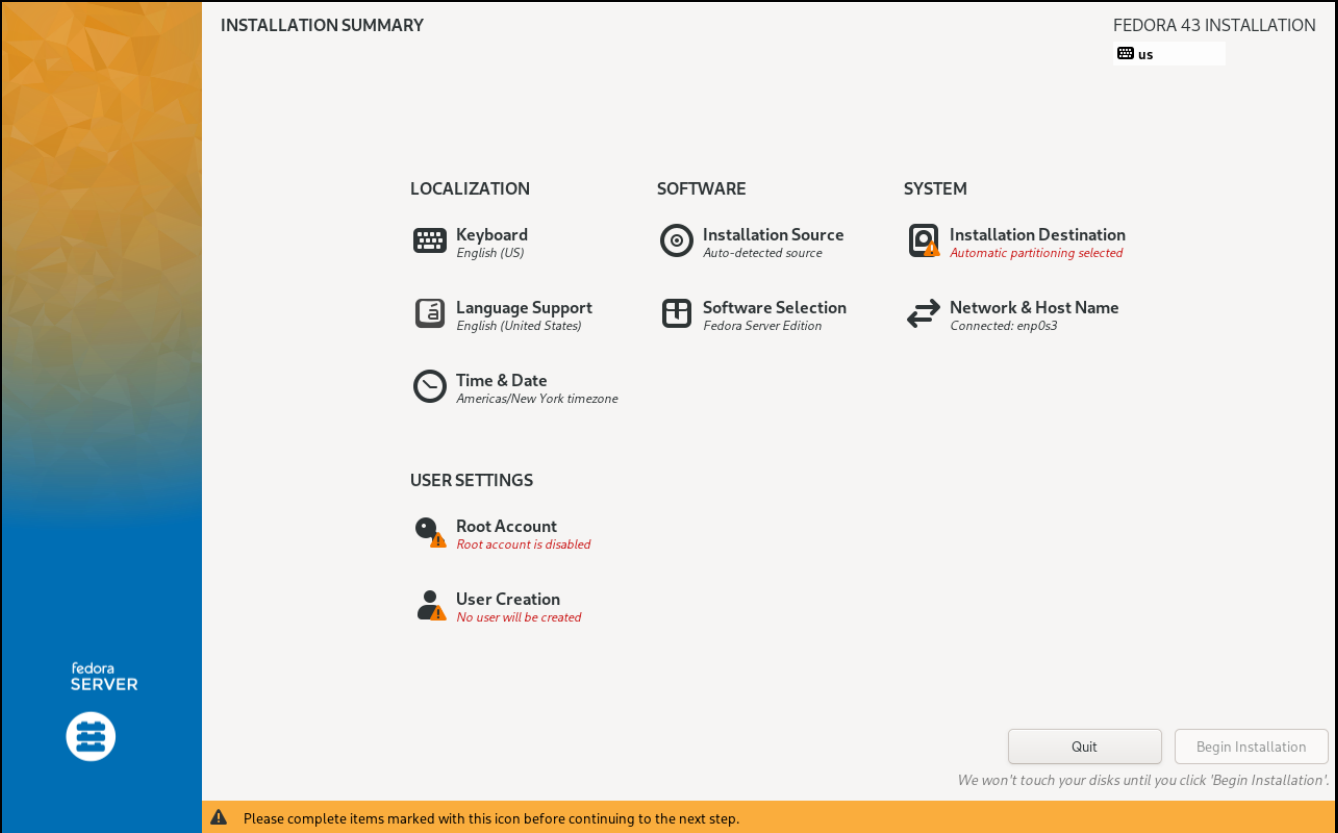
The Anaconda Installer for Fedora 43 Server provides only the interface shown in Figure 1 for interaction by the user. It does not provide a desktop interface of any kind so there’s no possibility to try Linux before performing the installation. It’s an installer only.
The Software Selection menu in Figure 2 offers only a few choices. And this is where I think the name of this Fedora Edition is misleading. The 2 main choices shown on the left panel are Fedora Server Edition and Fedora Custom Operating System. The name chosen for this edition implies that a server is the only choice, when the reality is much better.
Starting with the Fedora Custom Operating System provides a non-server starting point for building a system tailored to meet a set of specific needs not accounted for in any other Edition, Spin, or Lab ISO image. This should be called the Custom Edition.
To continue, the Fedora Custom Operating System works best for me as I’m not installing the server components.
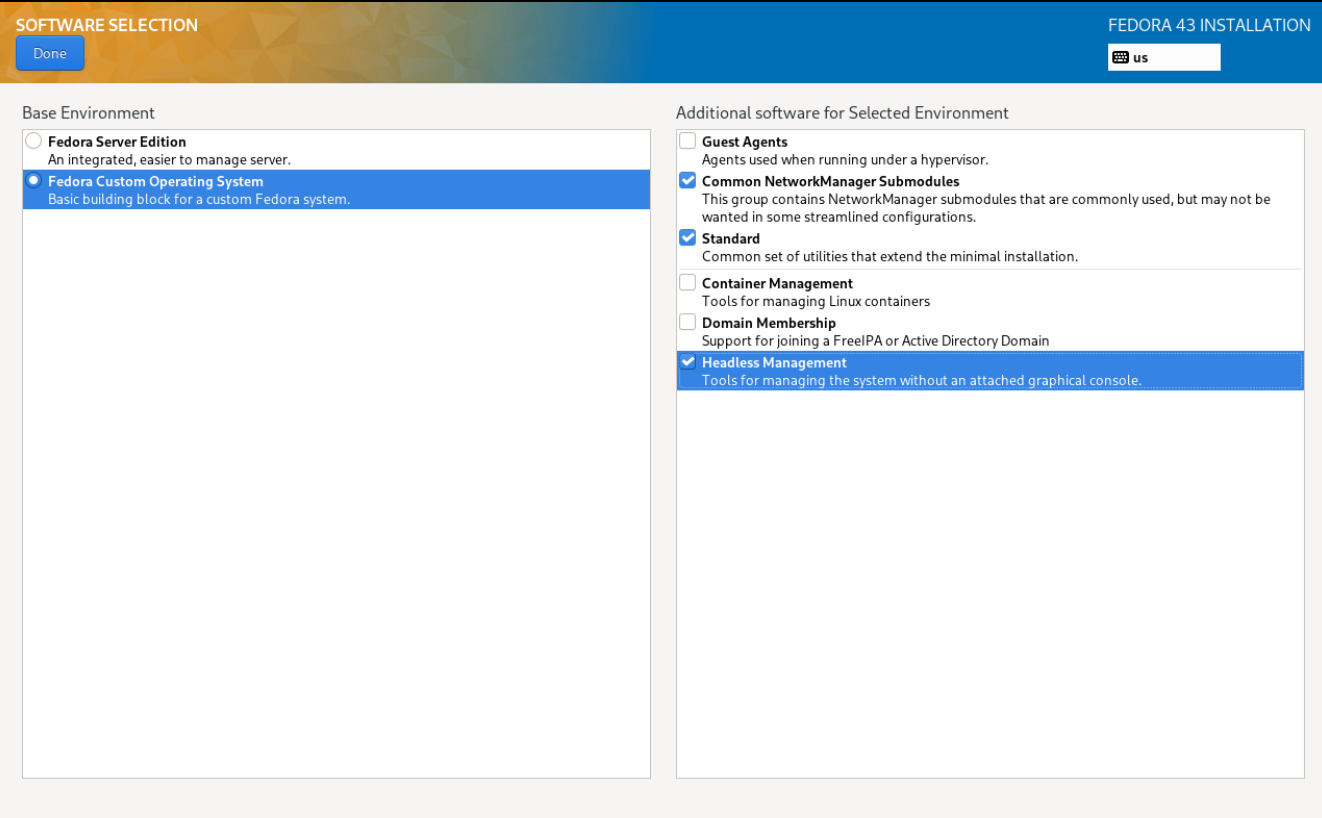
The choices for additional software in the right panel differ from server to custom. One of the six software groups are for containers, one is for Microsoft domain membership, neither of which I need. And since this system will be running on bare metal and not a hypervisor, I won’t need the Guest Agent option either.
I chose the remaining three options, as I felt they would provide the best base for me on which to build. I definitely need Network Manager, the Standard utilities, and I thought that the Headless Management option would also give me tools that I typically use on all my systems.
None of the available options includes a GUI interface. A GUI desktop can be can be installed later, but starting with a completely clean slate, makes creation of a well-designed system containing only the desired components much easier to accomplish.
Installation Destination
The Installation Destination menu is where I define the storage partitioning scheme and select the filesystems. Figure 3 shows the main menu for this section.
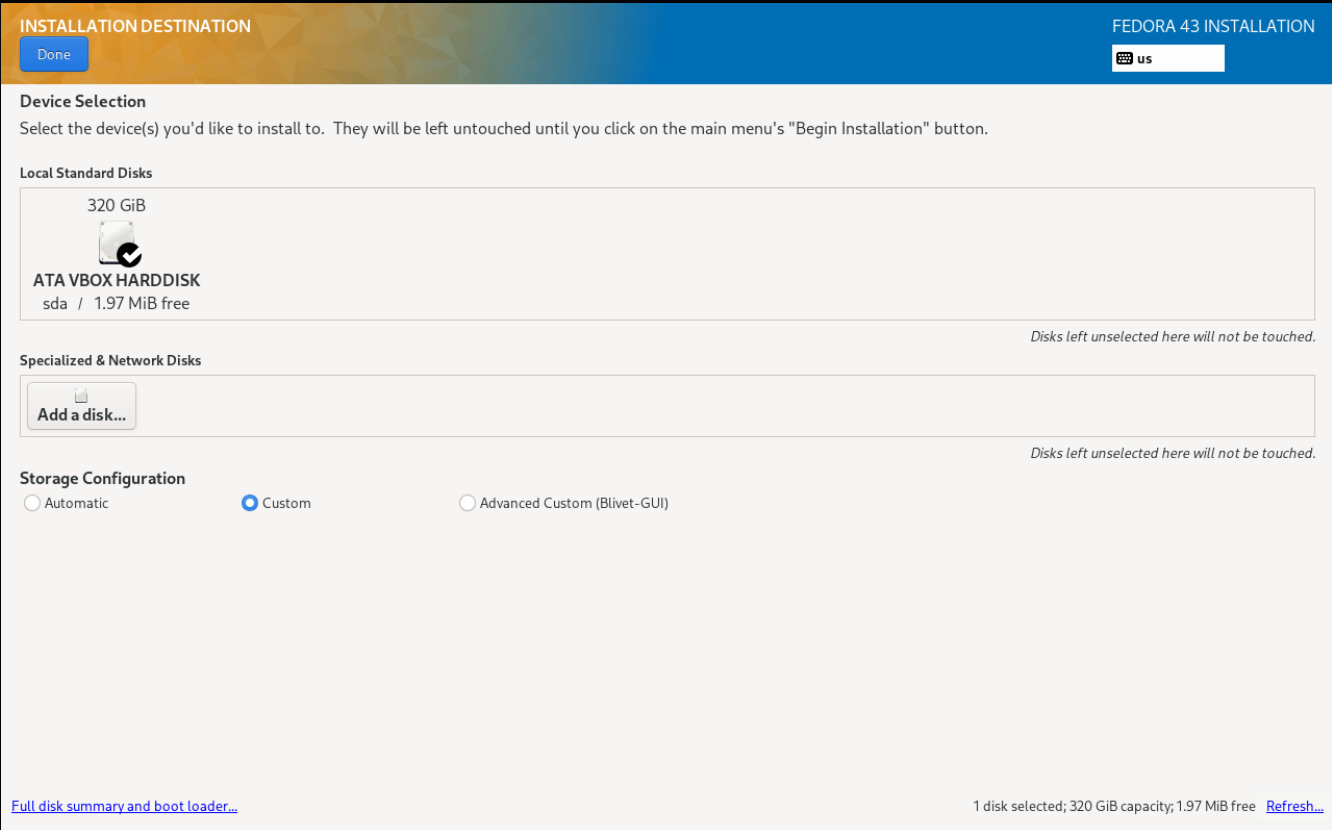
There’s only one local storage device on this VM in Figure 3, and it’s selected by default, but others would be displayed here if they existed. The key to meeting my requirements is to click on the Custom button on the Storage Configuration section of the menu. Then I click the Done button which takes me to the Manual Partitioning menu in Figure 4.
Any existing partitions on the selected drive(s) would be shown in the Manual Partitioning menu. I deleted those and than started creating the new partitions. I first select LVM partitioning rather than raw partitions. Then I can start creating new partitions.
In the Volume Group section of this menu, I change the partition name from the rather clumsy default one, to something shorter and more meaningful to me. I also modify the volume group so that it expands to take the entire amount of storage space available after the /boot, and BIOS Boot partitions.
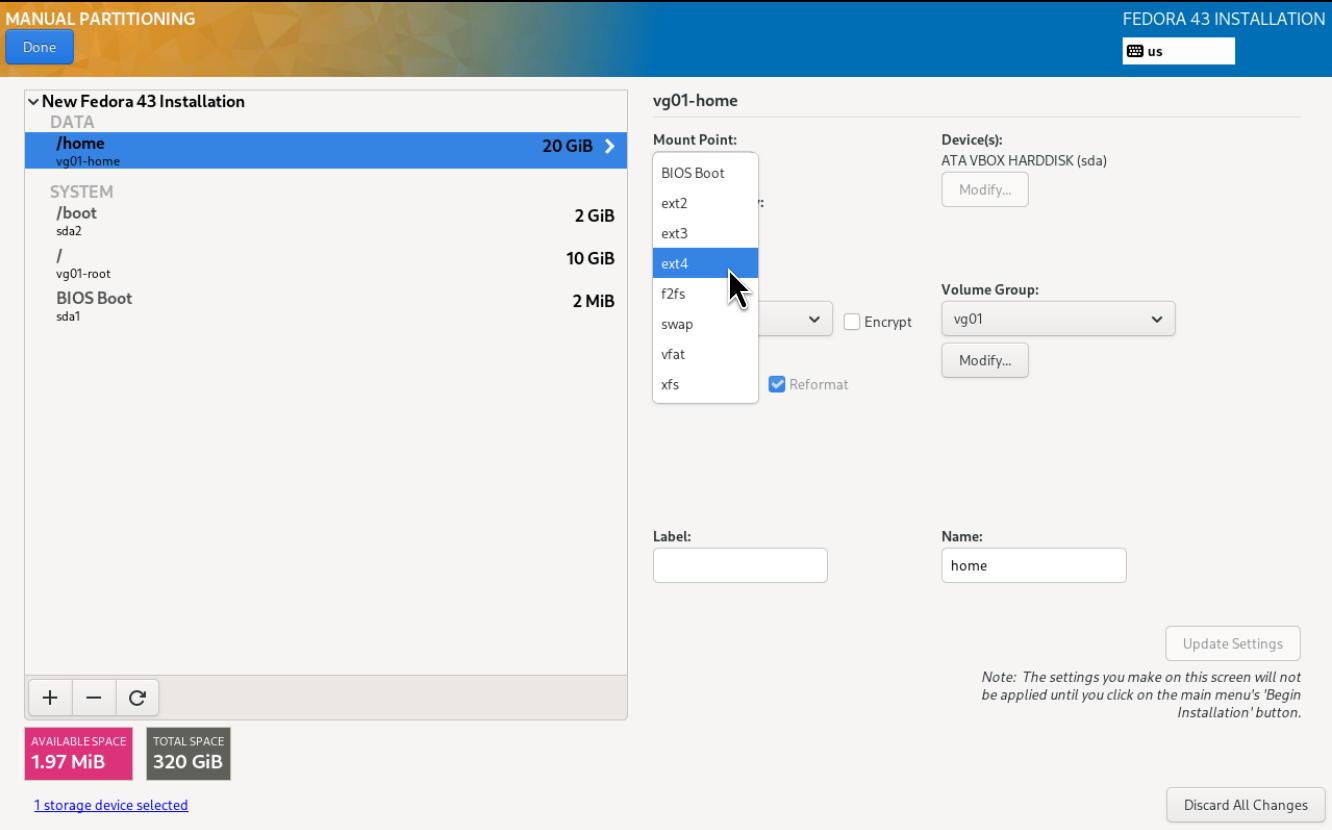
Figure 4 shows the first few partitions that I created, and that I’m working on the /home directory. You can see that there are options for BIOS Boot, EXT2, EXT3, EXT4, f2fs which is a new one to me1, swap, VFAT, and xfs filesystems.
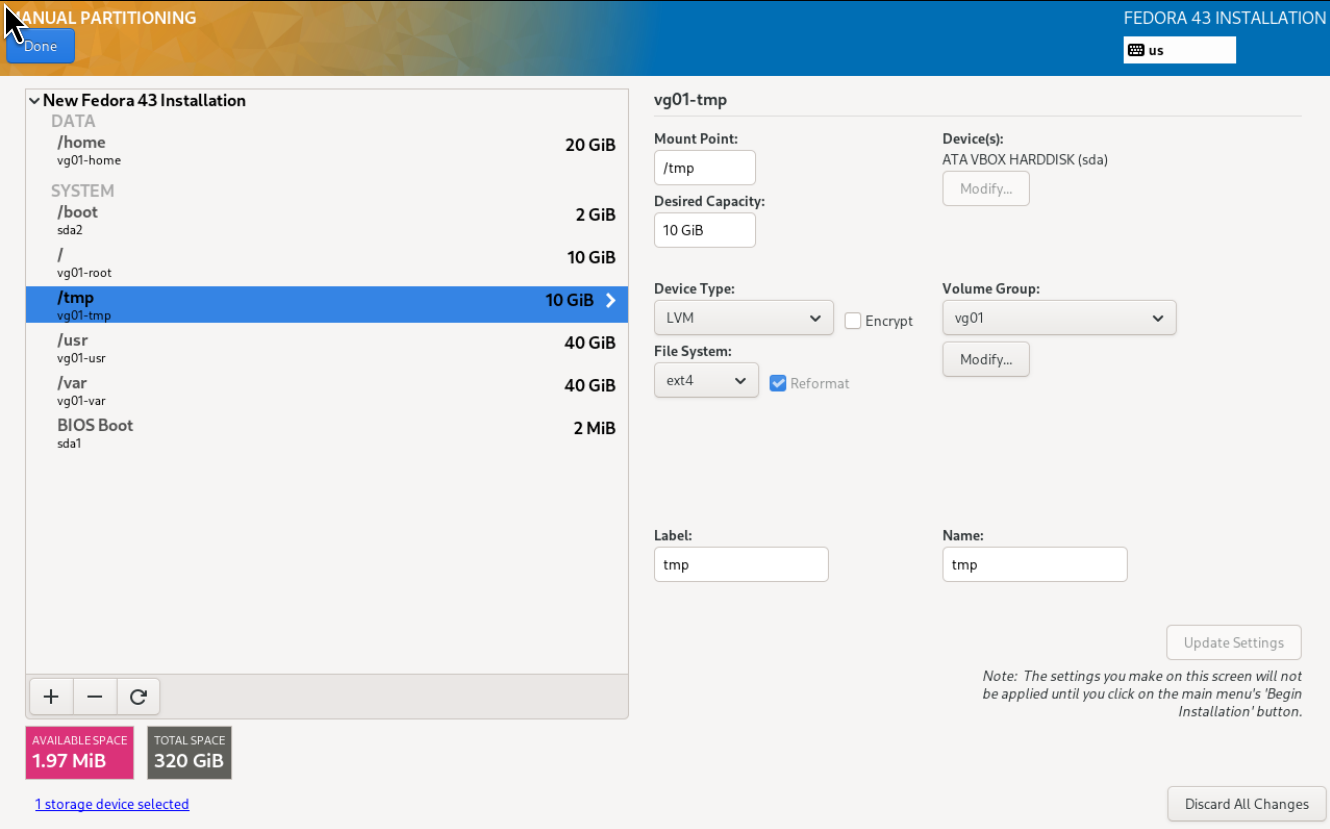
I always choose the EXT4 filesystem because it’s the one that makes the most sense for my requirements. It’s also well-known and supported by most, if not all, distributions. Figure 5 shows the filesystem configuration that I usually use on all my systems.
After setting up my partitioning and filesystem configuration, I make any final changes and perform the installation.
At this point I had a really simple system with a console. No GUI desktop was installed.
Post-Installation
Unlike other Fedora editions and spins, The SSHD daemon runs by default. I mean, what server doesn’t need SSH, and I always enable SSHD on all my systems, so this is a good choice. I did choose to allow access to root using a password. The default is to not allow passwords for root. For my initial SSHD setup the password makes things a bit easier to send the public key from my laptop which is my secondary workstation. I will change it back later.
Installed the post-install RPM I created and have used for many years, and install updates. I then used the postinstall script that was installed by the RPM, to install a lot of tools and packages that I typically use on most of my systems, and the Xfce desktop.
After my post-installation tools finished, I had a usable system with the filesystem structure I wanted, an excellent desktop, but without any cruft. It’s what I’m using now to do all my normal work, as well as writing this article.
My Impressions
Although I’m not using the Fedora Server Edition as a server, I am using it as the basis for building a Fedora system that meets my needs with little or no superfluous software. It’s actually designed for that and the Fedora Custom Operating System option makes that possible. Unfortunately, the Fedora folks seem to have forgotten or ignored that and haven’t even made an effort to inform the public that it’s an option. I know it’s something that less technical users shouldn’t use, but for those of us who are capable should at least be aware that the option is there for us.
Fedora Server Edition is the perfect starting point for use as either as server, or as the basis for a highly customized version of Fedora that’s not available with any of the other spins, editions, or labs. If you’re an advanced user or a SysAdmin with unique needs not otherwise available, I highly recommend that you explore Fedora Server Edition.
- The F2FS filesystem was created to be friendly as a Flash-Friendly File System. First released in the Linux kernel in late 2012, it has some limitations not shared by EXT filesystems. https://en.wikipedia.org/wiki/F2FS ↩︎