
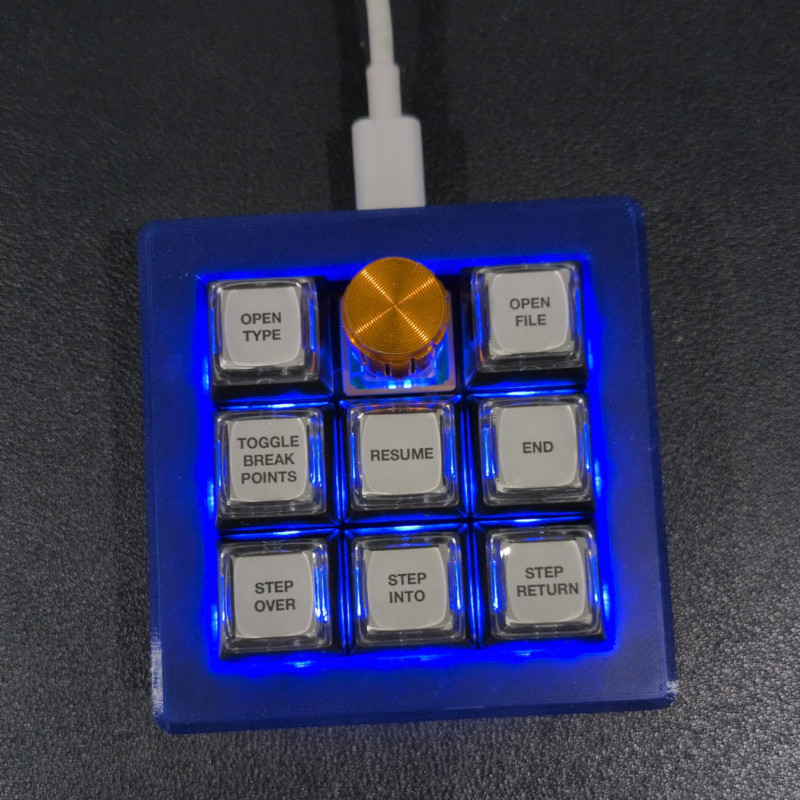
My brother recently gave me a Keebio BDN9 macro pad. It’s a configurable 9-key keyboard that supports all kinds of customizations, including little keycaps that have a removable cover, so you can insert small squares of paper to write out your own key labels.
My brother set it up with labels like “toggle break points” and “step over,” which he uses on his system as macros for his debugger. This one also has a knob in the top-center position; “clicking” the knob sets the LED backlight color, and turning the knob adjusts the brightness.
Set up the Keebio
The “trick” to using the Keebio BDN9 on Linux is two parts:
- Add a rules file so udev can recognize the keyboard
- Use a web-based setup tool to configure and save the keys and macros
Adding the rules file
First, I downloaded the 50-qmk.rules file from the QMK firmware project at GitHub. This file contains udev rules to recognize different keyboards using the QMK firmware, including the BDN9. Download the rules file and copy it to your /etc/udev/rules.d directory:
$ sudo cp 50-qmk.rules /etc/udev/rules.dOnce this file is installed, udev will identify the keyboard when you plug it in. For example, I saw these messages appear after I connected the macro pad with the USB-C cable:
usb 1-4: new full-speed USB device number 7 using xhci_hcd
usb 1-4: New USB device found, idVendor=cb10, idProduct=2133, bcdDevice= 2.00
usb 1-4: New USB device strings: Mfr=1, Product=2, SerialNumber=3
usb 1-4: Product: BDN9 Rev. 2
usb 1-4: Manufacturer: Keebio
usb 1-4: SerialNumber: 4A0032001157464E3332342000000000
input: Keebio BDN9 Rev. 2 as /devices/pci0000:00/0000:00:14.0/usb1/1-4/1-4:1.0/0003:CB10:2133.0009/input/input26
hid-generic 0003:CB10:2133.0009: input,hidraw6: USB HID v1.11 Keyboard [Keebio BDN9 Rev. 2] on usb-0000:00:14.0-4/input0
hid-generic 0003:CB10:2133.000A: hiddev97,hidraw7: USB HID v1.11 Device [Keebio BDN9 Rev. 2] on usb-0000:00:14.0-4/input1
input: Keebio BDN9 Rev. 2 Mouse as /devices/pci0000:00/0000:00:14.0/usb1/1-4/1-4:1.2/0003:CB10:2133.000B/input/input27
input: Keebio BDN9 Rev. 2 System Control as /devices/pci0000:00/0000:00:14.0/usb1/1-4/1-4:1.2/0003:CB10:2133.000B/input/input28
input: Keebio BDN9 Rev. 2 Consumer Control as /devices/pci0000:00/0000:00:14.0/usb1/1-4/1-4:1.2/0003:CB10:2133.000B/input/input29
hid-generic 0003:CB10:2133.000B: input,hidraw8: USB HID v1.11 Mouse [Keebio BDN9 Rev. 2] on usb-0000:00:14.0-4/input2
hid-generic 0003:CB10:2133.000C: hiddev100,hidraw9: USB HID v1.11 Device [Keebio BDN9 Rev. 2] on usb-0000:00:14.0-4/input3
Programming the macros
The easiest way to “program” the Keebio BDN9 is with the Via website. This web app relies on WebHID, so it will only work with a browser that supports WebHID, such as Google Chrome.
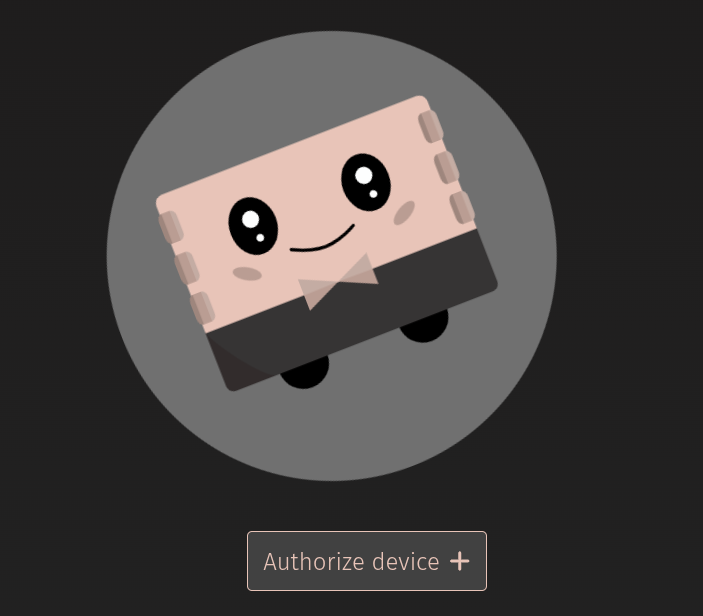
When you access the website for the first time, Chrome will ask you to make the connection to a HID device. Select the “Keebio BDN9 Rev. 2” entry and click “Connect” to continue:

After that, the web app will ask to connect to your device. Click the “Authorize device” button to begin:
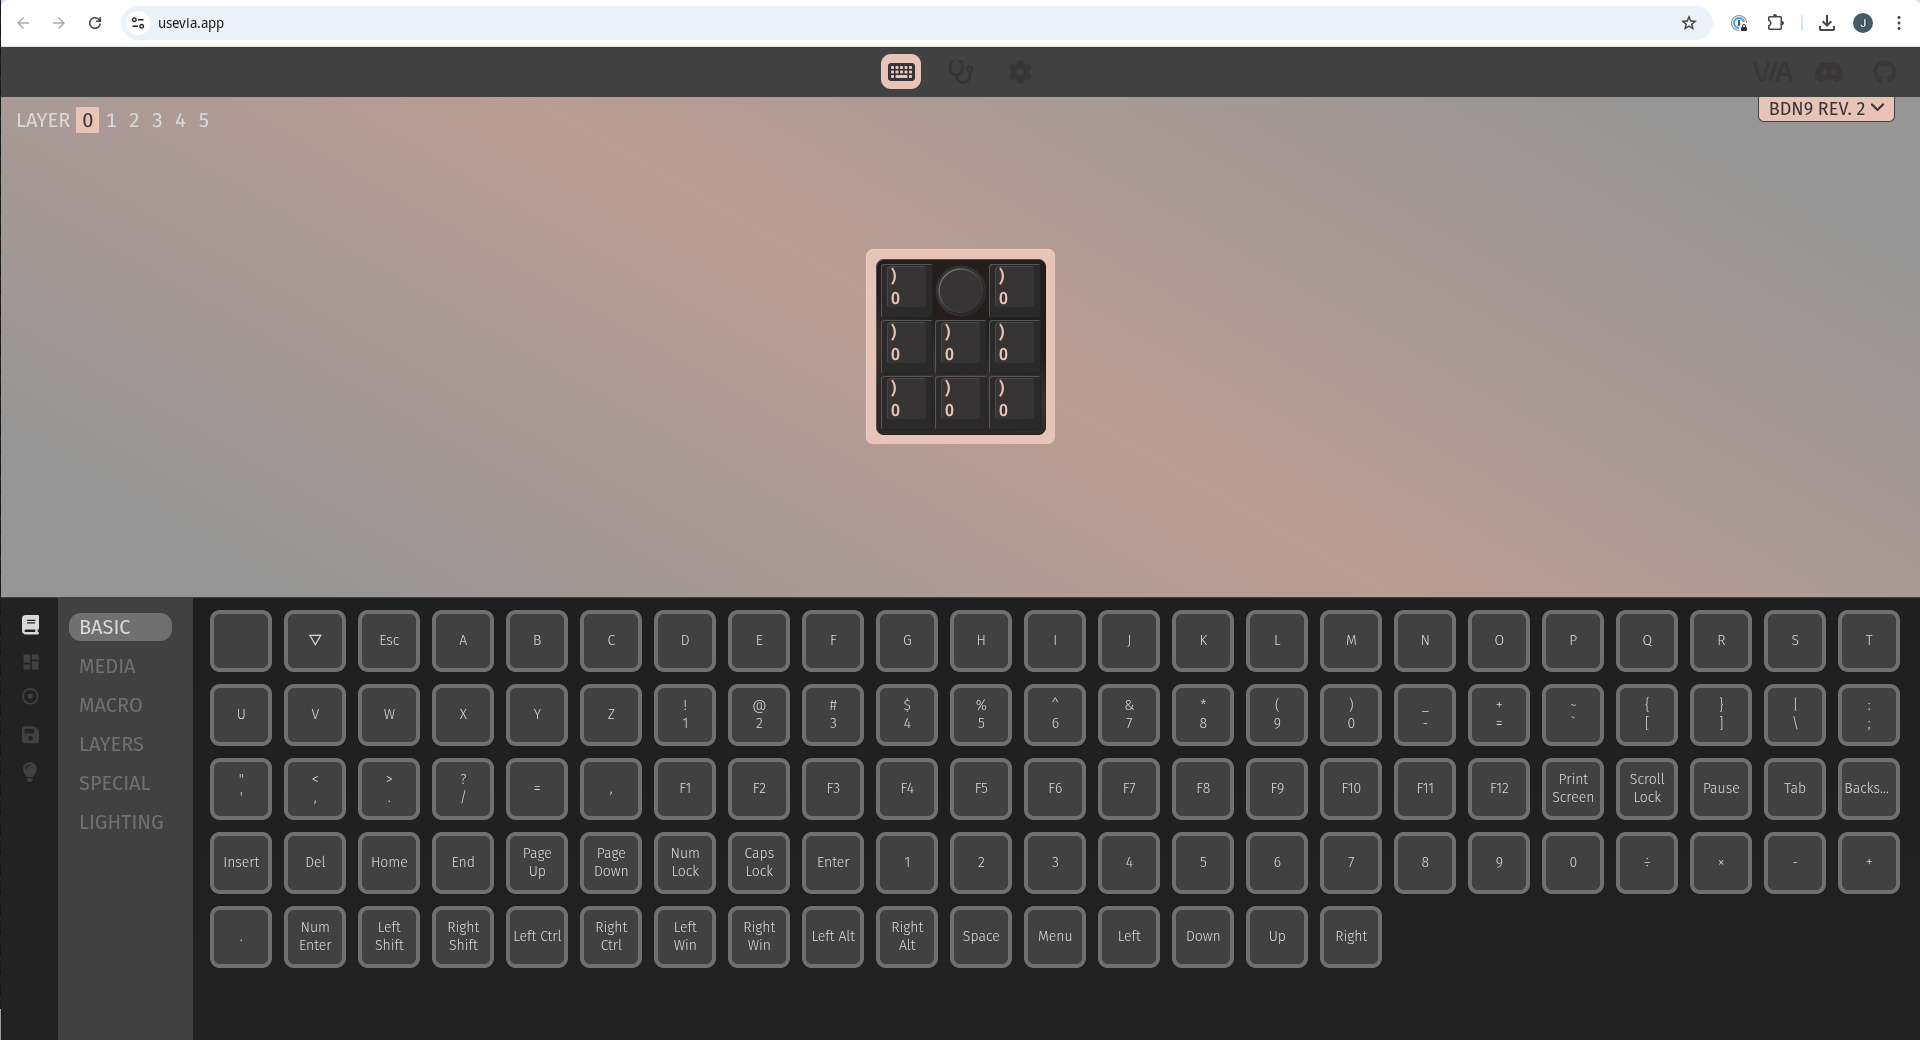
The web app is very easy to use. In the center of the screen, you should see a representation of the key pad. In the upper left corner, you’ll see the different “layers” supported by this device. On this Keebio, when you “click” the control knob, you’re actually changing the “layer, and the color indicates the layer, such as blue for layer 0.
The bottom of the screen shows the different ways to program each key on the key pad. You can add basic keys, like you would otherwise find on your keyboard. You can also add media controls, keyboard macros, and other features. As you click each menu item, the area to the right changes to show the keys available for that feature.
I wanted to add keyboard macros to this key pad, such as to enter a text string into a program. One way you might use this is at the shell: hit a macro key and the key pad “types” cd ~ as though you’d typed it on the keyboard. As a demonstration, I wanted to add macros that “typed” what was on each label of my key pad.
To start, click the “macro” tab on the left, and select a “macro” button to program. For my first test case, I set up a macro on the M1 entry.

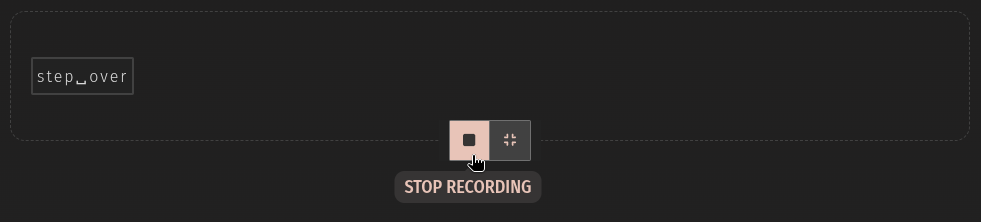
Then, click the “Record keystrokes” icon to record keystrokes into the macro:

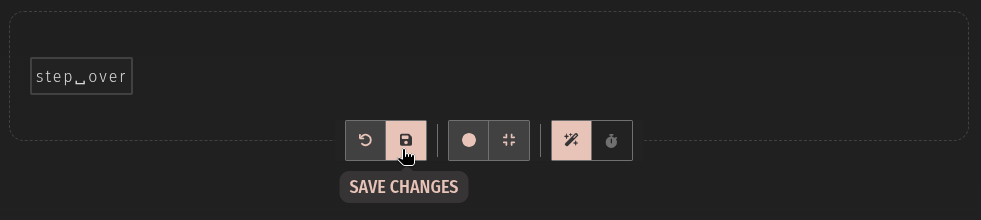
As a test, I typed the text step over, which was the same as the label on one of the keys on my key pad. When you’re done typing text into the macro, click the “Stop recording” button:
To save the macro to the key pad, click the “Save changes” icon:
If you want to save a complete copy of your key pad configuration, including all keys on all layers, use the “floppy disk” icon on the left side of the menu. This lets you save the configuration as a json file:
Make typing faster with macros
I saved a different macro on each key for my key pad. For this test, each macro just “types” what is on the label. If I tap the “toggle break points” key, the key pad types toggle break points for me. If I hit the “step over” key, the key pad types step over, and so on for the other keys.
This key pad supports up to six layers (layers 0 to 5). With eight keys on the key pad, that means I can save up to 48 different keys and macros. Imagine one set of macros (layer 0) to control a debugger, another set of keys (layer 1) to play media and adjust volume, another set of keys (layer 2) to insert text that I might type in email replies like “Thanks!” and other short text, and so on for other layers. The Keebio BDN9 macro pad has 3.9 kB of memory, which is plenty of room to store a variety of macros and key configurations.