3 easy ways to make screenshots on Linux

Last Updated on February 3, 2026 by David Both
When writing about open source software, I prefer to show a few screenshots to help demonstrate what I’m talking about. As the old saying goes, “a picture is worth a thousand words.” If you can show a thing, that’s often better than merely trying to describe it.
There are several ways you can take screenshots in Linux. Here are three methods I use to capture screenshots on Linux:
GIMP
The popular image editor, GIMP, makes it easy to take a screenshot. I like to use GIMP if I also need to modify the screenshot in some way, such as to add a highlight or to create a “drop shadow” for dramatic effect. To take a screenshot, go to the File menu and choose the Create submenu, and then choose Screenshot:
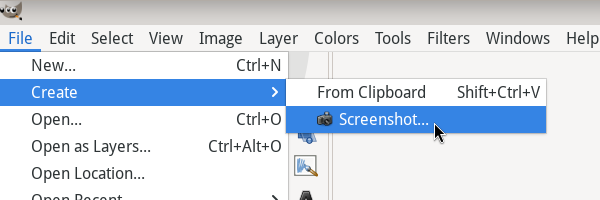
The dialog allows you to take a screenshot of a single window, the entire screen, or just a region. I like that this tool lets you set a delay: how long until you select the window, and how long after that to take the screenshot. I use this feature a lot when I want to grab a screenshot of a menu action, so I have enough time to go to the window and open the menu.
GIMP opens the screenshot as a new image, which you can edit and save to your preferred location.
Firefox
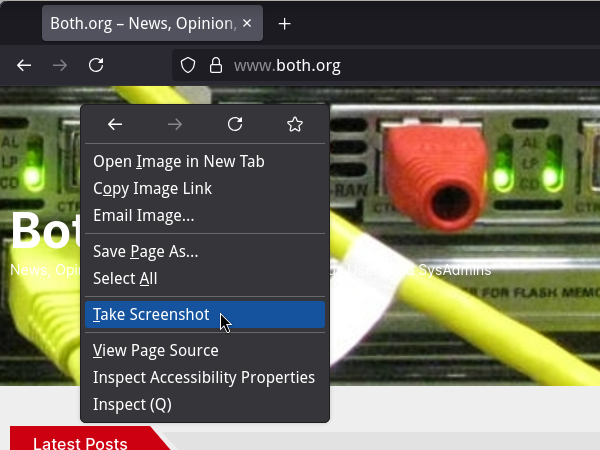
If you need to take a screenshot of a website, try Firefox’s built-in screenshot utility. Right-click anywhere in the web page body, and select Take Screenshot from the menu:
Firefox switches to a modal display and prompts you to click or drag on the page to select a region, or use one of the icons to save a copy of the full page or just what’s visible in the browser.
As you move your mouse around the screen, you may notice that Firefox highlights certain areas. These are block elements on the page, such as a div or another block element. Click on the element to take a screenshot of it. Firefox saves the screenshot to your Downloads folder, or wherever you have set as your “download” location.
Desktop
Every Linux desktop has a built-in screenshot tool. I run Xfce for my Linux desktop, and Xfce also provides a great screenshot tool that you can call up at any time using the PrtScr key on your keyboard:
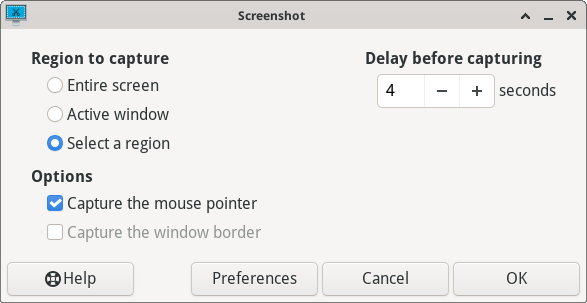
I often use this tool to grab a screenshot of a region on the screen, which is an incredibly useful way to crop a screenshot as you make it. Just move the highlight box to where you need it, and use the “grab” corners to change the size. You can also add a delay before taking the screenshot.
Or select one of the other options to take a screenshot of the entire screen, or just a single window on your system. Click the Ok button to take the screenshot, which the tool saves in your Pictures folder.
If you’re trying to document a process, a screenshot can save you a lot of time. Try using one of these methods to take a screenshot on Linux.
This article is adapted from 3 ways to take screenshots on Linux by Jim Hall and is published with the author’s permission.