Last Updated on April 28, 2026 by David Both
I recently reinstalled Fedora 43 Server Edition on my primary workstation for multiple reasons. One was that operating systems — even Linux — tend to accumulate cruft over time. Performing a fresh install is one good way to remove that cruft.
I chose the Fedora 43 Server Edition because it was — to the best of my knowledge at the time — the only Fedora install image that provided the ability to use any filesystem other than BtrFS, my preferred filesystem being EXT4 on a Logical Volume Manager (LVM) base.
The Everything
But I’ve discovered a new (to me) Fedora ISO Image, the “Everything.” Once again, I think the Fedora packagers have chosen a spectacularly poor name for this Fedora image. Because the implication is that installing this image will install literally everything that Fedora can possibly install. I’ll tell you my name for it at the end.
I found it sort of by accident. I was exploring the Fedora website and saw the “Miscellaneous Downloads” option, fairly far down on the “Get Fedora” main page. The text for that choice gives no clue as to the possibilities it contains.
I’m embarrassed to say that this Everything image has been around since Fedora 24, so that’s almost 10 years. I’ve seen references to it in various documents, but never thought about using it until I started looking for a better option than the standard editions and spins. So this time I decided to try it.
I’m glad I did. The Everything image allows you to install anything and, well, everything.
The Everything Installation
The Everything installation ISO image is one of the smallest — if not the smallest — one available. That’s primarily because it’s a network install so all the image does is boot to the Anaconda installer. It doesn’t provide a live image for users to test with. It’s pretty much the one you choose when you already know you’re going to install Fedora but want as many choices as possible.
That means all of the packages that will be installed will be downloaded directly from the Internet. So the most critical requirement to install Everything, is to have a reasonably fast and reliable Internet connection. I do, but not everyone does.
Welcome
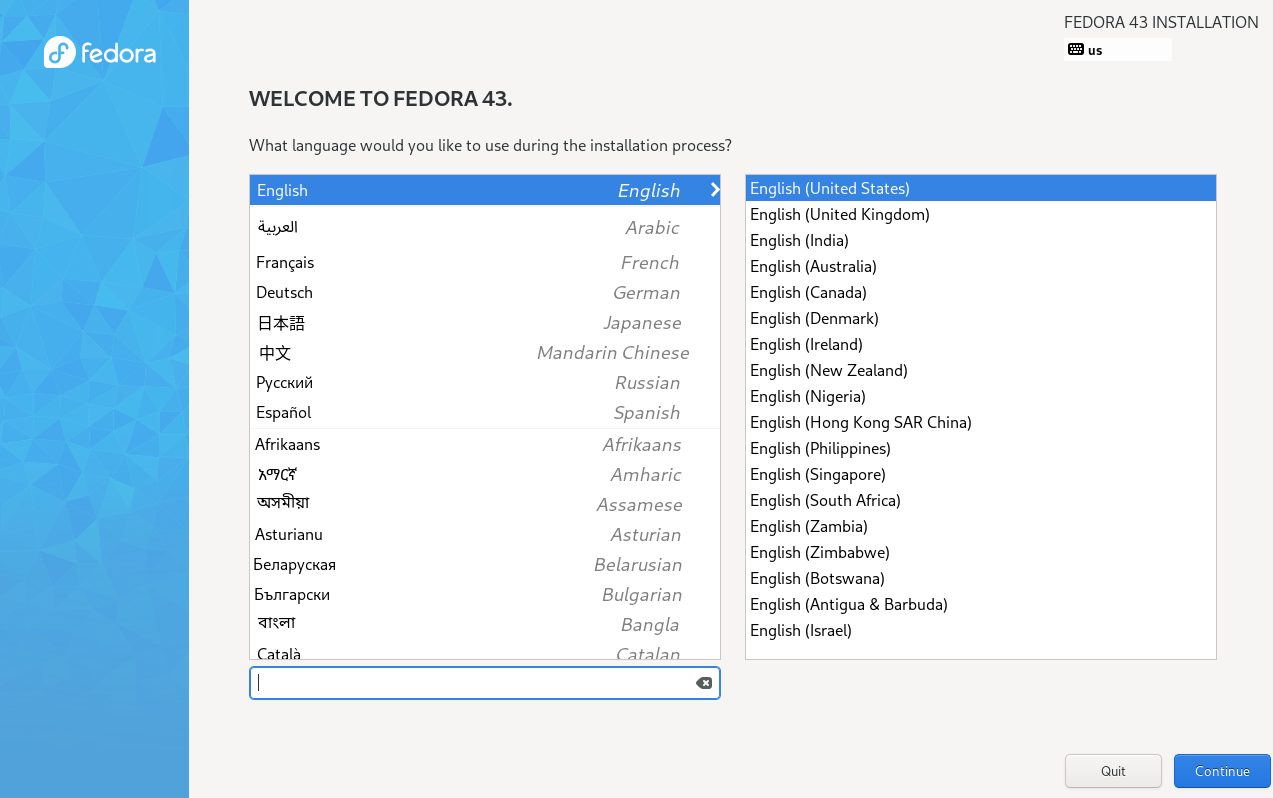
Booting the ISO image goes directly to the Welcome menu, shown in Figure 1, where I simply clicked on the Continue button as the default is U.S.English.
Installation Summary
Next is the Installation Summary page seen in Figure 2. This menu page is exactly like the one for the Server Edition. You must configure the marked items before the installer will allow you to proceed to the actual install. The Begin Installation button will remain greyed out until the required items have been given a reasonable configuration.
I also make other changes, which we’ll see momentarily.
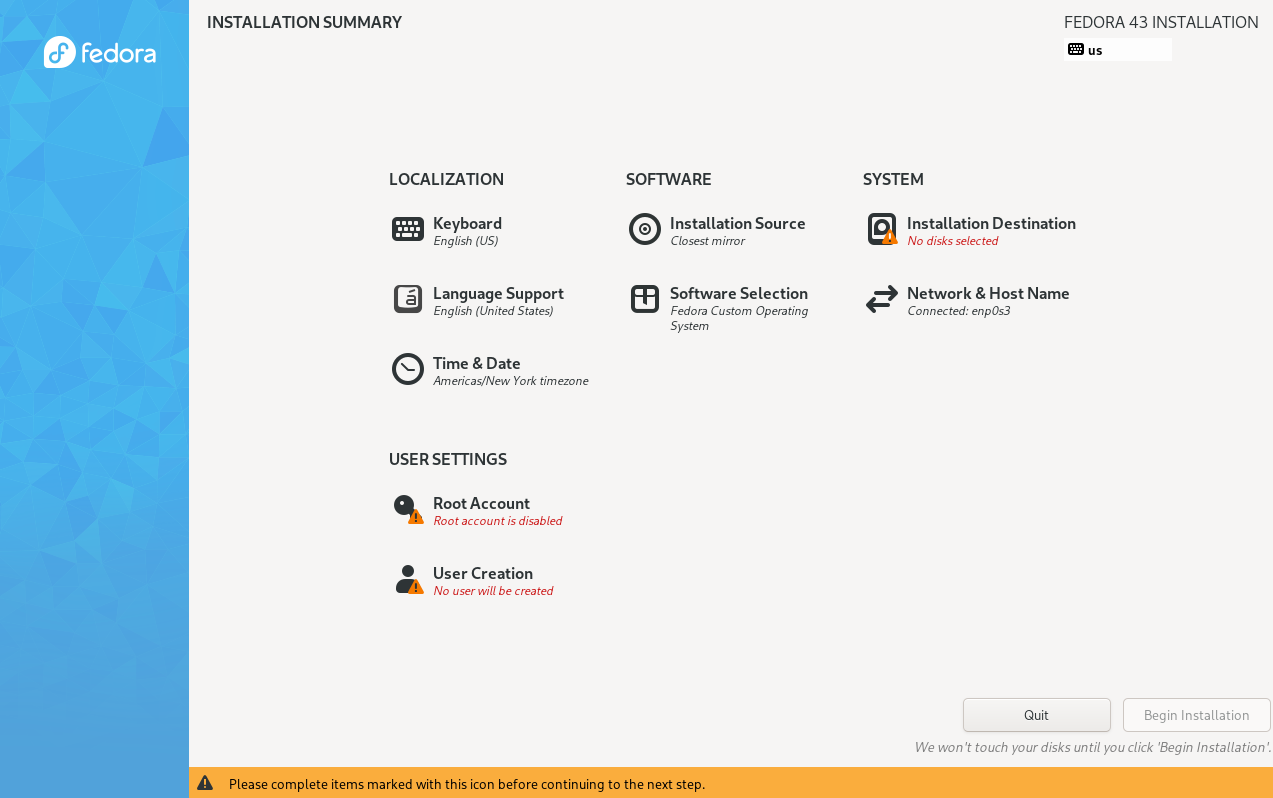
After completing the configuration of each of the menu items selected on this page, you’ll be returned here, to select another or to begin the install.
Network and Host Name
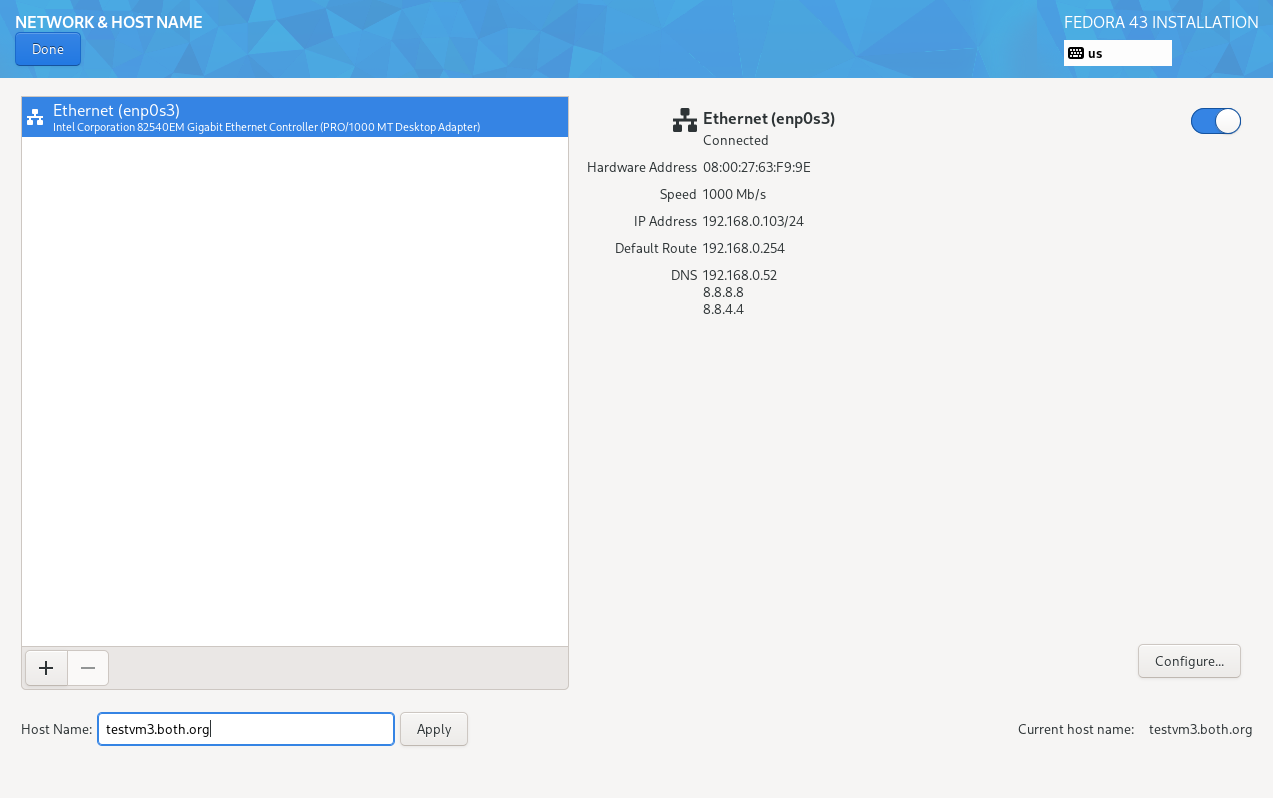
The first thing to do is set the hostname on the Network and Host Name page in Figure 3. If you don’t set the hostname here, it will default to one that’s not very helpful and you’ll need to change it later which requires a reboot. Check the IP address to verify that it’s correct. I use DHCP to manage IP network configuration based on the MAC address of each host so I like to check.
If you need a static IP configuration, you can click the Configure button to do it manually.
Root Account
I always enable the root account as seen in Figure 4, rather than doing everything as a non-root user that has been made an Admin. Part of my reasoning is that it’s too much like Windows in which the first regular user1 created is always the administrator, and anyone can easily be made an admin.
I’ve used a weak password for this test VM but for a working system, whether VM or physical, I always use a very strong password for root. If you do use a weak password, you’ll see a warning at the bottom of the screen indicating that you must click the Done key twice as a means of verifying that you do, in fact, want to use a weak password.
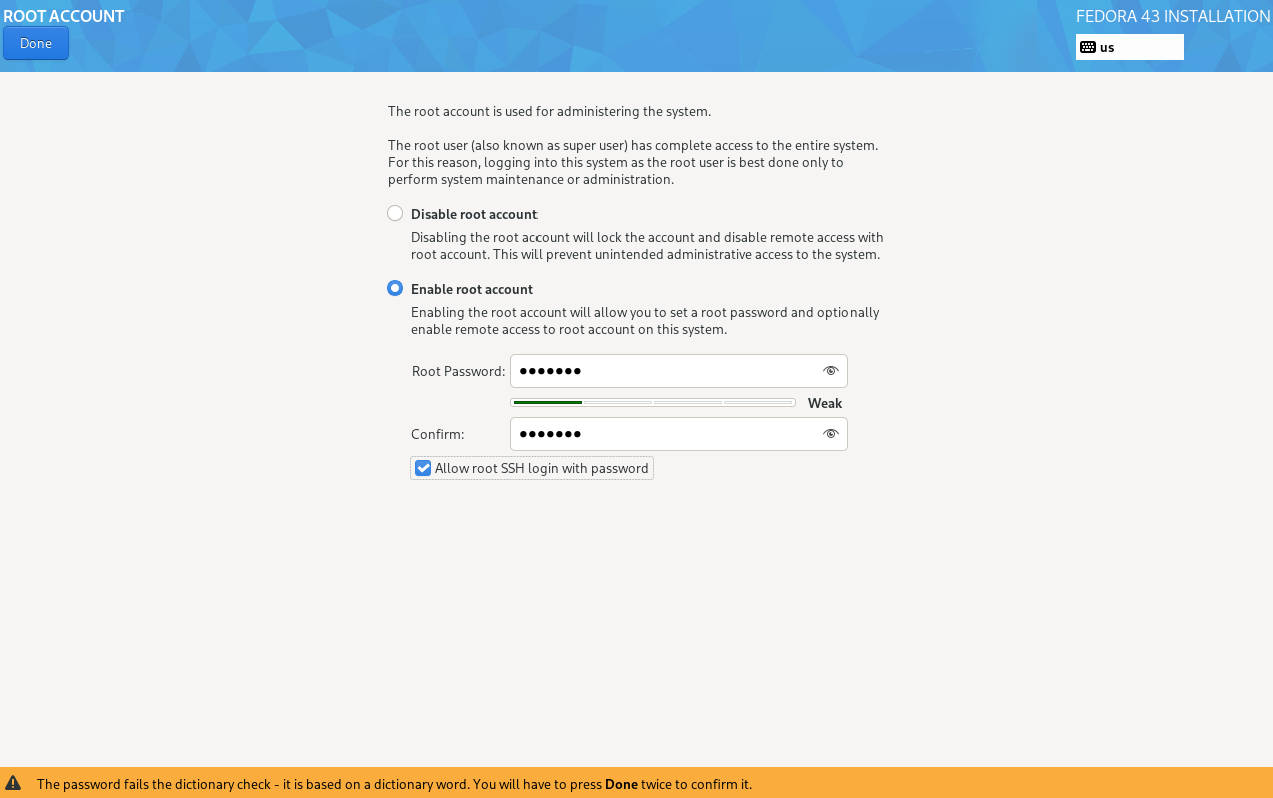
I choose to “Allow root SSH login with password” so that I can do some post-installation configuration from a remote system. You should not check this box unless you have a specific reason to do so.
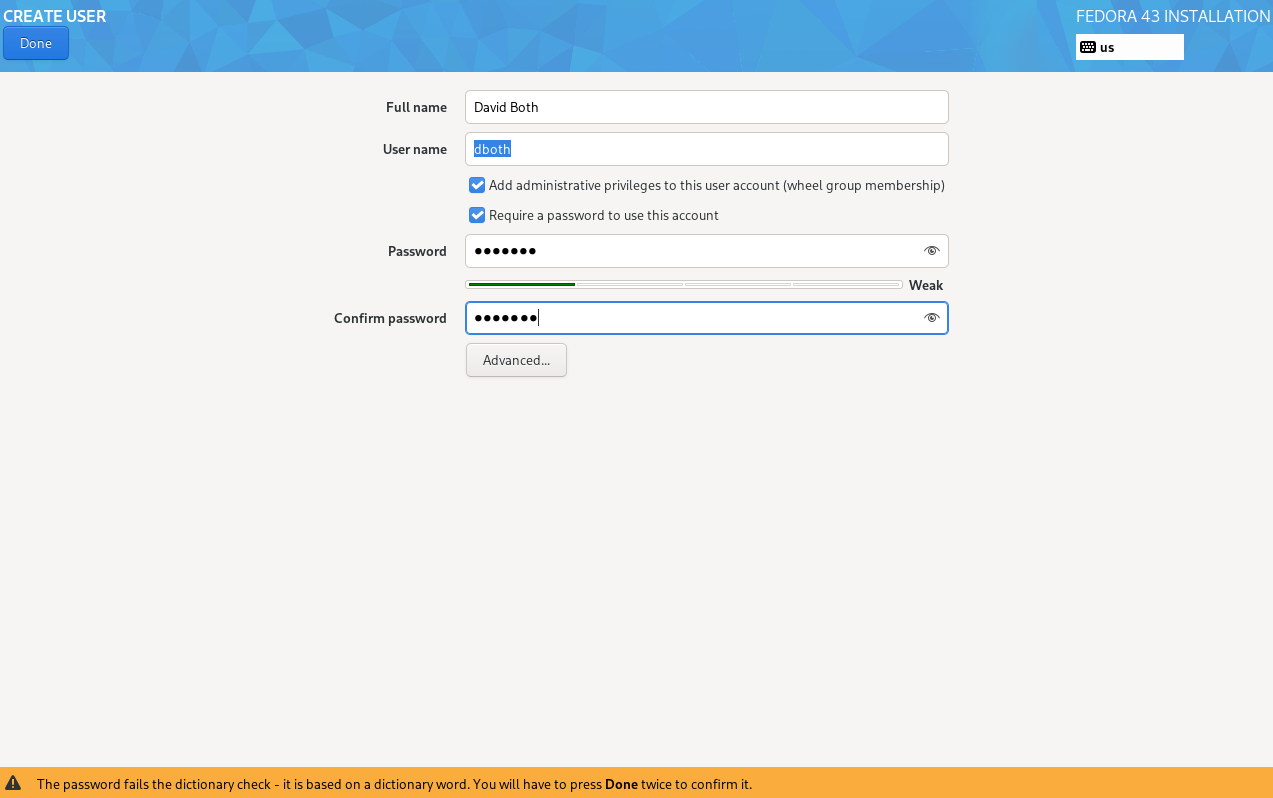
Create User
In Figure 5, I’ve created a regular user. I have added the capability for this user to elevate their privilege level to that of root. All regular user accounts should use a password for authentication.
Installation Destination
All of the Fedora Spins and Editions use the BtrFS filesystem with no other options available, and that’s perfectly fine for most users, so there are only a couple choices to make. If we choose the Automatic storage configuration, Anaconda would create a simple disk partitioning scheme using BtrFS, as done in the other Fedora Spins and Editions.
But as a SysAdmin, I usually need — or at least want — more control over how the disk space is assigned and managed. Therefore, I choose the Custom radio button option on this page, as shown in Figure 6. I can also choose which storage devices are used in the initial installation. In this case I’ve chosen the /dev/sda device and left the other storage drive for later use.
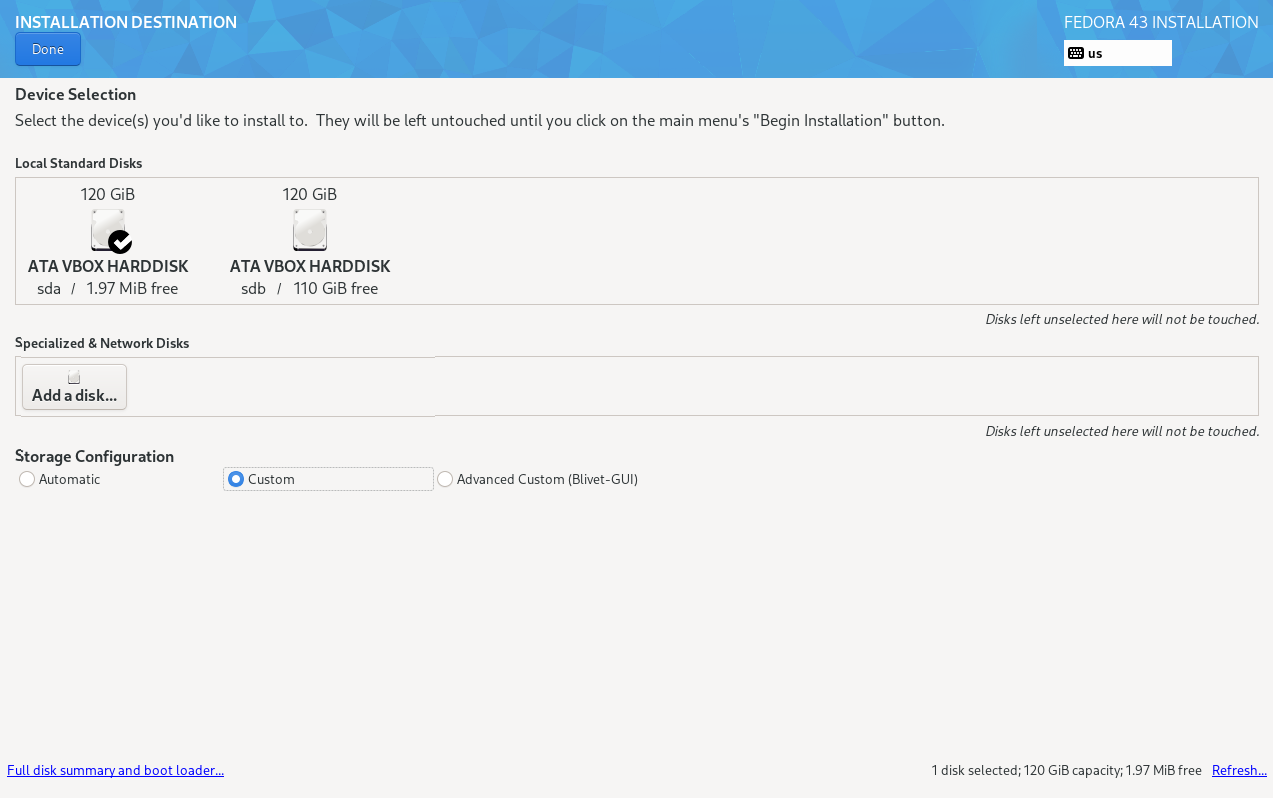
Click the Done button to continue to the next step.
Manual Partitioning
Manual partitioning allows the SysAdmin to create a partitioning scheme as simple or complex as needed. The default scheme on this page is BtrFS as shown in Figure 7. For this installation I clicked on the partitioning scheme selection bar and chose LVM for a Logical Volume Manager scheme.
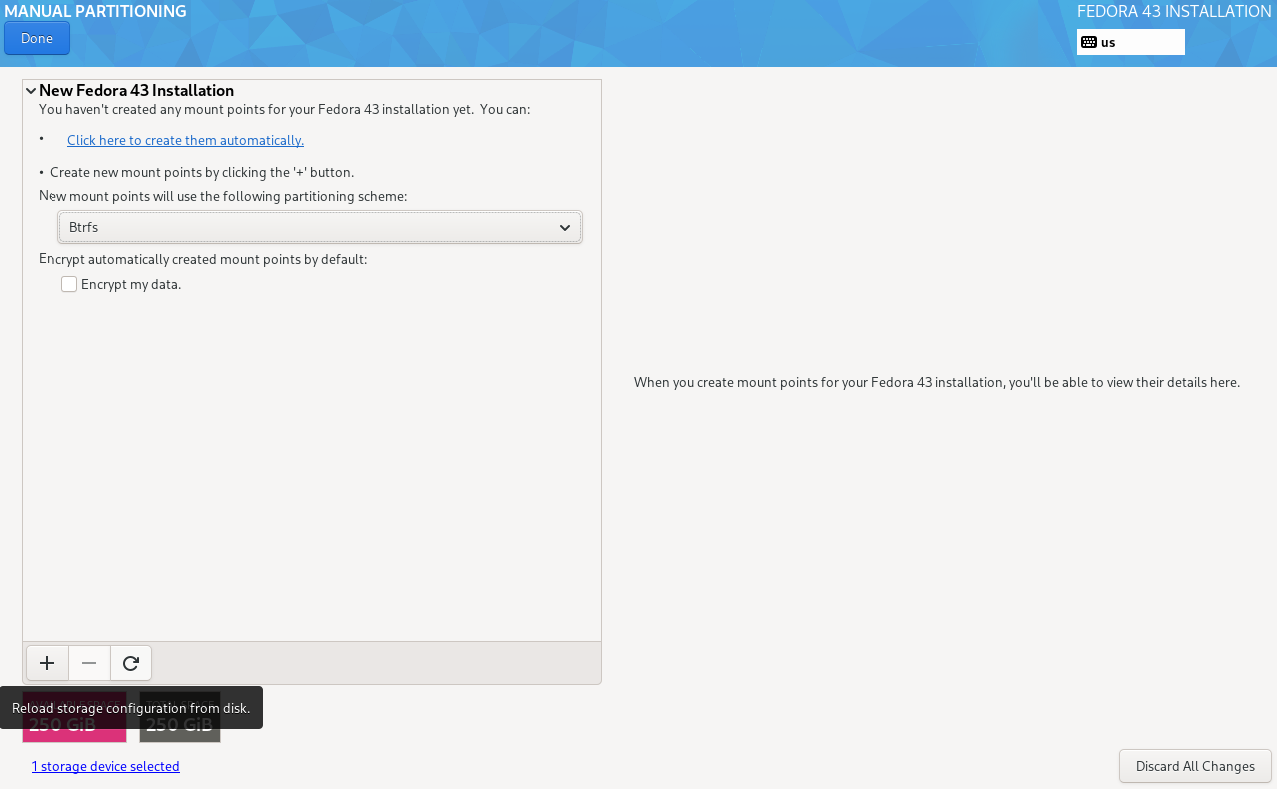
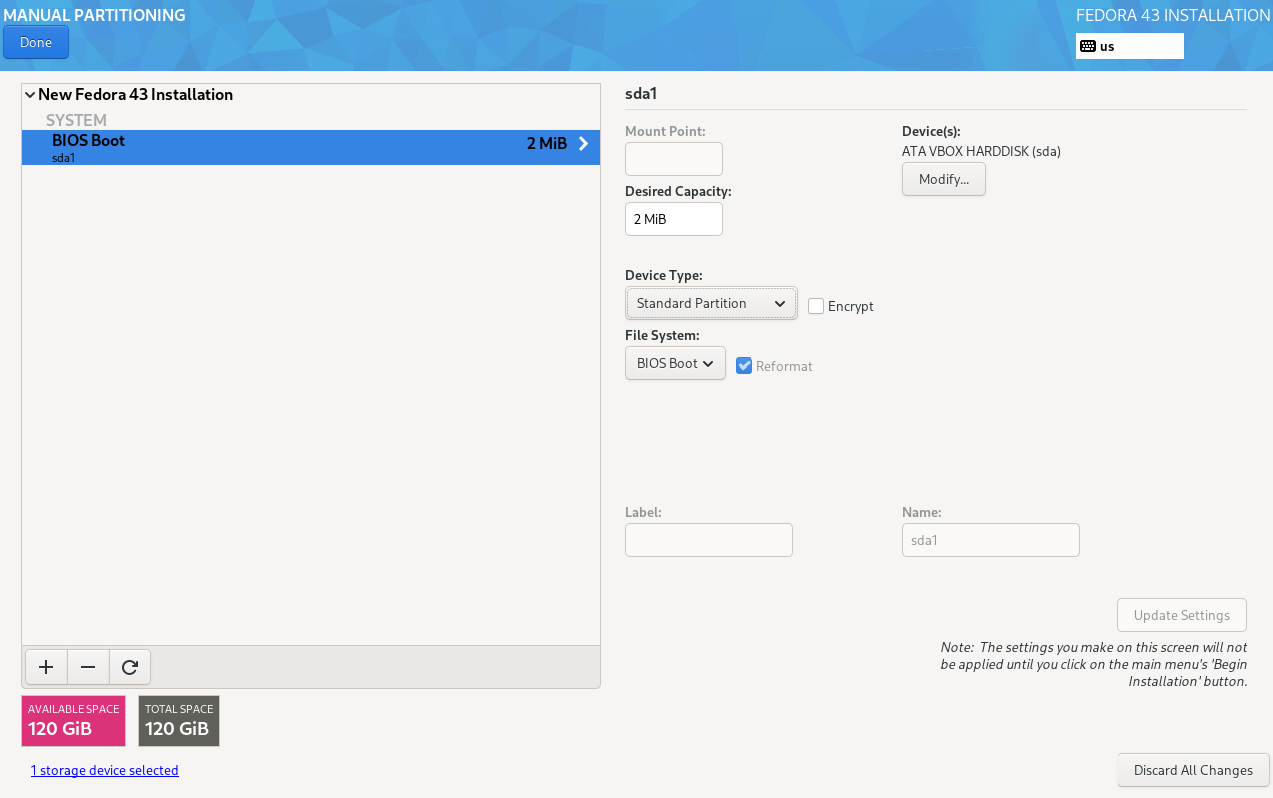
Figure 8 shows the Manual Partitioning menu with the BIOS Boot partition already added. This can only be a Standard Partition. Although the installer let’s you choose an EXT4 filesystem or part of an LVM/EXT4 volume group (VG), it will display an error message across the bottom of the page.
After adding the BIOS Boot partition, I add the /boot partition which must also be a standard partition, then the / (root) partition which I make an EXT4 partition. I usually make the root partition 10GB in size, but it can be changed later, after the installation, if necessary using LVM management tools. Now is also a good time to modify the volume group configuration, so I clicked on the Modify button to get the menu in Figure 9.
I renamed the VG to vg01 as that’s shorter and less complex than the default one. I also set the VG size to “As large as possible,” to ensure that all the remaining space on the storage device is allocated to the volume group. This doesn’t assign all the space to the logical volumes that are being created, and there will definitely be some free space on the VG to add more logical volumes or to increase the sizes of one or more existing ones when the need arises.
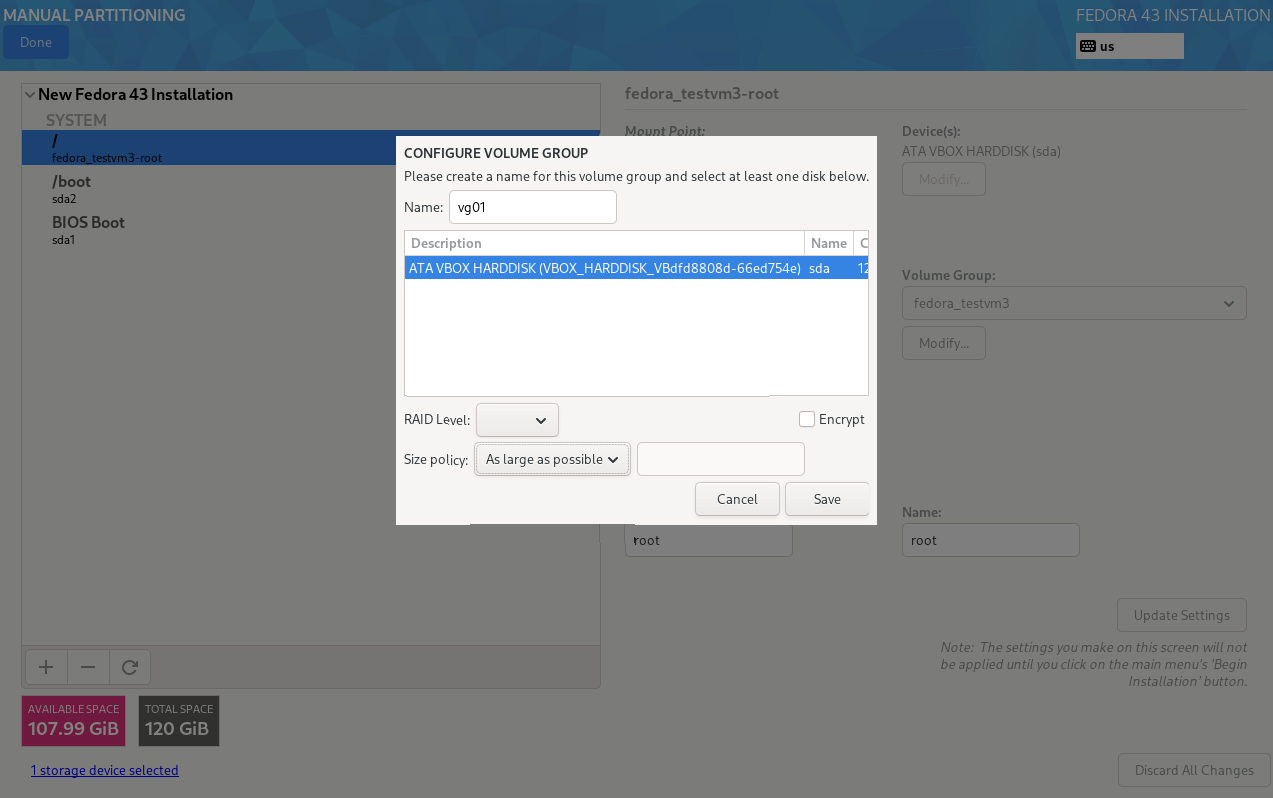
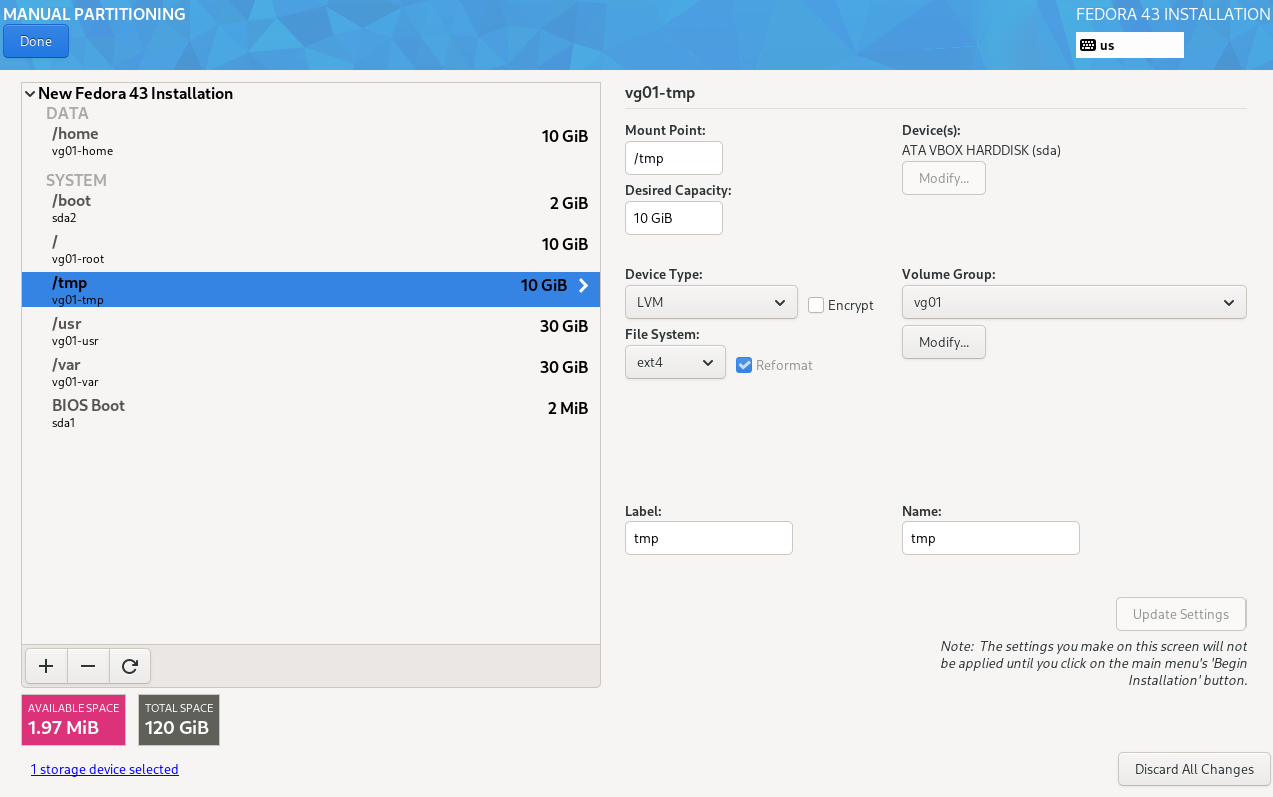
Figure 10 shows the complete partition configuration that I normally use for my testing VMs. This is not what many system administrators would use, but it works well for me and I use the same partitions and logical volumes, with somewhat different sizes depending upon the role of the system, for all my Linux hosts.
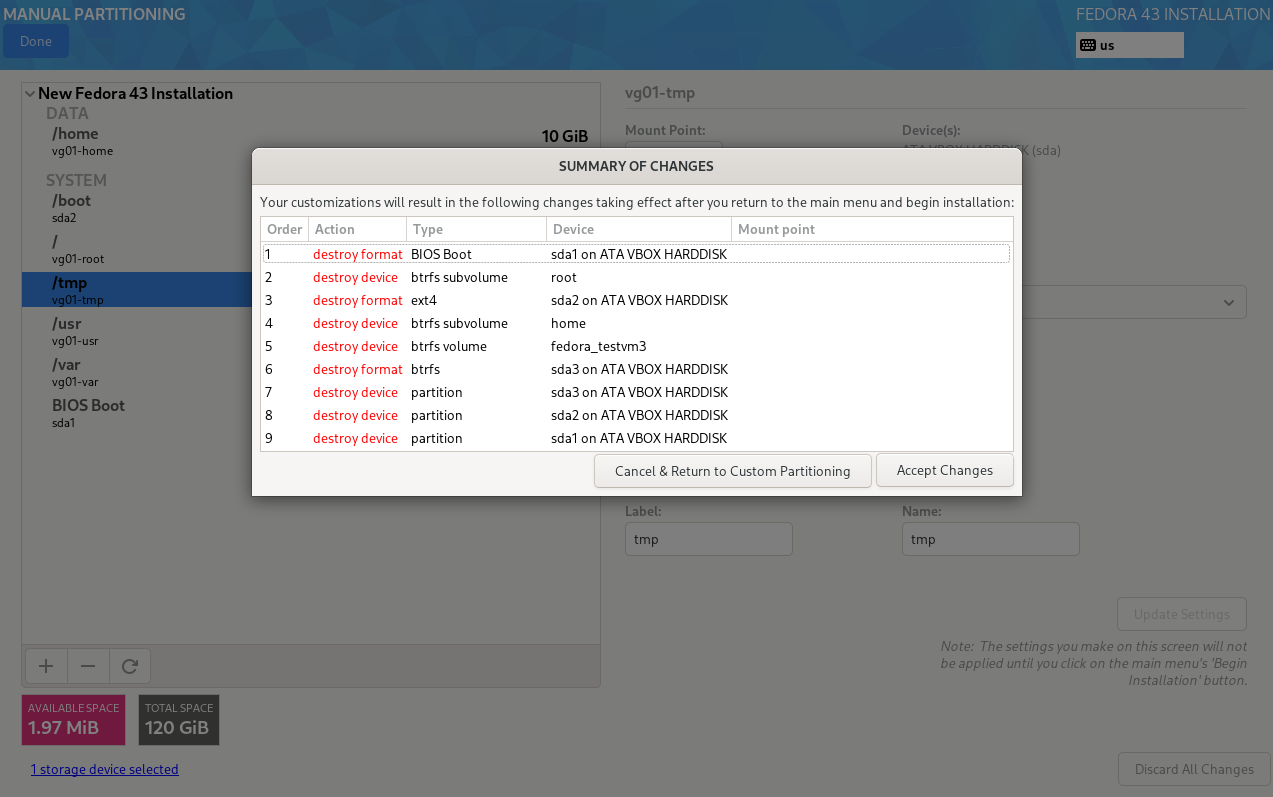
After completing the partitioning scheme, click the Done button and the installer displays a summary of all the changes you’ve made. In my case I deleted some existing partitions, which you might need to have done if installing over a pre-existing operating system.
It’s not usually necessary to check all of these changes and I’ve seldom done so. When ready, click on the Accept Changes button top continue.
Software Selection
The ability to choose from a large selection of software is the defining feature of the Everything installation image. The Software Selection menu allows you to select the desktop and software you want with nearly unlimited flexibility.
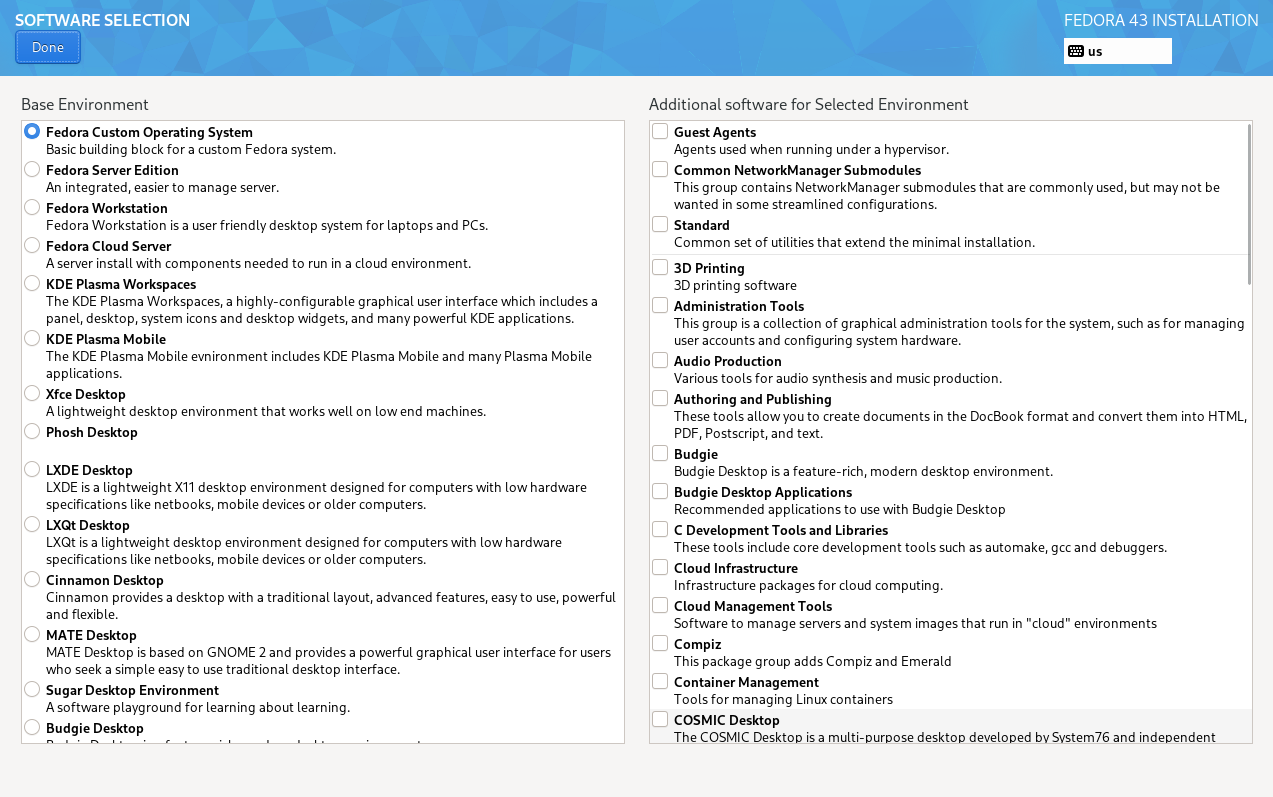
In Figure 12, you can see the primary selections. These include Custom, Server, Workstation, and Cloud Server Editions, as well as all of the desktop spins. No matter which edition or desktop you choose in the left column, you can modify it by adding any of the software listed in the right column.
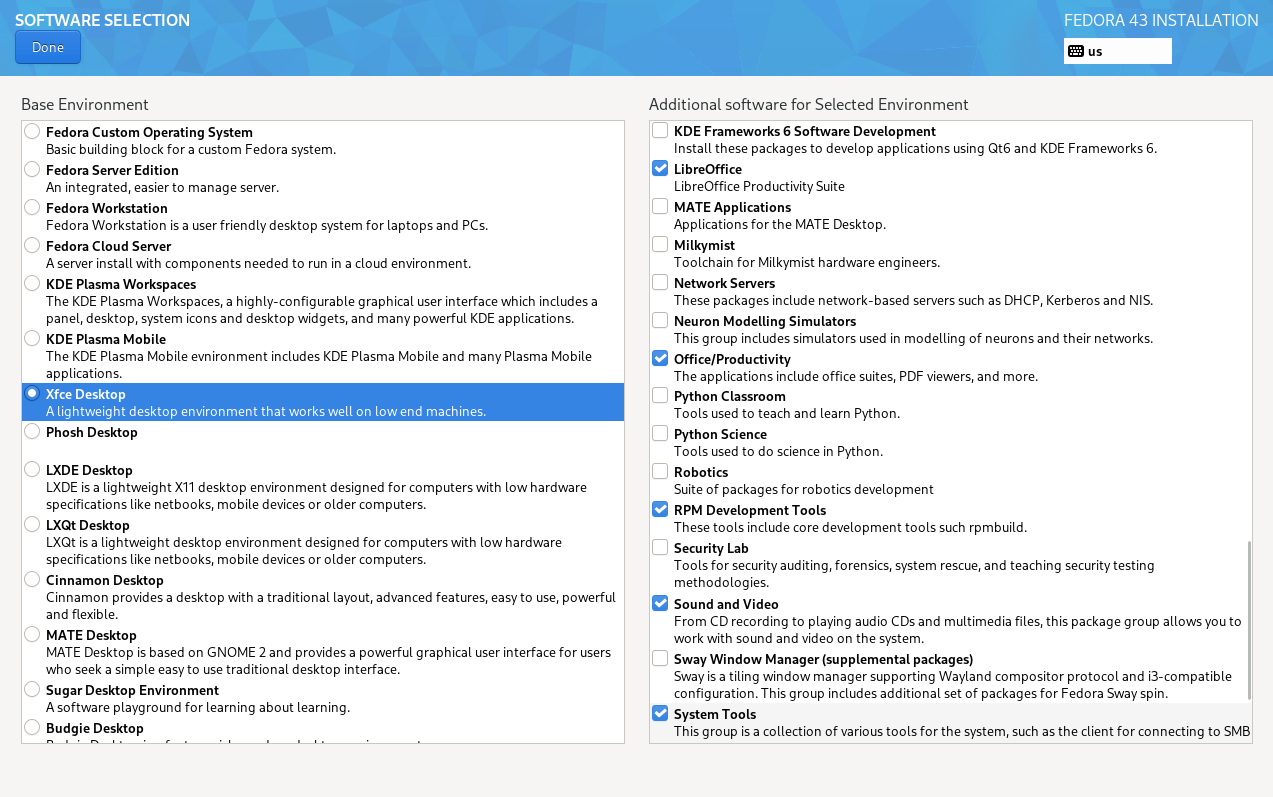
I suggest you scroll down both columns so you can see all the possibilities. Figure 13 shows some of the choices I made, starting with the Xfce Desktop, which is my favorite. If the desktop or edition you select requires any of the software from the right column, it will be auto-selected, and you can still choose additional software.
After making the selections for software to be installed, click the Done button, then on the Installation Summary menu, click on Begin Installation button. Figure 14 shows the Anaconda installer downloading about 2.5GB in software packages from the Internet.

When the installation completes, click on the Reboot System button. That can be a bit tricky as you need to remove the installation media or the system will reboot into the installation. It really should do a shutdown to allow you to remove the installation media, but with a VM you can use the VM Machine menu to do that instead of a reboot. On a physical machine, just wait until the screen goes dark and remove the USB install image, or wait until the Grub menu is displayed during the early part of the boot, press any key to stop the countdown timer, then perform a manual reset using the reset or power button on the computer.
You now have a Fedora Linux host that should have all or at least most of the software you need.
Thoughts on Everything
One thing I especially like about Everything is that there are so many choices. I can create a minimal system with no GUI desktop, a server with or without a desktop, or a Fedora Workstation, or a system with any one or several desktops. No matter which Edition or Spin is chosen in the left column, any of the packages in the right column can be selected to install any of the software groups that make up any or all of the Fedora Spins.
Not one of the other Linux distributions has such a huge number of choices during the install with such an easy way to create the Linux computer that works best for you right from the start.
The Everything installation went very well on the VM in this article. But since the true test is to install it on a physical host and use it for all my daily tasks, that’s what I’m going to do next. I’ll post about that when I have a chance.
Oh, yeah, my name for this image is The Menu — as in 1 from column A and as many as you want from column B.
- A regular user is one who isn’t root. Under certain conditions, a regular user can elevate their permissions to those of root. ↩︎