Setting up OBS Studio to record videos

I manage a YouTube channel for the FreeDOS Project, where I record “how-to” videos about FreeDOS. When I started the channel in August 2019, I didn’t know anything about recording videos. But with OBS Studio on Linux, I’ve found recording these videos to be pretty straightforward. Here’s how you can do it, too.
Configure OBS Studio
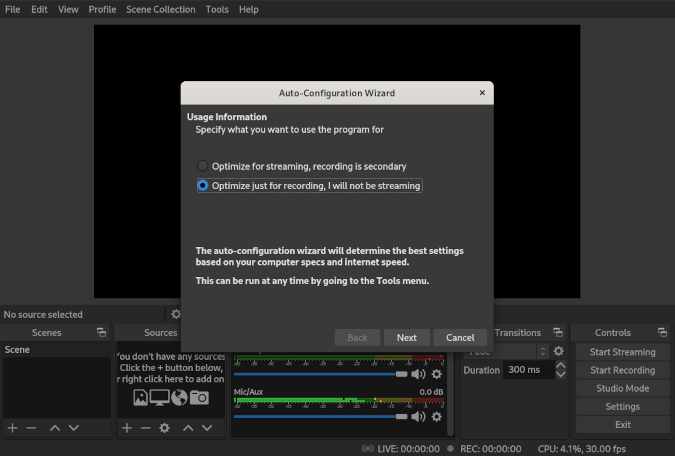
After you install OBS Studio, the first time you launch the software, you’ll get an auto-configuration wizard to determine the best settings for recording videos. This makes setup a breeze. If you’re recording videos on the desktop, like I am, then click the “Optimize just for recording” radio button and click Next.
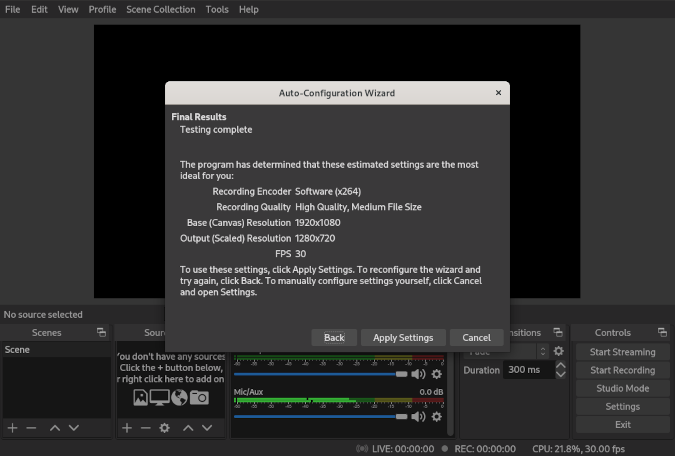
OBS Studio will run through a series of automated tests before it confirms the best video settings for your system. On my system, that’s 1920×1080 at 30 frames per second (fps), which is good enough for recording my videos.
Custom setup
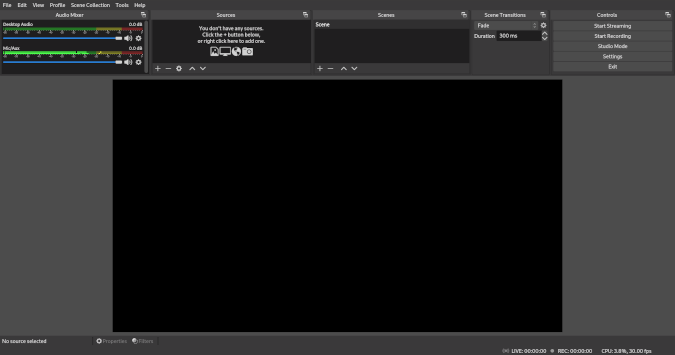
The default OBS Studio interface shows the video front and center and positions the controls at the bottom of the screen. While this is not a bad default arrangement, you can see in my early videos that I occasionally look away from the camera as I change from a full-screen webcam video to my QEMU screen. That’s because the default OBS Studio configuration places the scene controls in the lower-left corner.
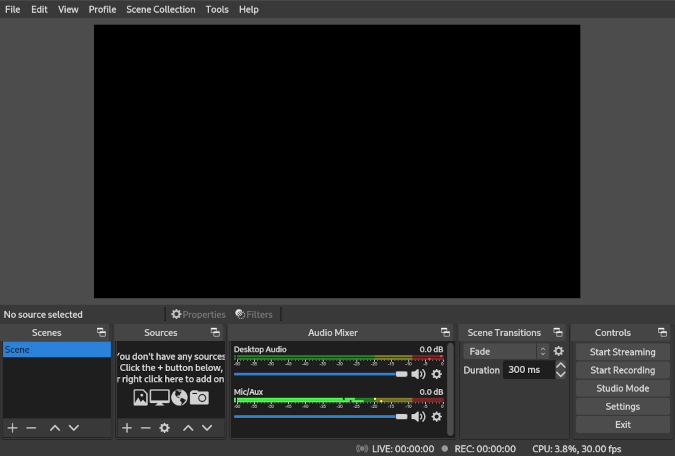
Breaking virtual eye contact like this is distracting, so I wanted another way to change scenes without looking for the scene controls. I discovered that I could click and drag the OBS Studio controls to different areas on the screen. By positioning the scene controls at the top of the screen, near my computer’s webcam, I don’t need to look away from the camera to change scenes.
So, my first step whenever I set up OBS Studio is to drag the controls to the top of the screen. I like to place the Scene selector panel in the middle, so I don’t have to look very far away from my camera to change scenes. I keep the recording controls to one side because I’m never on camera when I start or stop the video, so it doesn’t matter if I look away to start or stop my video recording.
Setting up scenes
You can set up OBS Studio to support your preferred video style. When I started recording videos, I watched other how-to videos to see how they were organized. Most start with a brief introduction by the host, then switch to a hands-on demonstration, and end with a “thank you” screen to advertise the channel. I wanted to create my videos similarly, and you can do that with scenes.
Each scene is a different arrangement of sources, or elements in the video. Each source is like a layer, so if you have multiple image or video sources, they will appear to stack on top of one another.
How you define your scenes depends on the kind of video you want to make. I do a lot of hands-on demonstration videos, so I have one scene with a full-screen webcam video, another scene that’s just a QEMU window, and yet another scene that’s “picture-in-picture” with me over my QEMU screen. This gives me a lot of options for how I want to record videos. I also set up separate scenes that show a “thank you” image and links to our social media, and note to encourage viewers to subscribe to my YouTube channel.
With these scenes, I can record my videos as Live; that means I don’t need to edit them afterward. I can use the scene controls in OBS Studio to switch from the QEMU scene to the full-screen webcam screen and back to the QEMU screen before wrapping up with separate scenes that thank my supporters and share information about my channel. Once you have the scenes set up, changing scenes is just clicking an item in the scenes menu.
Ready to create
Using OBS Studio is a great way to record videos. I’ve used this same method to record other videos, including pre-recorded conference talks, welcome videos for a remote symposium, and virtual lecture videos when I teach an online class.
The next time you need to record a video, try OBS Studio. I think you’ll find it easy to learn and use.
This article is adapted from How I use OBS Studio to record videos for my YouTube channel by Jim Hall, and is republished with the author’s permission.