Why I love classic markup
 Jim Hall
When I was an undergraduate student in the early 1990s, I discovered a loophole in the university’s computer lab policy: they charged you per-page to print to the lab’s laser printer, but printing to the line printer or dot matrix printer was free—as long as you didn’t abuse it.
While I had used a DOS word processor until then (and was quite happy with it) I decided to take advantage of the “free” printing. That started me on a journey to learn my first document markup: nroff.
Unix and nroff
The story of how nroff became nroff is one of my favorite stories about Bell Labs Unix. Here’s a quick overview:
Ken Thompson and others on the Unix team had used an old PDP computer system to work on the first Unix system. But that system was slow, and they wanted to buy a newer, faster system. They put in several requests to purchase a new PDP computer.
However, that wasn’t too long after Bell Labs had tried (and failed) to participate in the Multics project, and management was feeling “burned out” on operating system development. Every request was rejected.
Around that same time, the Bell Labs legal department was about to purchase a computer system that would allow them to write patent applications, which required specific formatting. The hardware was ready, but the vendor would need more time to finish the software. The Unix team struck a deal: you buy us a new computer, we’ll put Unix on it, and make updates to the current roff document preparation system to support patent applications.
And technically, no one would be working on operating systems. It just happened that they would have to make updates to Unix to support the new hardware—but technically, not operating systems development. You get the idea.
That’s how the Unix team got a new computer. And that’s how the roff command became nroff (or new roff).
It was dot commands
Back to my story of learning nroff. A document is just a plain text file with dot commands that make nroff do certain things or apply special formatting. Each dot command starts on a new line; otherwise, it’s just text. For example, you can center the next line with the .ce command, add extra spaces between paragraphs with .sp, set the left margin or “page offset” with .po, or set the temporary “first line” indent for a new paragraph with the .ti command.
You could format a document entirely using these basic commands, but it more likely you’d use a macro package that applied formatting for you. One macro system was created by Eric Allman, called the e macros, invoked with nroff’s -me command line option. The “standard” macro package was the s macros, developed at Bell Labs; you’d use these with the -ms command line option. At the time, I used the -me macros, although these days I prefer the -ms macros.
Let’s look at a short document written for the -ms macros. The Bell Labs macros are all uppercase, which makes it easy to identify them.
In this sample document, I’ll define the document’s title with the .TL command, and set the author’s name and institution with .AU and .AI respectively. In technical writing, the first paragraph in a new section should be “block” formatted, with no first line indent; use the .LP command for that. Other paragraphs use the .PP command.
.TL
Class Paper
.AU
J. Hall
.AI
Univ. of Wisconsin-River Falls
.LP
This is a sample report written in nroff.
I wrote many class papers in nroff when I was an
undergraduate student because nroff produced
output that could be easily printed on a
dot matrix printer.
.PP
That meant I could write my papers in nroff and
print them on the low-cost printer in the computer
lab.
Note that nroff automatically justifies the output
so the left and right margins look nice.
This is also called "adjusted" text.
Let’s save this file as report.ms, although the file extension doesn’t really matter. When I process this input file using the nroff command and the -ms macros, I’ll get a 1-page document with all lines starting on the left margin.
A printed page on a dot matrix printer, or any other typewriter-like device, typically used 10 characters per inch and 6 lines per inch. For what we call “US Letter” page size today, that’s 8 ½ × 11 inches, or 85 columns wide and 66 lines long. You can simulate a printed page by shrinking the font size in a terminal window and resizing the terminal so it is 85 columns wide and 67 lines long (the extra line means you can see the next command prompt without “losing” the top line of the document). But for this sample, I’ll just show the text output without the extra lines:
linux$ nroff -ms report.ms Class Paper
J. Hall
Univ. of Wisconsin‐River Falls
This is a sample report written in nroff. I wrote many class pa‐
pers in nroff when I was an undergraduate student because nroff
produced output that could be easily printed on a dot matrix
printer.
That meant I could write my papers in nroff and print them
on the low‐cost printer in the computer lab. Note that nroff au‐
tomatically justifies the output so the left and right margins
look nice. This is also called "adjusted" text.
The justified lines are each 65 characters wide. For paper that is 85 columns wide, we need to add extra space on the left side with the .po (page offset) command. If we add 10 spaces on the left, and each line is 65 columns wide, that means we’ll have 10 spaces left over on the right side. The output will be neatly balanced:
linux$ (echo '.po 10' ; cat report.ms) | nroff -ms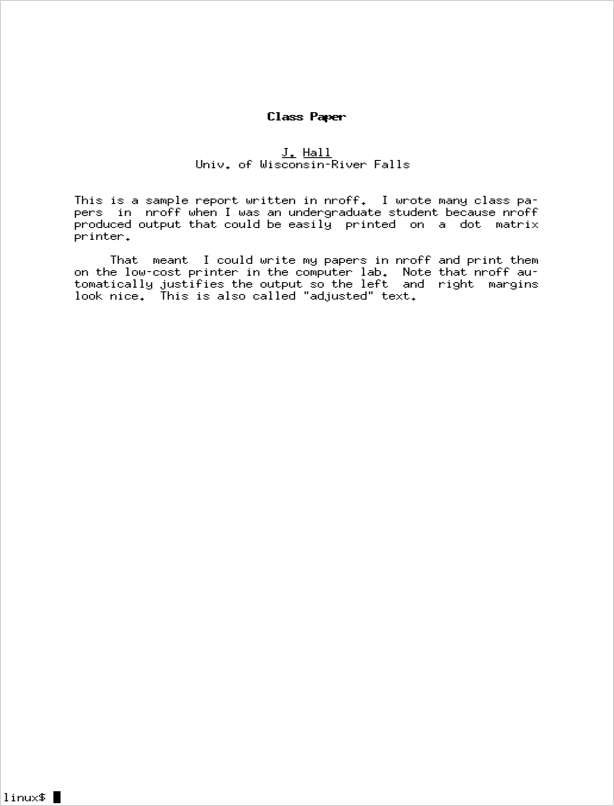
Upgrading to typesetting
Later, Bell Labs purchased a phototypesetter, and they updated nroff to become troff (or typesetter roff). When they purchased a second typesetter, troff became ditroff (device independent troff). These days, you can use groff (or GNU roff) to simulate typesetter output; to generate a PDF file as the output, use the pdfroff command and redirect the output to a file.
The Bell Labs team continued to develop the -ms macros to support the extra formatting in the typesetter. That means extra font styles like italic and bold, and (eventually) new fonts like Courier and Helvetica.
Let’s update the report.ms file to support this extra formatting. To add bold text, use the .B command. Use .I to turn on italic text, .CW for constant-width text (like a typewriter), and .R to go back to normal or “roman” text style. Each command will switch the type style—although it will limit formatting to just a word if you provide that word as the next option on the same line. This is easier to see in a demonstration:
.nr PS 18
.TL
Class Paper
.AU
J. Hall
.AI
Univ. of Wisconsin-River Falls
.LP
.I
This is a sample report written in nroff.
.R
I wrote many class papers in nroff when I was an
undergraduate student because nroff produced
output that could be easily printed on a
dot matrix printer.
.PP
.B
That meant I could write my papers in nroff and
.R
print them on the low-cost printer in the computer
lab.
Note that nroff automatically justifies the output
so the left and right margins look nice.
This is also called
.I adjusted
text.
To make the output easier to see as a screenshot, I’ve also used the .nr command to set a number register. In this case, PS is the number register for the text size (“point size”) which I’ve set to 18-point text. The default font is Times.
Let’s process this using pdfroff so we can see what the output might have looked like on a phototypesetter:
$ pdfroff -ms report.ms > report.pdf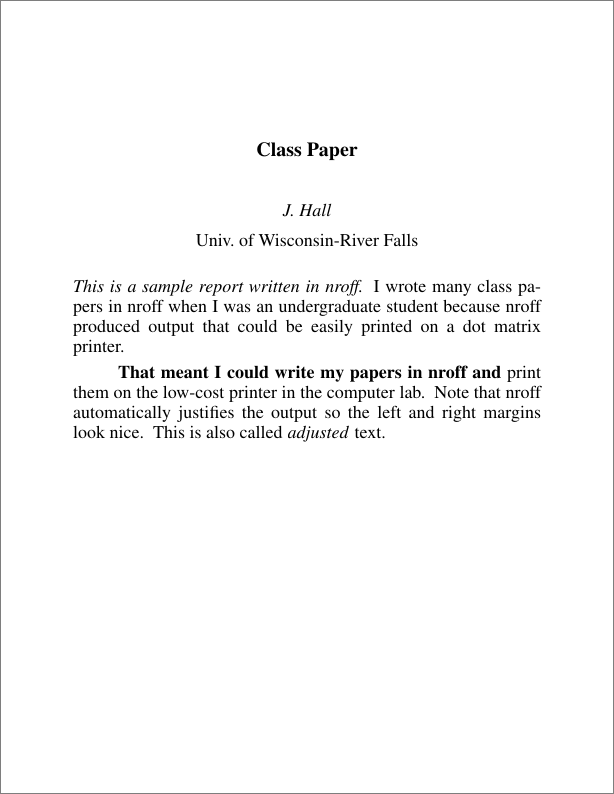
More to learn
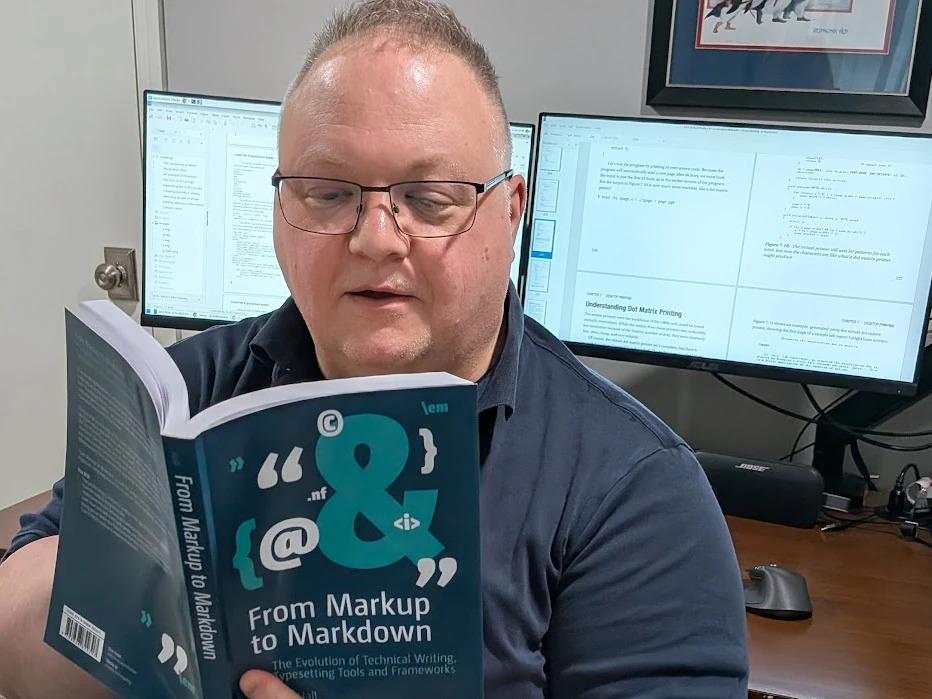
This is a simplified version of what I talk about in my new book, From Markup to Markdown, now available from Springer/Apress. If you’re a programmer or technical writer, you’ll love this book!
From Markup to Markdown is about how we’ve used computers for writing, including RUNOFF, nroff, LaTeX, HTML, and DITA. There’s even a chapter in there about word processing with WordStar, one of the first desktop word processors. I added a ton of references and examples in each chapter, so you can see how to create and format documents. Many chapters also provide source code of a simple implementation of each system, to show how things worked.
I have so many favorite parts of this book; I can’t really pick just one thing that I love. But I think the nroff and troff chapters really stick with me. That’s how I got started with document preparation, before I learned other markup and writing tools.
From Markup to Markdown is available in print and ebook editions from Springer/Apress. You can also order it from Amazon and other book sellers.
 David Both