Running FreeDOS on Linux

FreeDOS 1.3 booting on QEMU
FreeDOS is a great little operating system. FreeDOS is an open source implementation of DOS, the original operating system for the IBM Personal Computer. Like any DOS, FreeDOS is a fairly simple operating system with few moving parts, relying only on an Intel-compatible CPU and a BIOS (the Basic Input/Output System).
Unfortunately, the BIOS requirement also means that you cannot run FreeDOS on actual hardware built after about 2020. That’s when the PC industry largely dropped support for “Legacy” mode in UEFI; “Legacy” mode provided BIOS services for operating systems like DOS.
But you can run FreeDOS on your Linux system, using a virtual machine or a PC emulator. Here’s how I boot FreeDOS on my Linux desktop machine using QEMU. QEMU should be available on every Linux distribution; I am running Fedora Linux.
Downloading FreeDOS
The original DOS operating system in the 1980s and 1990s was only available as a set of floppy disks, but FreeDOS is also a modern DOS, including many open source applications and tools not found in the original DOS. To accommodate everything, FreeDOS is available as a CD-ROM distribution.
The FreeDOS distribution is actually a “Live CD” distribution, meaning you can boot the CD and run FreeDOS directly. The LiveCD doesn’t include everything, so most people usually install the full FreeDOS distribution instead.
Let’s start by downloading a copy of FreeDOS. Visit the FreeDOS website in your web browser and click on Download FreeDOS 1.3.
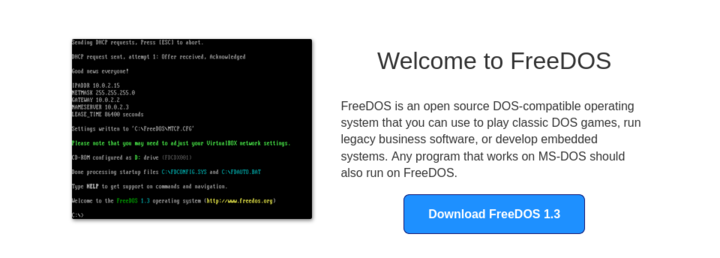
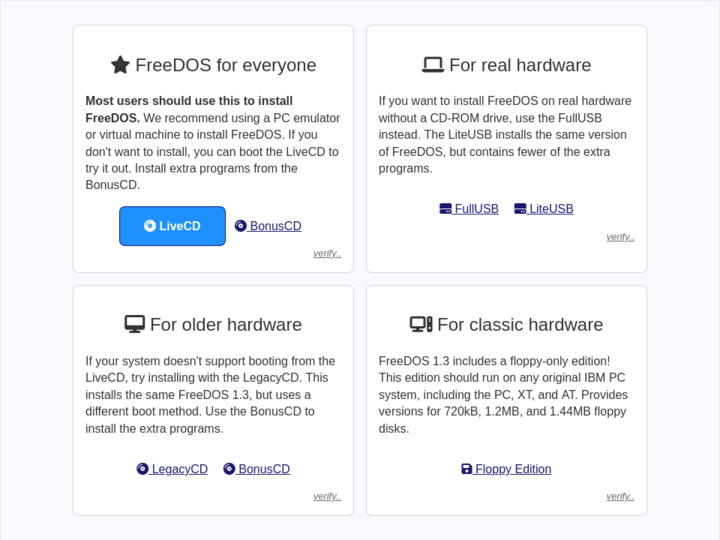
This will bring you to the “download” page that contains different ways to download FreeDOS, depending on your system. To boot and install FreeDOS in a virtual machine, you will need the “LiveCD” image. Click the big blue button to download it.
The “LiveCD” is actually provided in a zip file that also contains a “Readme” file:
$ unzip -l FD13-LiveCD.zip
Archive:  FD13-LiveCD.zip
  Length      Date    Time    Name
---------  ---------- -----   ----
  1474560  02-20-2022 00:03   FD13BOOT.img
419573760  02-20-2022 00:03   FD13LIVE.iso
     6521  02-20-2022 00:03   readme.txt
---------                     -------
421054841                     3 files
You can extract the zip file to get everything, or you can just extract the CD image with this command line:
$ unzip FD13-LiveCD.zip FD13LIVE.iso
Archive:  FD13-LiveCD.zip
  inflating: FD13LIVE.iso
System emulation with QEMU
QEMU (the “Quick EMUlator”) can emulate a variety of systems and architectures, including the Intel i386 line of CPUs used in the DOS era. Because QEMU emulates the hardware for the “guest” operating system, that means you can use QEMU to boot FreeDOS on Linux, and FreeDOS will “think” it is running on real hardware.
But QEMU is not a graphical program where you can click buttons and select menus to set up a virtual machine. Instead, you need to use the command line to define everything under QEMU. Fortunately, QEMU provides a lot of standard virtual devices by default, including many that were common for DOS machines, including Cirrus Logic CL-GD5446 VGA card, PS/2 keyboard and mouse, IDE interfaces for hard drive and CD-ROM, floppy disk, network, and serial ports. You can also define a SoundBlaster 16 sound card, AdLib music card, and other common peripherals.
Let’s start with the basic command line first. Type this to start QEMU as an i386 machine with 32 MB of memory.
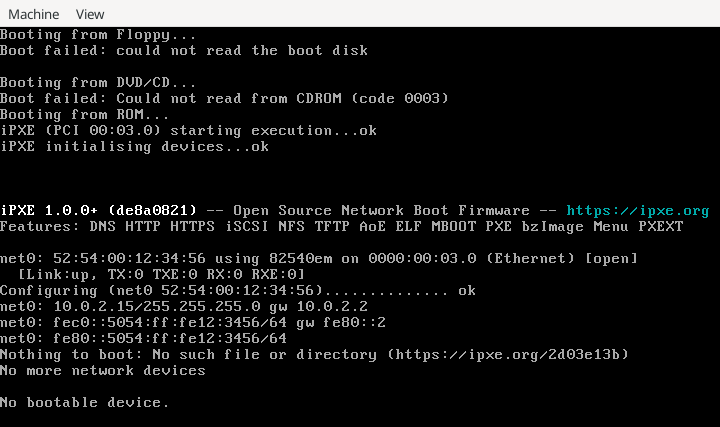
$ qemu-system-i386 -m 32 This doesn’t specify any drives, neither hard drives nor CD-ROM, so it won’t actually boot – it unsuccessfully tries to boot from several media including the network – but you can see that it is doing something:
Use the Machine > Quit menu action to close the QEMU window.
Booting FreeDOS in QEMU
Let’s add to the QEMU command line to define the LiveCD image as the CD-ROM drive:
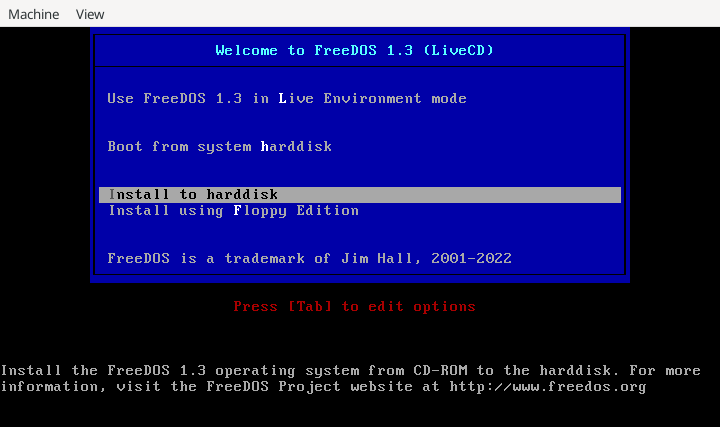
$ qemu-system-i386 -m 32 -cdrom FD13LIVE.iso This boots the LiveCD in the virtual machine. You should be greeted by the FreeDOS 1.3 LiveCD boot menu, which lets you boot into a “Live Environment Mode” with a minimal version of FreeDOS, or boot from the system hard disk, or install to the hard disk:
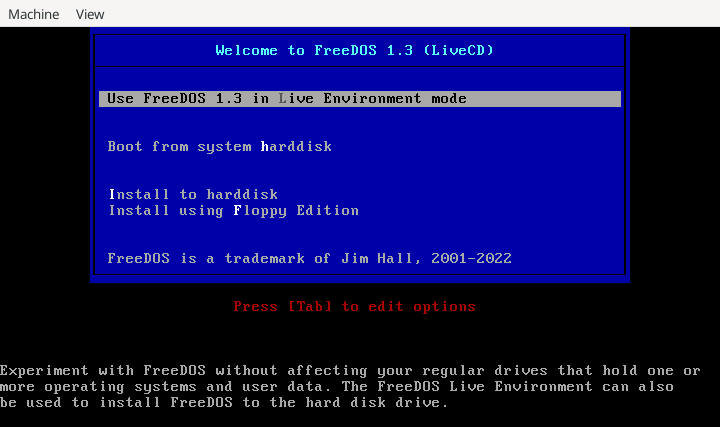
If you hit Enter on the first menu option, you’ll boot FreeDOS into the Live Environment.
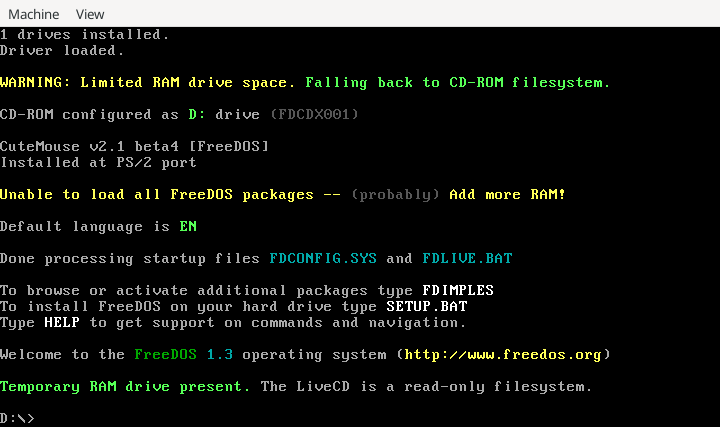
Note that 32 MB is a lot of memory for DOS systems in the 1990s, but it’s not quite enough to hold the minimal in-memory installation of FreeDOS, so you will see a warning message in yellow. The warning message just indicates that, with only 32 MB of memory, FreeDOS will run from the CD-ROM filesystem, instead of using a copy of FreeDOS that would have been extracted into memory.
Improving performance
The Linux kernel supports an advanced feature called KVM or Kernel-based Virtual Machine, which allows “guest” operating systems to run at near-native speeds.
Let’s update the QEMU command line one more time to enable KVM support:
$ qemu-system-i386 -enable-kvm -m 32 -cdrom FD13LIVE.iso KVM requires that the “host” system type is the same as the “guest” system type, such as running an “Intel” virtual machine on Intel hardware. If the underlying hardware is a different architecture, like ARM for Raspberry Pi, you will not be able to use KVM. This may slow down the virtual machine noticeably – but look at this way: even when booting FreeDOS with QEMU on a Raspberry Pi, the virtual machine shouldn’t run any slower than running on a DOS-era ’486 or Pentium machine. And for DOS, that’s still fast.
Installing FreeDOS
Running FreeDOS in this way means you are limited to the read-only environment of the LiveCD. If you want to do more with FreeDOS, you will need to install it. To install, you’ll need a target hard drive, which you will need to define as a virtual hard drive. QEMU provides the qemu-img command to do that for you.
The qemu-img command can create virtual disk images in several formats, including raw, VDI, VHDK, and QCOW2. I prefer the QCOW2 format. Use this command to define a 500 MB virtual hard disk called freedos.qcow2 using the QCOW2 virtual disk format:
$ qemu-img create -f qcow2 freedos.qcow2 500m
Formatting 'freedos.qcow2', fmt=qcow2 cluster_size=65536 extended_l2=off compression_type=zlib size=524288000 lazy_refcounts=off refcount_bits=16
To use this in a QEMU virtual machine, you need to add it on the command line as the first or primary hard disk, which QEMU identifies as hda. However, you should also tell QEMU to actually boot from the CD-ROM image instead, at least until FreeDOS is fully installed. To do that, you’ll add an extra QEMU command line option at the end:
$ qemu-system-i386 -enable-kvm -m 32 -hda freedos.qcow2 -cdrom FD13LIVE.iso -boot order=dQEMU recognizes several options to the -boot option, and in this example I’ve instructed QEMU to boot with order=d. That sets the boot selection order to just the CD-ROM drive (d). You can also use a to indicate the first floppy drive, c for the first hard drive, or n to boot from the network. Combine options like order=ac to try to boot first from the “A:” floppy before attempting to boot from the “C:” hard drive.
In this case, booting from the CD-ROM will boot the FreeDOS 1.3 LiveCD. To run the installer, select the third menu option:
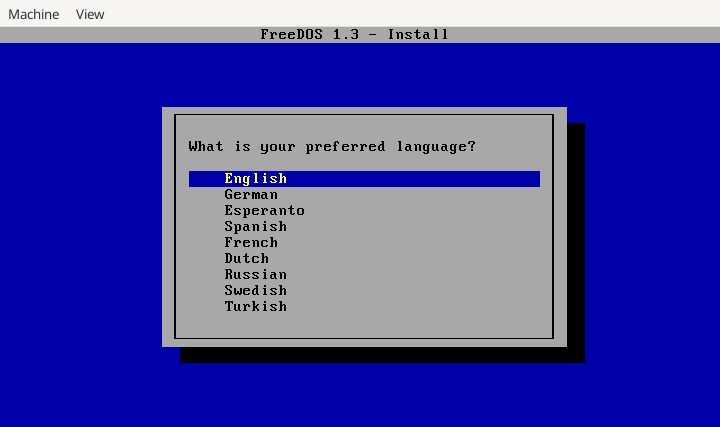
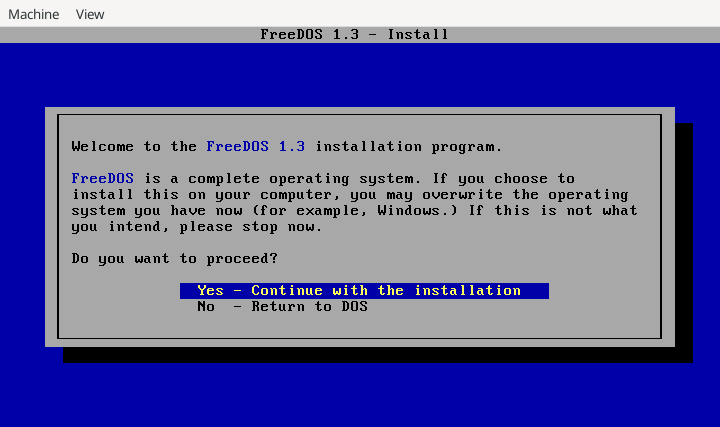
From there, follow the prompts to select your preferred language and start the installation:
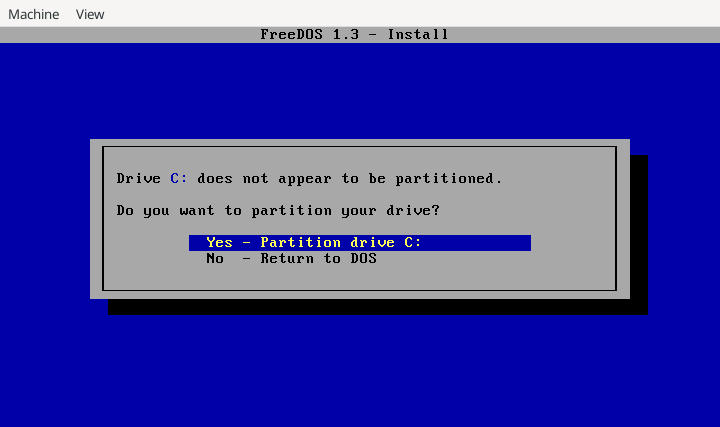
Since the virtual hard disk that you created with qemu-img is completely blank, it is missing any partition information. Operating systems need to divide the disk into regions called partitions, which also need a filesystem to save files. FreeDOS will recognize that the hard drive doesn’t have any partitions on it, and will offer to create a partition for you. Select the “Yes” option to do that:
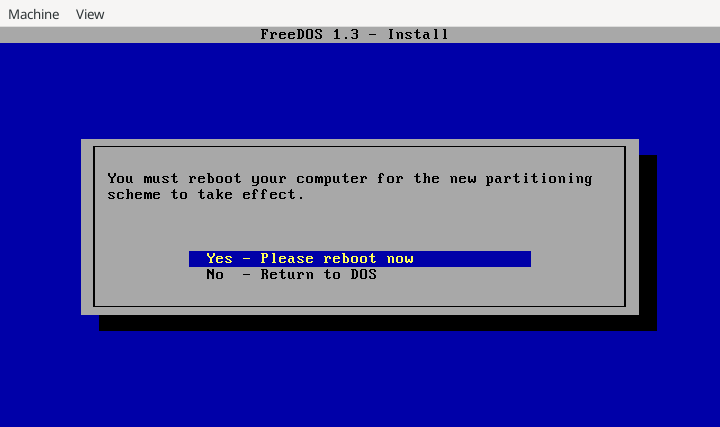
FreeDOS (like any DOS) reads the hard drive’s partition information once, when the operating system boots. Adding or removing partitions means you need to reboot so FreeDOS will recognize the new partition information:
By the way, that is why it is important to tell QEMU to boot from the CD-ROM when installing FreeDOS. If QEMU doesn’t boot after you’ve created the partitions, this probably means QEMU is trying to boot from the hard disk – and because the hard drive doesn’t have an operating system on it yet, QEMU won’t be able to boot.
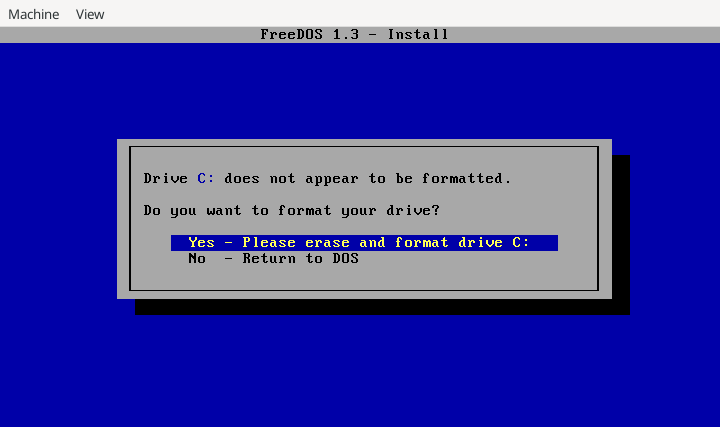
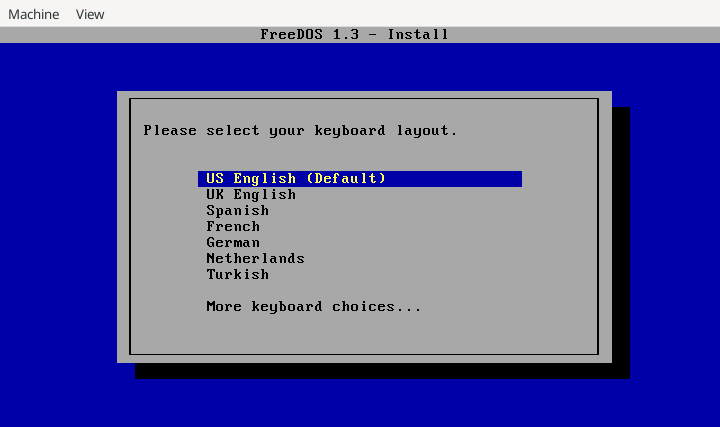
Otherwise, you should be able to boot back into the installer, and the FreeDOS install program will pick up where it left off. You’ll be prompted to write a filesystem to the new partition (this step is called formatting) then FreeDOS will ask for your keyboard layout before actually installing the operating system.
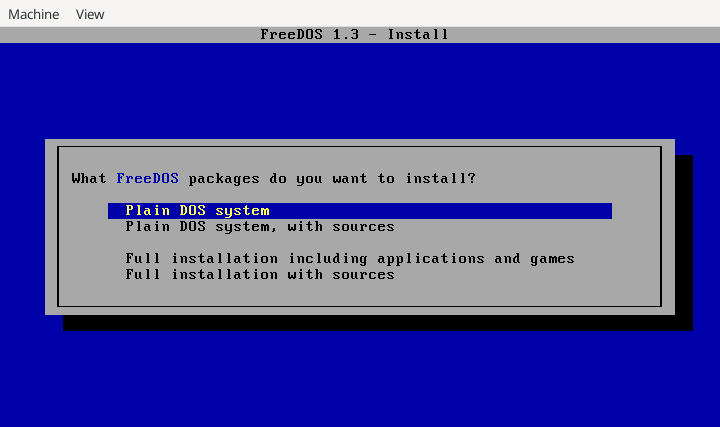
You can install a minimal version of FreeDOS that just includes the standard DOS commands, or you can do a “full” installation that includes a ton of applications and games. Either one will give you a working version of FreeDOS – the only difference is that with the “plain DOS” system, you’ll need to use the package installer if you want to install other programs later.
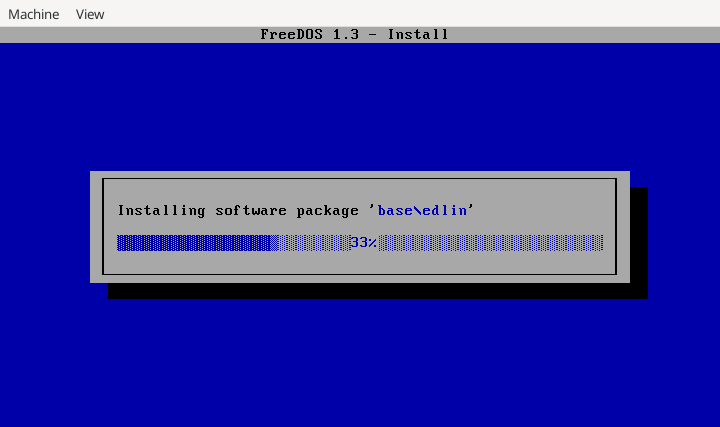
Either way, the installer will do the rest automatically and install the packages that you selected:
After the installation is complete, the install program will prompt you to either reboot the computer or exit to DOS. I recommend exiting to DOS, then type the shutdown command to let FreeDOS finish writing any data and quit QEMU on its own.
Booting FreeDOS
Congratulations, you’ve installed FreeDOS in QEMU! After this, you don’t need to boot from the LiveCD anymore; you can boot from the virtual hard disk, just like you were on a real DOS machine. To boot FreeDOS from the virtual hard disk, you’ll need to modify the QEMU command line slightly, to change order=d to order=c.
$ qemu-system-i386 -enable-kvm -m 32 -hda freedos.qcow2 -cdrom FD13LIVE.iso -boot order=cYou can also omit the -boot options altogether, and QEMU will attempt to boot from the “C:” drive before trying the CD-ROM drive. With an installed FreeDOS, this is the same effect as telling QEMU to boot from the hard drive anyway:
$ qemu-system-i386 -enable-kvm -m 32 -hda freedos.qcow2 -cdrom FD13LIVE.iso