How I write with Linux — My complete toolchain

Last Updated on April 4, 2026 by David Both
Monday, October 20 is National Day on Writing in the U.S. when writing in all it’s forms is celebrated. As an author who publishes in a variety of places, I write everything using Linux and Free Open Source Software (FOSS) — except for my Costco lists.
I use a lot of tools, different ones depending on the task, and yet some of the same ones for all. This article will explore the tools I use to write with for my most frequent media, my books, the odd document or two, and the articles I write for Both.org, this web site.
Writing for books and documents
Let’s start by looking at how I write for my books, as it also applies to many of the other documents I write.
Creating the document
I start with a template I’ve created for LibreOffice Writer that sets all my preferred fonts and sizes for the various headings, paragraph, and code styles. The original template for my books was provided by Apress, my publisher, but I made a few mods to it. I also have a template for other documents such as the training courses and lab projects I used to write, as well as documents that describe my current network and the systems connected to it. After all, one of tenet 18 of “The Linux Philosophy for SysAdmins,” is, “Document Everything.”
Figure 1 shows LibreOffice Writer with the first page of Chapter 1 of my “systemd for Linux SysAdmins” book. I like to use the tabbed toolbar selector just below the menu bar because it makes locating the toolbar with the tools I need quite easy. The sidebar in Figure 1 displays the Navigator that makes moving around the document sections easy.

Although Writer can save in Open Document Format (ODF), it can also save in DOC, DOCX, RTF, XML, HTML, and more. It can also export directly to PDF. I typically saved my documents in DOCX for my editors, and PDF so that the production teams could see precisely how I wanted things like tables, lists, and images to look. This worked very well for the most part, especially for my later books as I learned what I needed to provide for the best result on the printed page.
Adding Images
I use images to illustrate my books and documents and there are several tools that I use for that. I use a lot of screenshots due to the nature of my documents. I typically use Screenshot, the default for the Xfce desktop, and which is integrated into it so that all I need to do to launch it is to press the Print Screen key. Figure 2 shows the Screenshot setup dialog that allows me to define the parameters for my screenshot.

I ensured that LibreOffice Writer was the active window before I pressed the Print Screen key so choosing the Active window radio button here sets that window as the one the image will be taken. I didn’t want to capture the mouse pointer so I deselected that check-box and I did want to capture the window border so I selected that check-box. I didn’t need a delay so ensured that was set to zero. Then I clicked the OK button to take the screenshot.
Figure 3 shows Screenshot after capturing an image of LibreOffice Writer shown above in Figure 1.
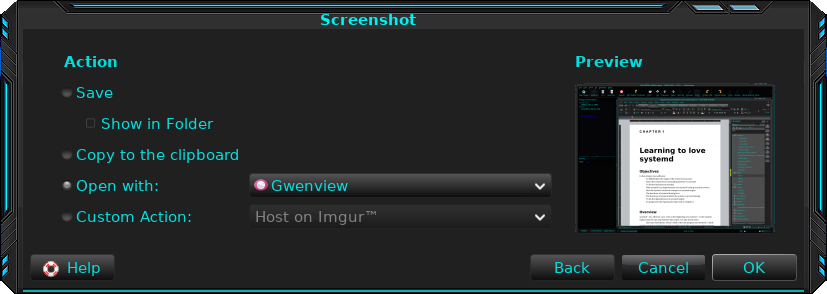
At this point I can choose to save the image directly to a folder, copy it to the clipboard, or open it with Gwenview, GIMP, Krita, Okular, or other image viewer. The ones you can choose from will depend upon which ones you have installed on your system. In this instance I opened the image in Gwenview so I could look at it before saving it to a file.
Note that to take a screenshot of Screenshot in Figure 3, I pressed the Print Screen key again. Since the first screenshot window was the active window, I only needed to have it take a screenshot of the active window.
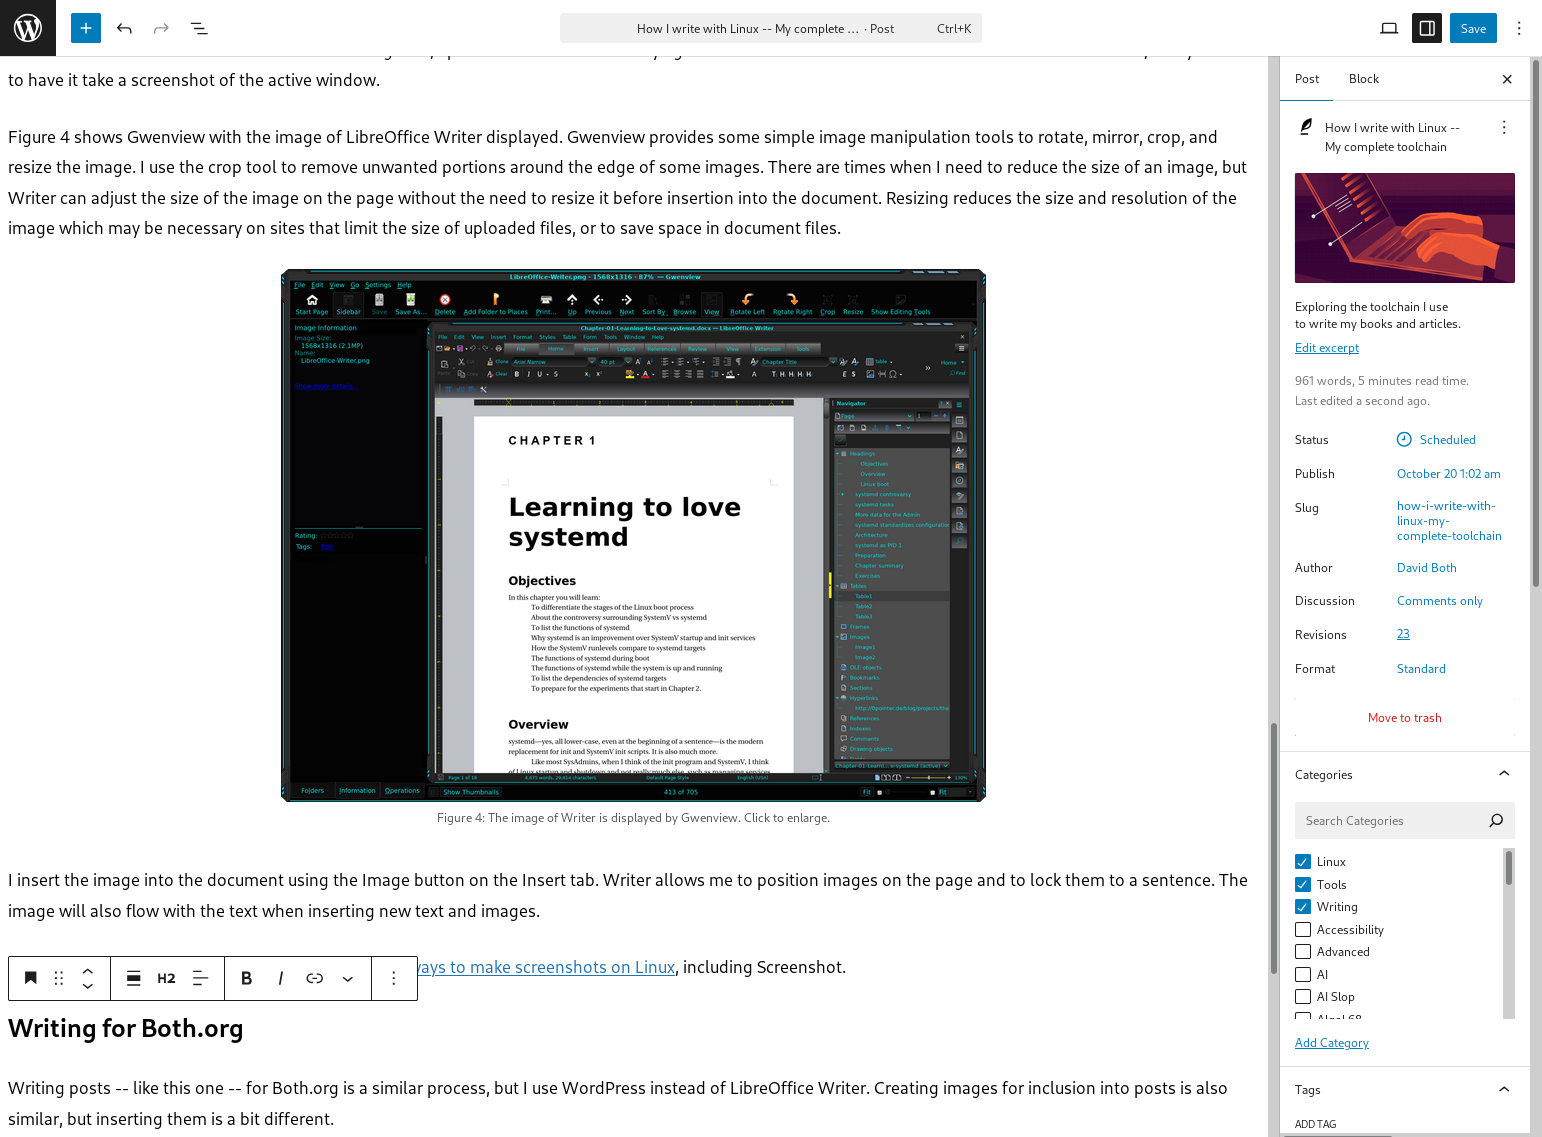
Figure 4 shows Gwenview with the image of LibreOffice Writer displayed. Gwenview provides some simple image manipulation tools to rotate, mirror, crop, and resize the image. I use the crop tool to remove unwanted portions around the edge of some images. There are times when I need to reduce the size of an image, but Writer can adjust the size of the image on the page without the need to resize it before insertion into the document. Resizing reduces the size and resolution of the image which may be necessary on sites that limit the size of uploaded files, or to save space in document files.

After making changes to the image, I can save it directly from Gwenview into any of 26 different image formats. I prefer to save images in PNG format, but I sometimes use JPG. Gwenview can also convert existing images from one format to another.
I then insert the saved image file into the document using the Image button on the Insert tab. Writer allows me to position images on the page and to lock them to a sentence. The image will also flow with the text when inserting new text and images.
Contributor and Editor Jim Hall shows us Three easy ways to make screenshots on Linux, including Screenshot.
I’ve also used Krita and GIMP to create or modify images. I can just barely use those tools because I use them so seldom, but I can always figure out how to do what I need to do.
Writing for Both.org
Writing articles — like this one — for Both.org is a similar process, but I use WordPress instead of LibreOffice Writer. Creating images for inclusion into posts is the same, but inserting them is a bit different. The images can be uploaded directly into the post which also adds them to the WordPress media library, or they can be uploaded to the library first. WordPress gives me control over positioning and sizing images. It also allows linking the displayed image to the original file so that you can click on the image to show the original. This can be helpful if the image has been sized much smaller than the original. Click on Figure 5, or any other image in this article, to enlarge it. Figure 5 shows part of this article in the WordPress editor.
Some of our contributors use other tools such as Markdown, and Writer documents paste directly into WordPress quite well.
Conclusion
Writing for a book or other types of documents intended for printing to paper, is only a little different from writing an article for a web site. These are my tools but there are plenty of others available in the FOSS world for every stage of the process. I use these because they support the creative aspects of my writing and let me concentrate on that.