Installing Fedora 43 Minimal on a Raspberry Pi

Image by: Dwight Sipler on Flickr
Years ago, I bought an original Raspberry Pi (before it was called the “1”) and then later upgraded to a Raspberry Pi 3B. This is a great little device to experiment with, or to set up an in-home micro-server, or to do any number of things.
Fedora 43 was recently released a few weeks ago, so I wanted to upgrade my Raspberry Pi to run Fedora 43. On a desktop machine, I upgrade Fedora by backing up my data, reinstalling a fresh copy of Fedora, and then restoring my data. On the Raspberry Pi, it’s a bit simpler than that: The Raspberry Pi’s main storage is on a microSD card, and I bought two of them when I ordered my Raspberry Pi 3B, years ago. That way, I could install Linux on one microSD card, and not risk whatever I was doing on the “primary” install, which was safely stored on the other microSD card.
So installing Fedora 43 on my Raspberry Pi 3B is really just a matter of installing to a second microSD card, and booting from that.
Download and install
I already have a desktop system where I run a graphical desktop, so I don’t need to stretch my Raspberry Pi to run a full desktop. In fact, I prefer to run my Raspberry Pi as an “old school” Unix device, with everything at the command line. That means I can download a version of Fedora 43 that doesn’t include any “extras.”
I downloaded the Fedora-Minimal-43-1.6.aarch64.raw.xz image from the Fedora Project website. This is a compressed raw image of the Fedora 43 “Minimal” distribution; “minimal” means it only contains the packages required to boot a running instance of Fedora, and connect it to a network. Most other packages will need to be installed manually afterwards, and that’s fine for me.
To install Fedora on a Raspberry Pi, it’s easiest to write the image from a desktop Linux machine, so you’ll need the Fedora ARM Image Installer package. This is probably not installed by default on your system, but you can install it by typing this command:
$ sudo dnf install arm-image-installerMy desktop computer doesn’t have a microSD card slot on it, but I have an SD/microSD card reader that connects via USB, which I bought for around $10 online. When I connect the microSD in the USB reader, and connect the USB reader to my computer, the microSD is recognized as /dev/sdb. It’s important to know where to find your microSD card so you don’t accidentally write the Fedora 43 ARM image to your hard disk. I verified the disk by viewing the last few lines of the kernel messages after connecting the USB reader; the disk it just recognized will be the microSD card:
$ sudo dmesg | tail
[ 1831.829956] sd 6:0:0:0: Attached scsi generic sg0 type 0
[ 1831.830686] sd 6:0:0:1: Attached scsi generic sg1 type 0
[ 1831.832446] sd 6:0:0:0: [sda] Media removed, stopped polling
[ 1831.838928] sd 6:0:0:0: [sda] Attached SCSI removable disk
[ 1833.239843] sd 6:0:0:1: [sdb] 124735488 512-byte logical blocks: (63.9 GB/59.5 GiB)
[ 1833.240713] sd 6:0:0:1: [sdb] Write Protect is off
[ 1833.240726] sd 6:0:0:1: [sdb] Mode Sense: 2f 00 00 00
[ 1833.241440] sd 6:0:0:1: [sdb] Write cache: disabled, read cache: enabled, doesn't support DPO or FUA
[ 1833.258210]  sdb: sdb1 sdb2 sdb3
[ 1833.258702] sd 6:0:0:1: [sdb] Attached SCSI removable disk
In this case, I can see the remnants of a much older install I did on this microSD card; remember, I swap out each microSD card every time I install a new version of Linux on this Raspberry Pi. The microSD card has three partitions on it, recognized via the USB card reader as sdb1, sdb2, and sdb3.
The Fedora ARM Image Installer supports a variety of ARM-based devices, but I need to know the device name to use for a Raspberry Pi 3. To list the supported platforms, run the ARM Image Installer with the --supported option:
$ sudo arm-image-installer --supported
AllWinner Devices:
a64-olinuxino a64-olinuxino-emmc amarula_a64_relic bananapi_m2_plus_h5
 bananapi_m64 beelink_gs1 emlid_neutis_n5 emlid_neutis_n5_devboard
 libretech_all_h3_cc_h5 libretech_all_h3_it_h5 libretech_all_h5_cc_h5
 nanopi_a64 nanopi_neo2 nanopi_neo_air nanopi_neo_plus2 nanopi_r1
 nanopi_r1s_h5 oceanic_5205_5inmfd orangepi_3 orangepi_lite2
 orangepi_one_plus orangepi_pc2 orangepi_prime orangepi_win orangepi_zero2
 orangepi_zero2w orangepi_zero3 orangepi_zero_plus orangepi_zero_plus2
 pine64-lts pine64_plus pine_h64 pinebook pinephone pinetab sopine_baseboard
 tanix_tx6 teres_i transpeed-8k618-t x96_mate

TI am625 Devices:
beagleplay

QCom Devices:
dragonboard410c dragonboard820c hmibsc qcm6490 qcom

Rockchips Devices:
eaidk-610-rk3399 evb-px5 evb-rk3328 evb-rk3399 ficus-rk3399 firefly-rk3399
 geekbox khadas-edge-captain-rk3399 khadas-edge-rk3399 khadas-edge-v-rk3399
 leez-rk3399 nanopc-t4-rk3399 nanopi-m4-2gb-rk3399 nanopi-m4-rk3399
 nanopi-m4b-rk3399 nanopi-neo4-rk3399 nanopi-r2c-plus-rk3328
 nanopi-r2c-rk3328 nanopi-r2s-rk3328 nanopi-r4s-rk3399
 orangepi-r1-plus-lts-rk3328 orangepi-r1-plus-rk3328 orangepi-rk3399
 pinebook-pro-rk3399 pinephone-pro-rk3399 puma-rk3399 roc-cc-rk3328
 roc-pc-mezzanine-rk3399 roc-pc-rk3399 rock-4c-plus-rk3399 rock-4se-rk3399
 rock-pi-4-rk3399 rock-pi-4c-rk3399 rock-pi-e-rk3328 rock-pi-e-v3-rk3328
 rock-pi-n10-rk3399pro rock64-rk3328 rock960-rk3399 rockpro64-rk3399

Other Devices:
rpi02w rpi3 rpi4
And that’s how I remembered that the device name for the Raspberry Pi 3 is rpi3.
Now that I knew the media device to write to and the Raspberry Pi 3 target name, I could finally run the Fedora ARM Image Installer on my desktop Linux system. I added an extra option to let the installer automatically resize the filesystem to fill the rest of the microSD card:
$ sudo arm-image-installer --image=Fedora-Minimal-43-1.6.aarch64.raw.xz --target=rpi3 --media=/dev/sdb --resizefs
=====================================================
= Selected Image:
= Fedora-Minimal-43-1.6.aarch64.raw.xz
= Selected Media : /dev/sdb
= U-Boot Target : rpi3
= Root partition will be resized
= Version: 5.3
=====================================================

*****************************************************
*****************************************************
******** WARNING! ALL DATA WILL BE DESTROYED ********
*****************************************************
*****************************************************

 Type 'YES' to proceed, anything else to exit now

= Proceed? YES
= Writing:
= Fedora-Minimal-43-1.6.aarch64.raw.xz
= To: /dev/sdb ....
5574230016 bytes (5.6 GB, 5.2 GiB) copied, 191 s, 29.2 MB/s5596250112 bytes (5.6 GB, 5.2 GiB) copied, 191.753 s, 29.2 MB/s

1334+1 records in
1334+1 records out
5596250112 bytes (5.6 GB, 5.2 GiB) copied, 191.778 s, 29.2 MB/s
= Writing image complete!
= Resizing /dev/sdb ....
Checking that no-one is using this disk right now ... OK

Disk /dev/sdb: 59.48 GiB, 63864569856 bytes, 124735488 sectors
Disk model: USB3.0 CRW   -SD
Units: sectors of 1 * 512 = 512 bytes
Sector size (logical/physical): 512 bytes / 512 bytes
I/O size (minimum/optimal): 512 bytes / 512 bytes
Disklabel type: dos
Disk identifier: 0x599aae61

Old situation:

Device     Boot   Start      End Sectors  Size Id Type
/dev/sdb1  *      34816   444415  409600  200M  6 FAT16
/dev/sdb2        444416  4638719 4194304    2G 83 Linux
/dev/sdb3       4638720 10930175 6291456    3G 83 Linux

/dev/sdb3:
New situation:
Disklabel type: dos
Disk identifier: 0x599aae61

Device     Boot   Start       End   Sectors  Size Id Type
/dev/sdb1  *      34816    444415    409600  200M  6 FAT16
/dev/sdb2        444416   4638719   4194304    2G 83 Linux
/dev/sdb3       4638720 124735487 120096768 57.3G 83 Linux

The partition table has been altered.
Calling ioctl() to re-read partition table.
Syncing disks.
e2fsck 1.47.2 (1-Jan-2025)
Pass 1: Checking inodes, blocks, and sizes
Pass 2: Checking directory structure
Pass 3: Checking directory connectivity
Pass 4: Checking reference counts
Pass 5: Checking group summary information
root: 40900/196608 files (0.1% non-contiguous), 535041/786432 blocks
resize2fs 1.47.2 (1-Jan-2025)
Resizing the filesystem on /dev/sdb3 to 15012096 (4k) blocks.
The filesystem on /dev/sdb3 is now 15012096 (4k) blocks long.

= Raspberry Pi 3 Uboot is already in place, no changes needed.

= Installation Complete! Insert into the rpi3 and boot.
First boot
After writing the Fedora Linux image to the microSD card, I only needed to insert the card into the Raspberry Pi to finish the setup. The first time you boot the system, Fedora goes through a text-based “menu” where you can define the language, time zone, wired network, root password, and primary user account:
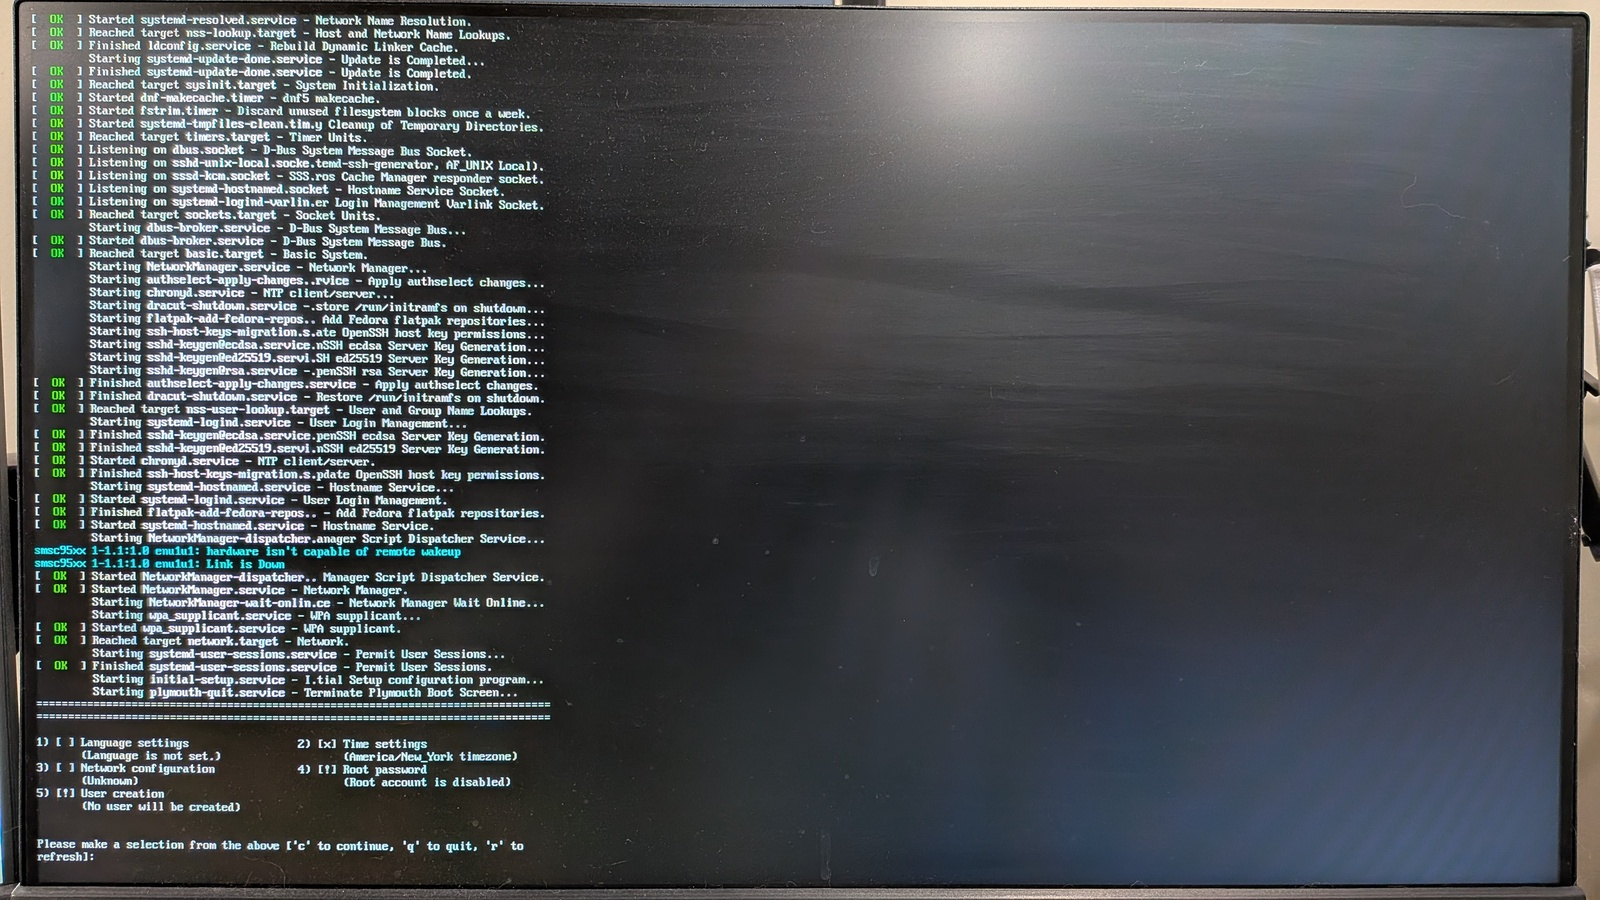
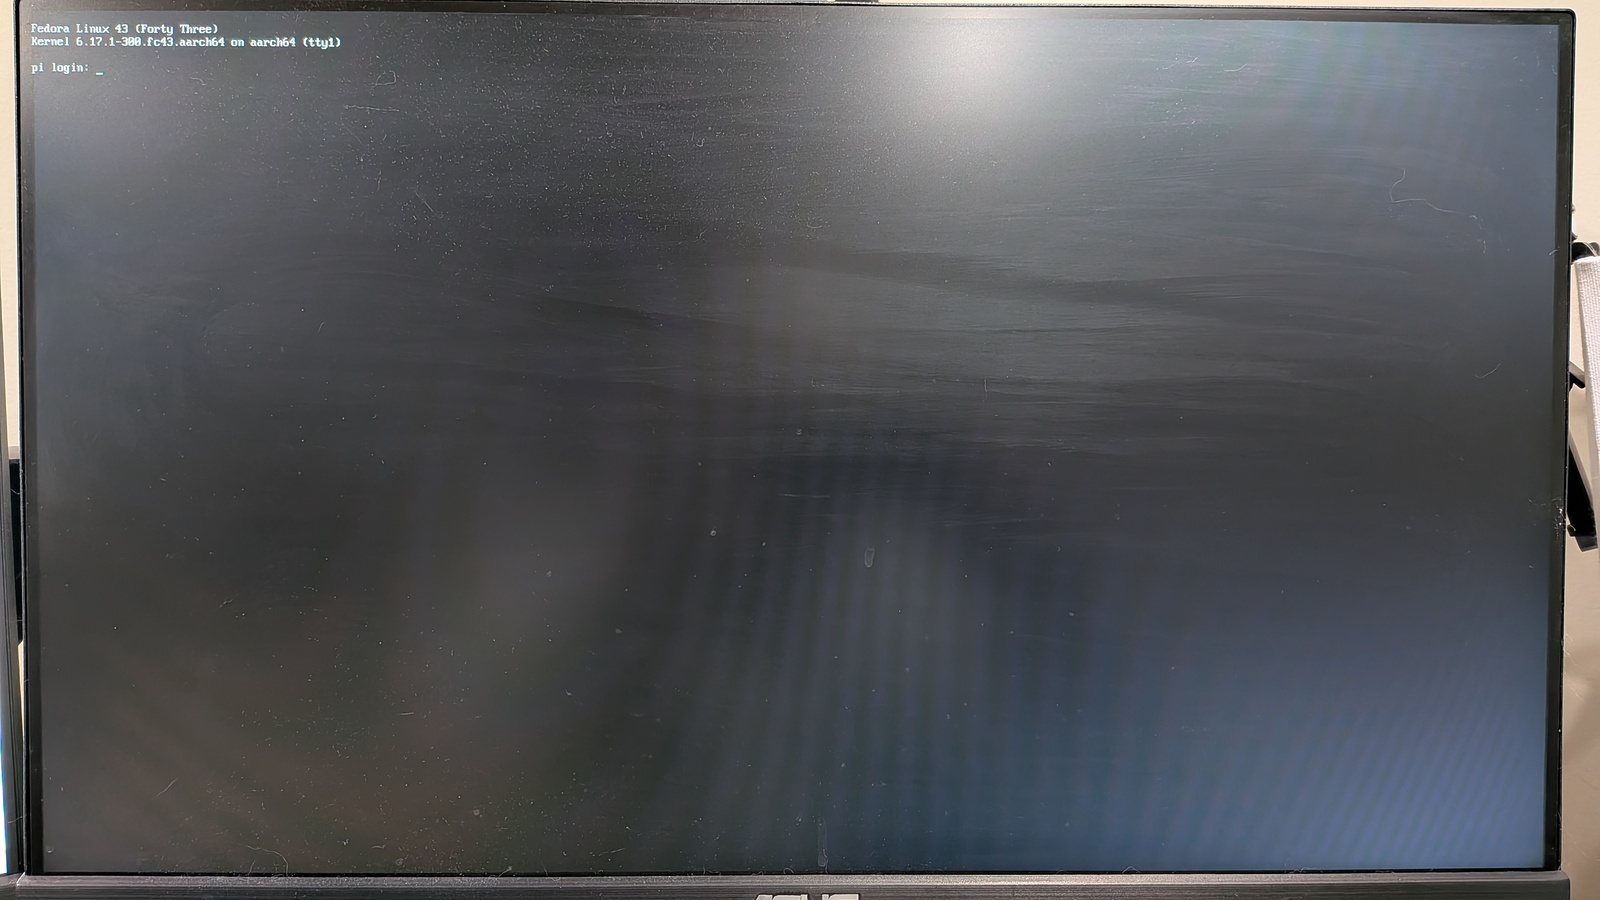
Respond to each prompt, and you’ll be good to go. You’ll know you’ve finished when the Raspberry Pi boots into a “login” prompt:
The default font is quite small for me to read comfortably, but fortunately you can use the setfont command to load a new font. These console fonts are stored in the /usr/lib/kbd/consolefonts directory, and include a “monospace serif” font (sun12x22.psfu.gz) that reminds me of Sun Workstations, several variations of a “DOS” font (like drdos8x16.psfu.gz), and a version of the “Terminus” font. I used the Terminus font (Lat2-Terminus16.psfu.gz), but doubled the text size to make it easier to read. I created a 1-line Bash script to load the font, so I don’t have to type that long path every time:
#!/bin/bash
setfont --double /usr/lib/kbd/consolefonts/Lat2-Terminus16.psfu.gz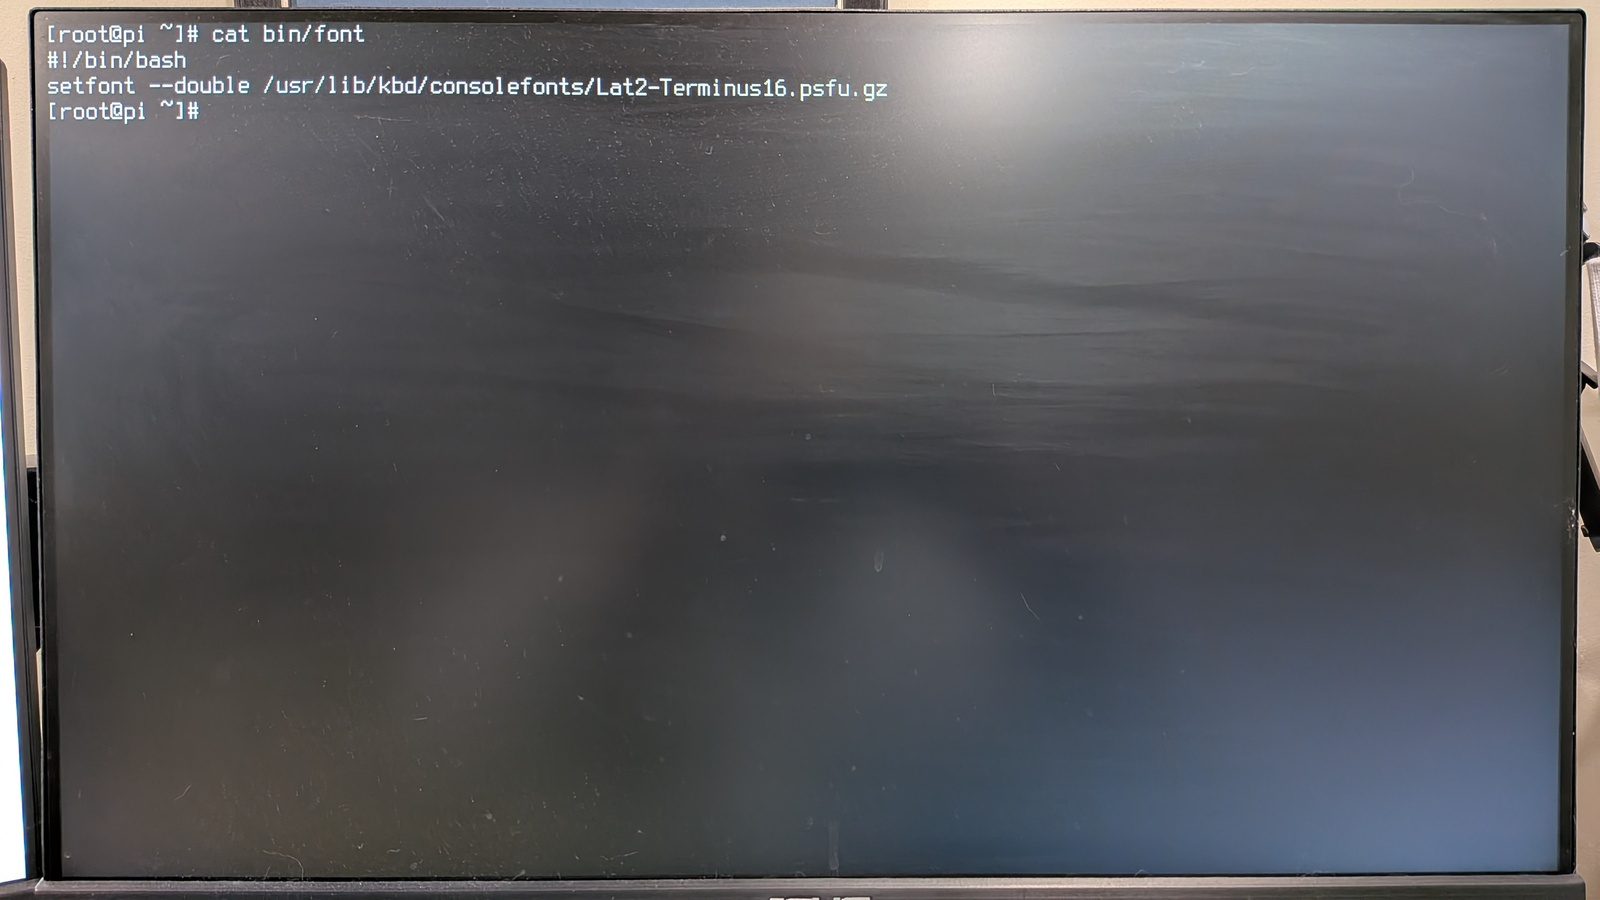
Wireless networking
I only want to run the Raspberry Pi in “text” or “console” mode, so that means I need to do everything from the command line. I don’t have a graphical desktop that can configure the network for me.
Fortunately, the nmcli command (“Network Manager command line interface”) isn’t too difficult to use. First, you can check the status of the network devices with this command:
# nmcli dev status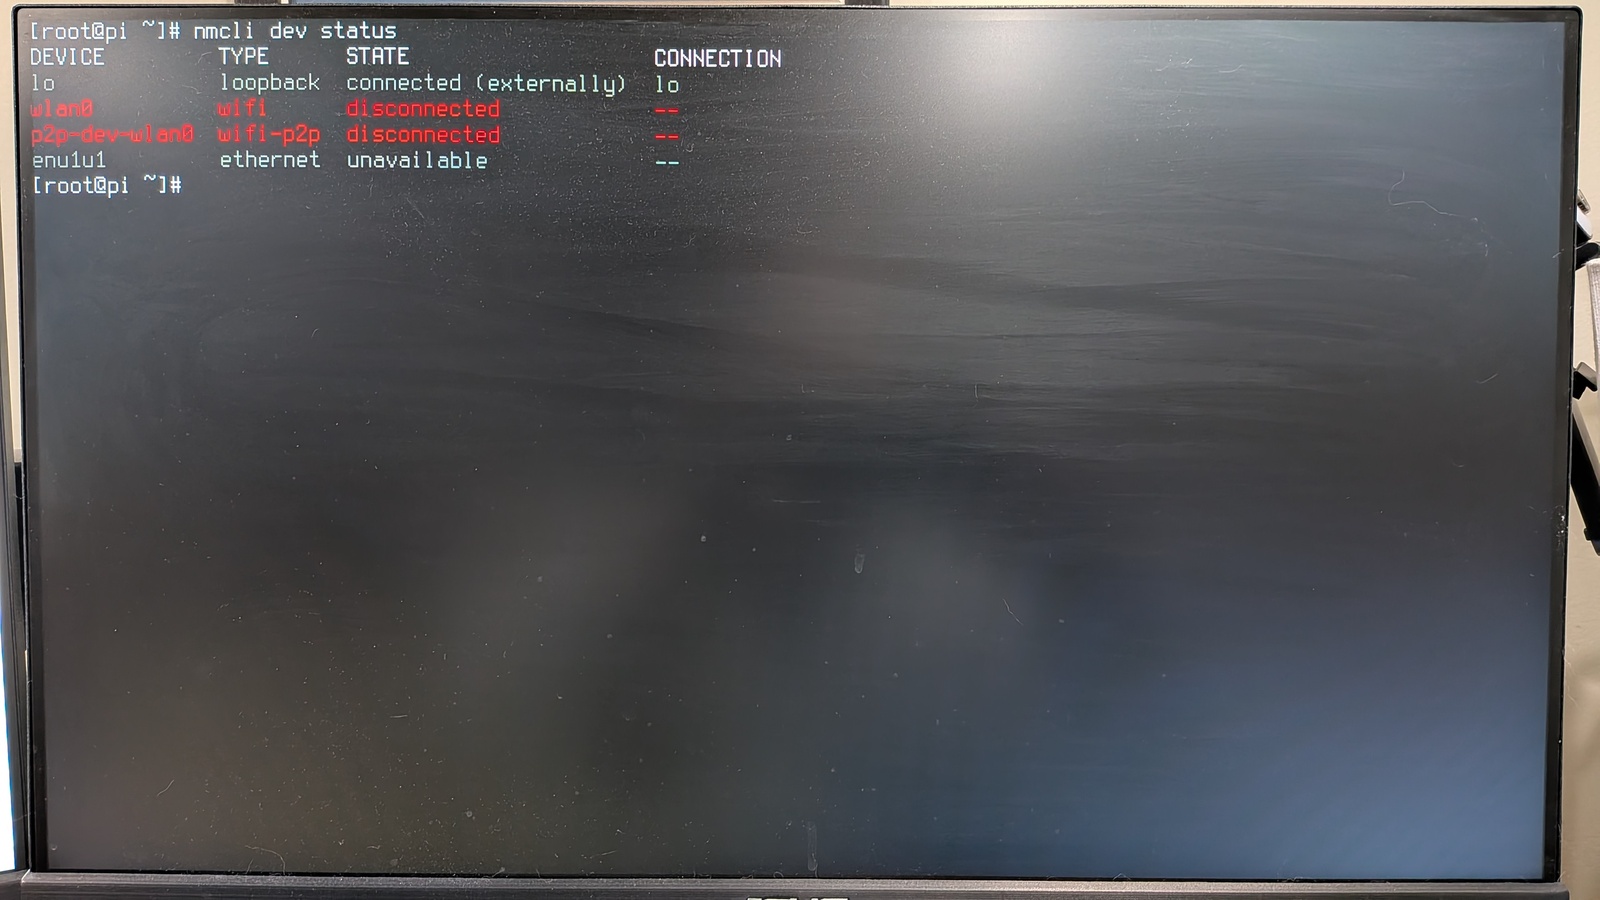
In my case, I don’t have my Raspberry Pi connected to a wired network; I need to use wireless networking instead. My Pi’s WiFi radio was up and running, but if yours isn’t activated, you can use this device to turn it on:
# nmcli radio wifi onThen, get a list of the available wireless networks using the list command:
# nmcli dev wifi list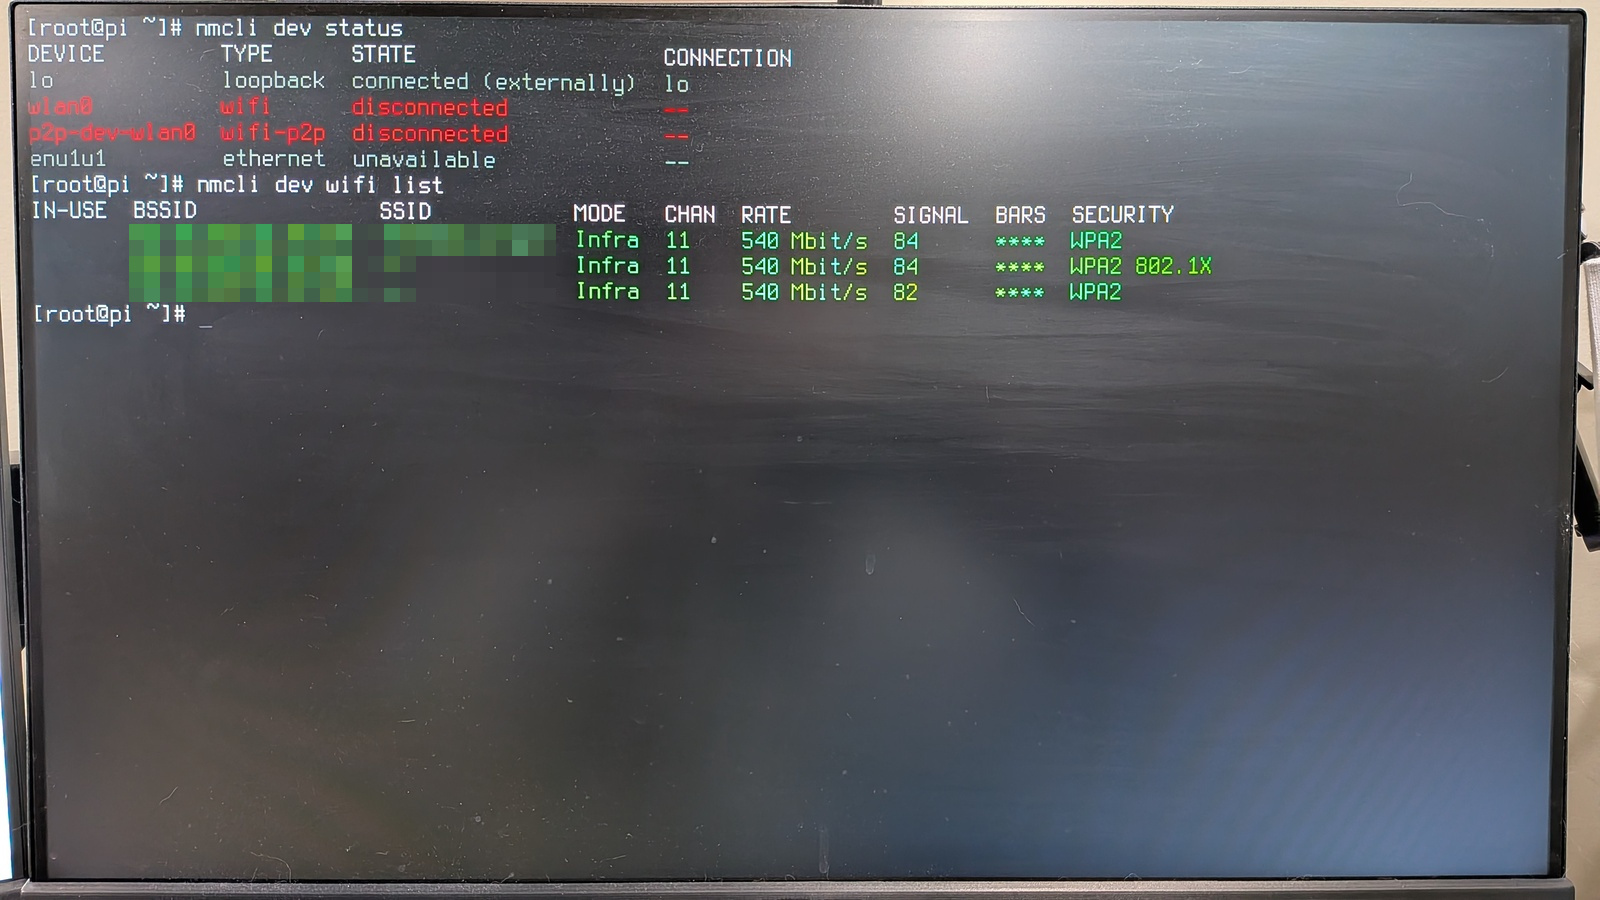
You should see a list of all the WiFi access points, and their signal strengths. Connect to the network you prefer with the connect command. You can use several variations for this command: you can add the network password with a password option, but I prefer to use the --ask option so I get prompted for the network password. Prompting is the more secure method anyway; even though I’m the only person using this device, it’s good practice to not expose a password to anyone who can see the command line using the ps command.
# nmcli dev wifi connect ________ --ask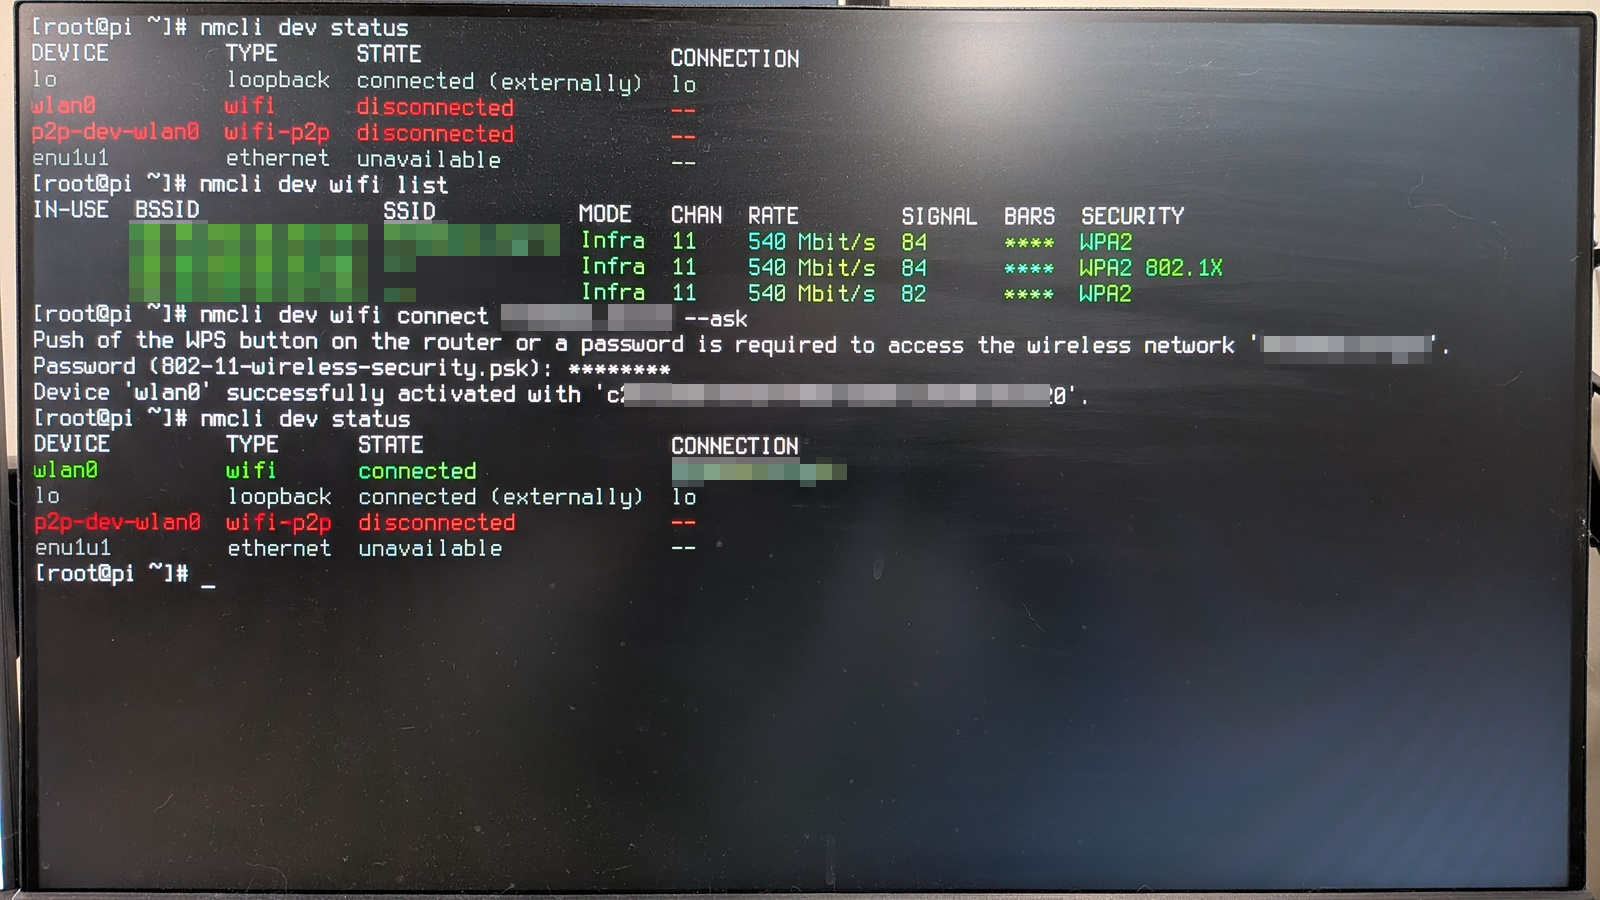
Linux from the command line
And that’s how I set up Fedora 43 on my Raspberry Pi. I know I’m doing things “the hard way” by doing everything from the command line, but that’s how I prefer to use this device. I think it’s a fun way to get back to the roots of Unix while exploring the command line. Using the Raspberry Pi in text mode, using the command line, is a great throwback experiment to remind us how people used Unix from terminals in an era before computers had enough power to run a graphical desktop.
If you want to try this for yourself, start by downloading a copy of Fedora Minimal 43 for ARM aarch64 systems. As Fedora notes on their website, “Fedora Minimal is the smallest possible Fedora Linux installation. It does not include a desktop environment.” So be prepared to work entirely from the command line. But that’s part of the fun of experimenting with Linux.