How I got RGB Lighting Working on my Corsair Keyboard
Corsair K70 RGB MK2 keyboard
A good keyboard is important to your health and productivity but there’s no reason it can’t be fun, too.
Let’s start with the proposition that a good quality keyboard is good for your health and productivity, not to mention your wallet. Then we’ll get to the fun stuff — I promise!
The keyboard is one of the most important components of your computer because it is our primary interface to input data into the computer. Many of us spend hours each day at a keyboard, yet we use keyboards that cost $5 to $10(US) and which can give us carpal tunnel syndrome as well.
The primary reason we use cheap keyboards is that they’re — well — cheap. These cheap keyboards use mushy dome technology. They have no tactile or audible feedback to let you know when they have activated. These cheap keyboards also wear out significantly faster than the mechanical keyboards that I prefer.
Mechanical Keyboards
What kind of keyboards should we be using? Good ones; relatively expensive ones; mechanical keyboards. But why pay more for a mechanical keyboard? KeyboardLabs has an excellent article that explains Top 8 Benefits Of Using Mechanical Keyboards (Compared w/ Traditional Keyboards). Besides more efficient typing, mechanical keyboards last ten — yes, 10 — times longer than the cheap rubber dome keyboards. And the other six reasons as well.
Let’s look at a couple examples–keyboards that I currently use.
The Unicomp Model M keyboard in Figure 1 is the same keyboard that IBM made famous with its original PC in 1981. This keyboard sells for $104 and is well worth the cost. It has great tactile and audible feedback so it is clear when the keys have been pressed. The Model M is heavy which keeps it from sliding around when you use it.

I use this keyboard on the KVM that connects most of my computers. This no-frills keyboard is what you want when you spend a lot of time typing and need that good, solid keyboard feel. Be sure to get the USB version. Be aware that this keyboard may sound very loud in an otherwise quiet environment. But I do like that clicky sound. These keyboards are practically indestructible. Mine is around 15 years old and I’ve never had the slightest problem with it.
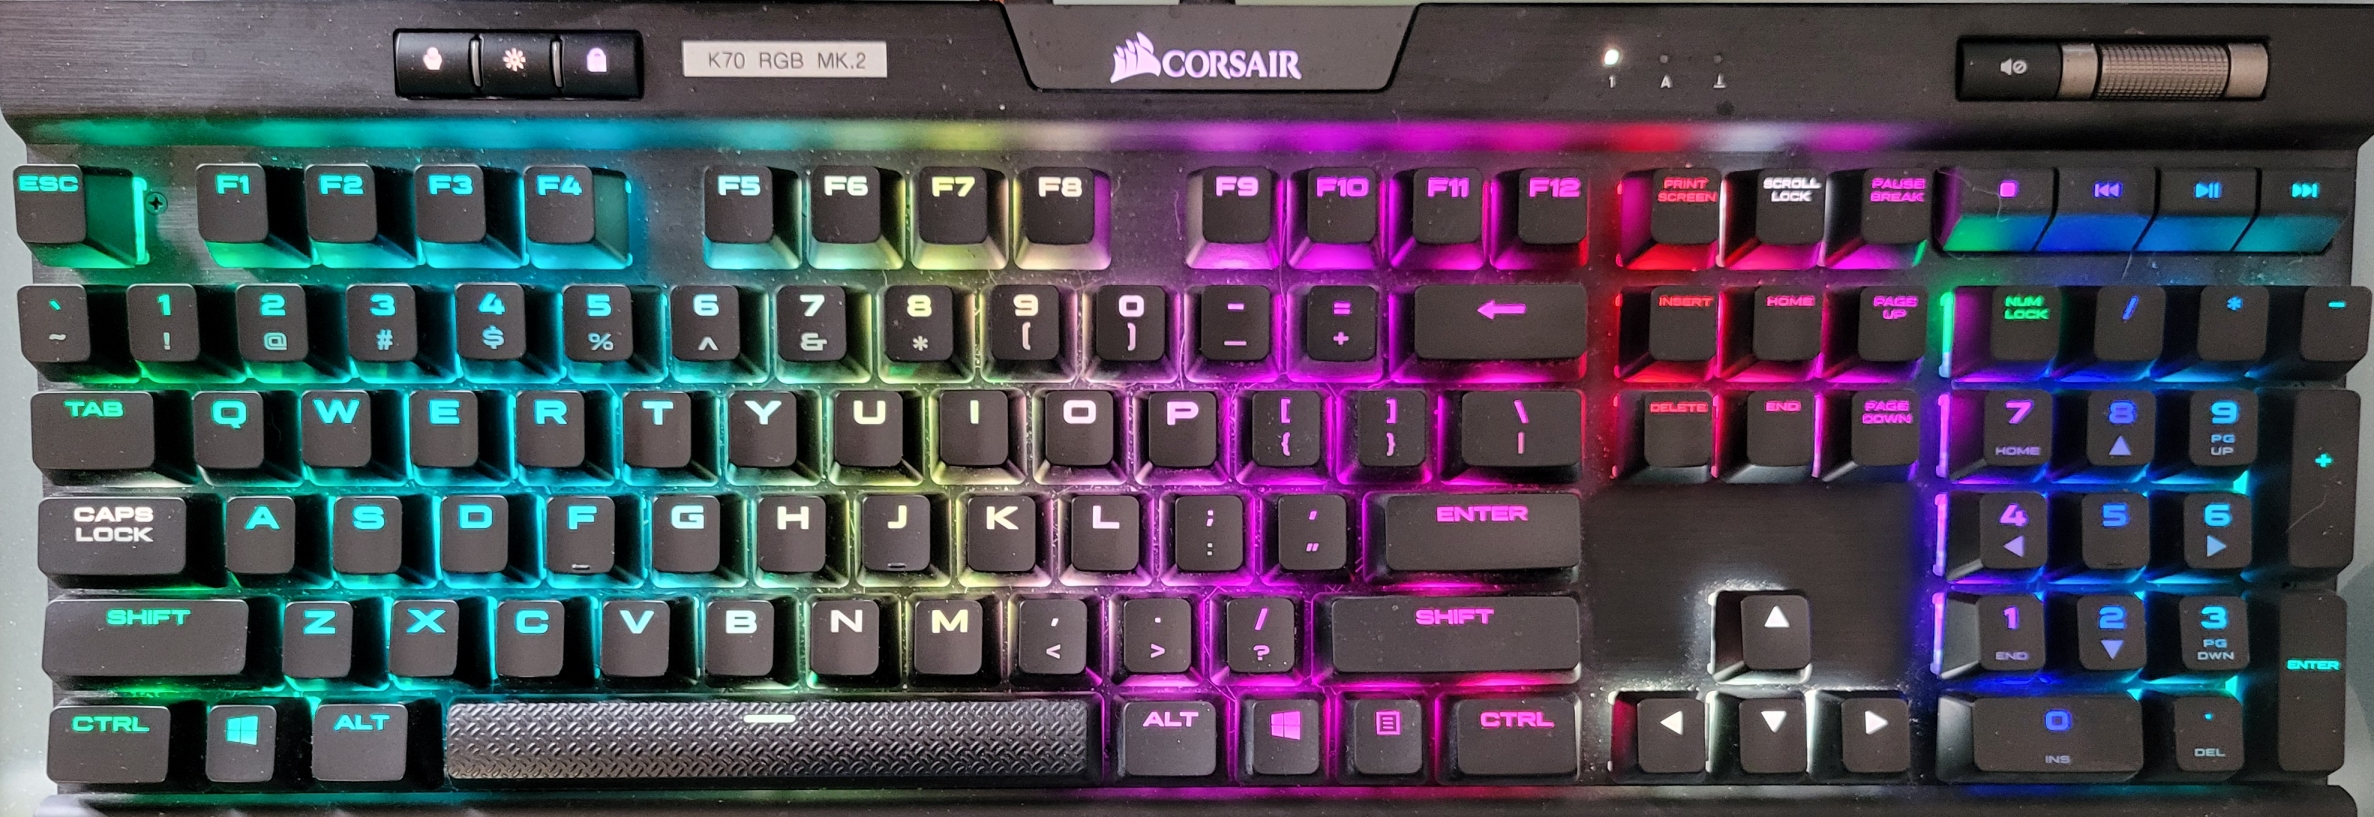
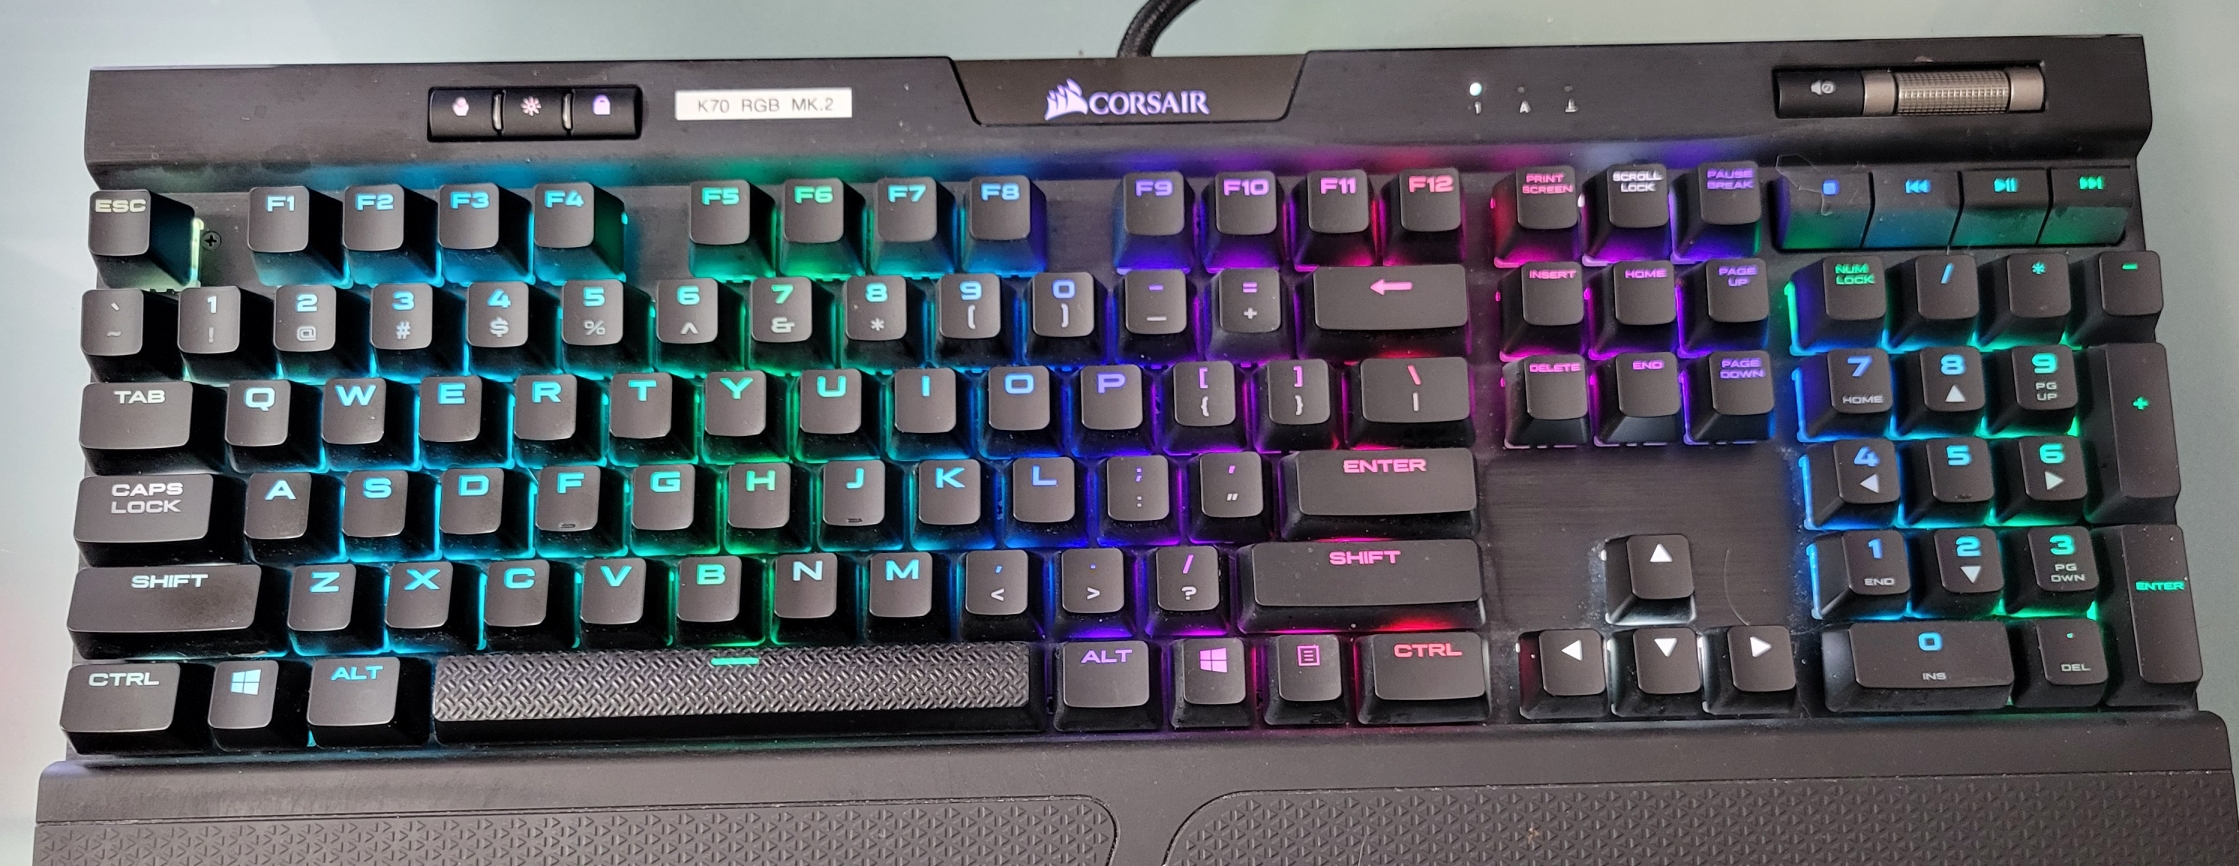
I use the Corsair model K70 RGB MK2 in Figure 2 for my primary workstation. I’m using it right now to write this article. This keyboard is also heavy and doesn’t slide around while I’m using it. Its construction is solid and I’ve dropped a 30 pound object on the keyboard with no functional damage. That little incident did leave a small depression in the keys centered on I, J, K and L.
I also like this keyboard for it’s RGB lighting which allows me to create interesting and colorful light patterns. More on this soon — I mean it this time.
Many gaming keyboards work exceptionally well and are available at computer stores or on-line at prices ranging from about $50 to $200 and more. Unless you are into gaming (in which case you already know this) don’t get a keyboard that boasts “fast” or “high speed” keys for business use. These are extremely fast and sensitive and just lightly resting your fingers on a key can cause it to activate. The computer store staff should know what you are talking about; if they don’t, find a store that has staff who do know.
The Keys
There are many types of mechanical keys that can be used in modern keyboards. These types can be defined by three major qualities: Tactile and audible feedback as well as the amount of travel the keystroke requires to the activation point.
Tactile feedback is the little clicky feel you get at the moment the switch in the key activates. I have found this to be useful when typing with my 4.75-finger style. Boys didn’t take typing when I was in school sixty years ago. My keyboard also has a nice audible click when the keys are activated. Between the two types of feedback I can tell when I’ve missed a key or when I’ve hit more than one.
I prefer Cherry MX blue or Cherry MX brown keys for my personal best typing experience. I recommend reading the switchandclick guide to Cherry MX keys to help you determine which types might work best for you. Most computer stores don’t maintain a large selection of mechanical keyboards but you might be able to try one or two to get an idea of how they feel.
Laptops
Most of the better laptops available today have mechanical keys. All three of my System76 laptops have excellent mechanical keys that offer excellent tactile feedback. But not all laptop keyboards are as good as those. If your laptop keyboard really sucks you can easily connect a much better external USB mechanical keyboard.
About Those Keyboard Lights — Finally
My mechanical RGB keyboard provided a few lighting schemes by default but I wanted to make some changes to the existing ones and create a couple of my own. The Corsair software doesn’t run on Linux but there’s a package for Fedora, cbk-next, that performs the same functions. ckb-next is an open-source driver for Corsair RGB keyboards and mice. It aims to bring the features of Corsair’s proprietary CUE software to Linux operating systems. This project is currently a work in progress, but it already supports much of the same functionality, including full RGB animations. If your distro doesn’t have a package, you can download it from GitHub and install it manually according to the instructions found there.
Install this package on Fedora as root with the dnf command.
# dnf -y install cbk-nextTo start cbk-next when using Fedora, go to the Applications menu and choose one of the submenus, Settings, Administration, or System as it appears in all three locations. Click on the ckb-next icon to launch the software. This is a user-level background daemon so it runs as the logged-in user and not as root. If you want it to start at user login you can use the setup menu for your desktop. I use the Xfce desktop so this appears in the Session and Startup menu.
The cbk-next user interface in Figure 3 allows selection of existing animation modes listed in the left column. The keyboard animation changes in concert with the physical keybaord and the visual representation in the interface shows exactly what the keyboard lighting looks like.
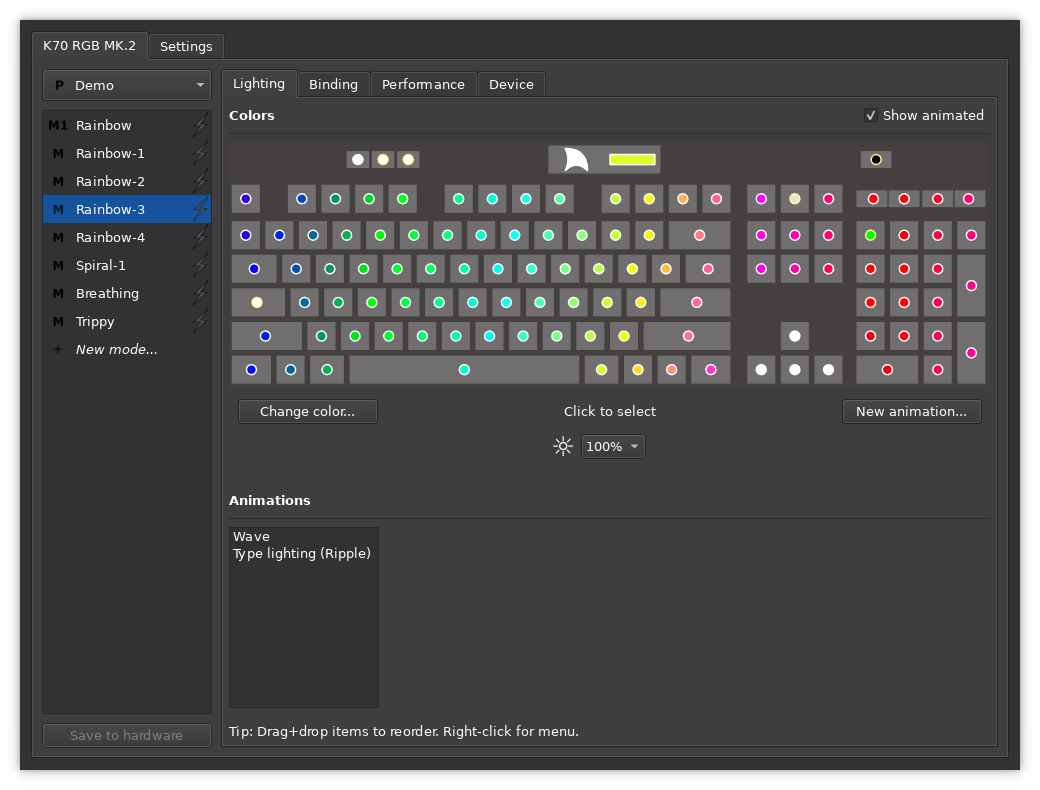
The animation section of this window contains two different animations. Multiple animations can be used in CKB modes and they add together to create some amazing effects. Click on the New Animation button to add a new animation to the existing mode. Personally I think that two animations is best and that three or more tend to become too complex to discern the patterns and it looks like nothing more than a jumble of color. Your experience may be different so experiment all you want.
The tab area at the very top-left of the window will contain a list of all connected devices including multiple keyboards and mice. The ckb-next software does not work on RGB fans or devices other than keyboards and mice. The Settings tab provides options for setting modifier keys, whether to start CKB at the next login for this user, HDPI scaling, adding the CKB icon to the system tray, brightness levels, and more.
Creating and Modifying Animation Modes
There are two methods you can use to create a new animation mode. You could click on the New Mode menu in the left sidebar. But then you must start from nothing. I much prefer to duplicate an existing mode and modify that. You can see in Figure 3 that I have a number of numerically differentiated Rainbow modes that started from the default Rainbow mode. For this new mode I right clicked on Rainbow-4 and selected the Duplicate menu item, then renamed new mode that to Rainbow-5. You should select the default Rainbow mode and duplicate it. Be sure to rename the duplicated mode so you it can be easily identified.
The default tab, Lighting, displays the existing animations applied to this mode as can be seen in Figure 4. The light blue background indicates that a key is selected for this animation.
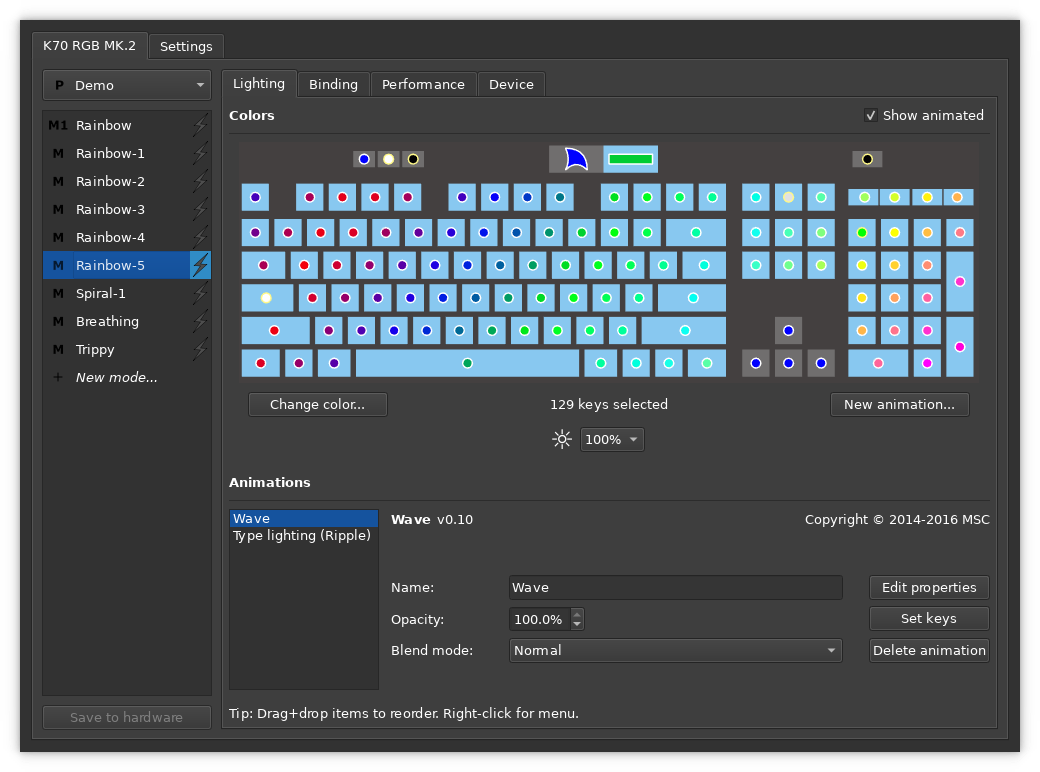
Select an existing animation to view its characteristics. Click on the Edit Properties button to modify the animation. Figure 5 illustrates the options for modifying the Wave animation. You can alter the angle of the wave, its color, and the total duration required for the wave to progress from its starting point to the opposite side of the keyboard. Configure the Wave animation on your host to match Figure 5.
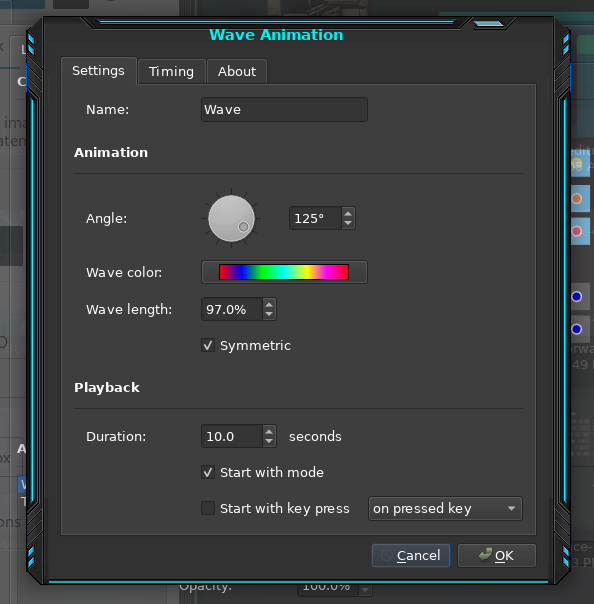
At the bottom of the Animation window in Figure 5, there is an option for the animation to start when the mode is selected or launched at login. This means that the wave function is always moving across the keyboard.
Select the Timing tab and set the Repeat to every 10 seconds for the On mode start configuration section. Set the Repeat to Forever. Because this animation starts at login or when the mode is selected, changes in the On key press section are ignored.
Delete the existing Type lighting animation. Then click on the New animation… button and select Ripple then Edit properties.
You’ll see that it starts on a keypress. Change its name to Type lighting (Ripple). Change the animation settings to match those in Figure 6. On the Timing tab, set the repeat to 0.7 seconds for the On keypress section. Remember that since this animation only starts on a keypress, the On mode section has no effect.
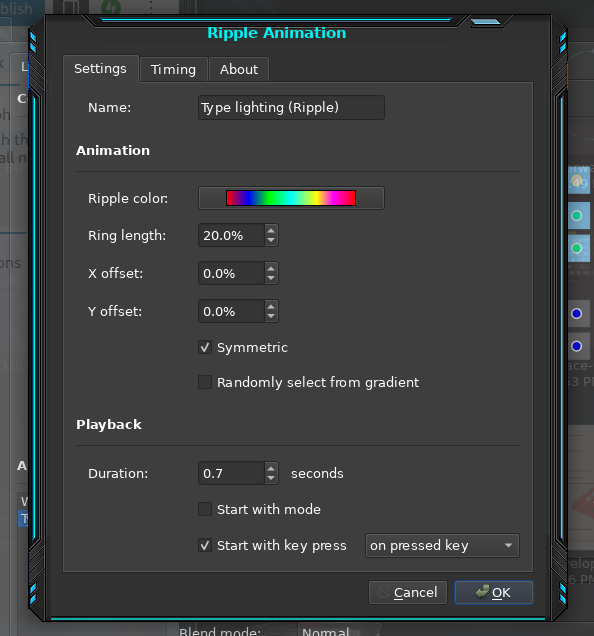
The combined effect of these two animations is for a constant flow of waves across the keyboard with ripples that rapidly spread in a circle from a pressed key. It’s really a lot of fun and you’d think it might be distracting, but I find that it isn’t distracting at all. I have come to expect it and so tend to think there’s a problem when I use a plain keyboard.
Now that you have this mode configured — duplicate it and experiment with the new mode. Change the various animation settings to discover the many interesting ways in which the mode can be changed. I spent hours experimenting (playing, really, but don’t use that word or people will think Linux is fun). If your Corsair keyboard has a profile switch, you can use that to switch between animation modes. In Figure 2, that’s the leftmost of the three small keys above the F3 and F4 keys.
Other Tabs
The other tabs in the main window of the CKB configuration tool allow you to set some basic configuration items.
The most useful example of this for me is to change the key bindings. I was able to set the audio controls to work properly to pause playback and to set the volume. The Performance tab is where the lock-key colors can be set so you can tell whether they’re on or off. The Device tab lists all the connected Corsair devices that it recognizes.
Conclusion
There are ckb-next packages available for Fedora, Mint, and Ubuntu. Other distros may have them, too. In any event cbk-next can be downloaded from GitHub and installed manually.
The ckb-next software is open source. It works well for me and makes my keyboard time fun and interesting.