My start with BASIC programming
Microsoft recently released the source code to 6502 BASIC. If you don’t know, Microsoft got its start by selling BASIC. As the website points out:
Microsoft BASIC began in 1975 as the company’s very first product: a BASIC interpreter for the Intel 8080, written by Bill Gates and Paul Allen for the Altair 8800. That codebase was soon adapted to run on other 8-bit CPUs, including the MOS 6502, Motorola 6800, and 6809.
and:
The 6502 port was completed in 1976 by Bill Gates and Ric Weiland. In 1977, Commodore licensed it for a flat fee of $25,000, a deal that placed Microsoft BASIC at the heart of Commodore’s PET computers and, later, the VIC-20 and Commodore 64.
and:
This is BASIC M6502 8K VER 1.1, the 6502 BASIC lineage that powered an era of home computing and formed the foundation of Commodore BASIC in the PET, VIC-20, and the legendary Commodore 64. This very source tree also contains adaptations for the Apple II (“Applesoft BASIC”), built from the same core BASIC source. The original headers still read, “BASIC M6502 8K VER 1.1 BY MICRO-SOFT”—a time capsule from 1978.
Yes, that early port of BASIC to the 6502 became what many programmers of my generation learned as Applesoft BASIC. I learned BASIC programming on the Apple II at school, and my family bought an Apple II+ clone called the Franklin ACE 1000. My brother and I read books to teach ourselves how to write programs. That was my start with programming!
To celebrate this release of Microsoft’s 6502 BASIC, I’d like to show you how I wrote programs on the Apple II:
The basics of BASIC
Applesoft BASIC programs used line numbers; every instruction for the computer had a line number next to it. So if you wanted to write a simple 3-line program that counted from 1 to 10, you had to use line numbers like 10, 20, and 30.
10  FOR I = 1 TO 10
20  PRINT I
30  NEXT I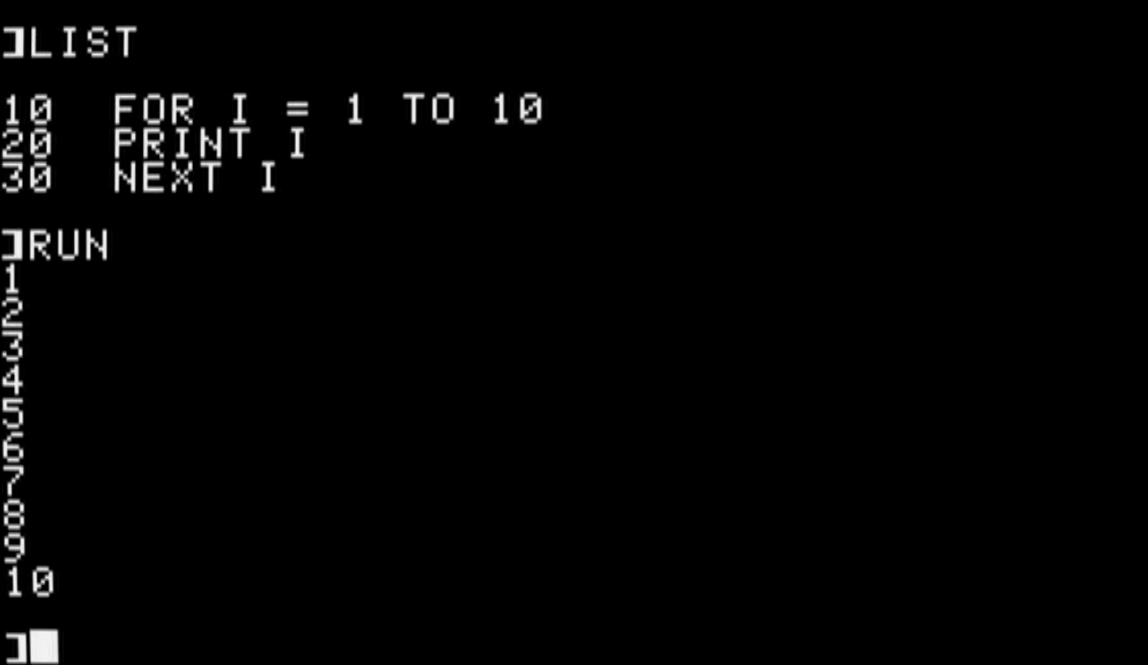
Using line numbers may seem awkward today, but back then it was the only way to enter a program into the computer. And the line numbers made it easy to edit an instruction, or to add a new instruction. For example, I could modify this program to print ten random numbers instead, just by modifying line 20. To do that, I would type a new line 20, and Applesoft BASIC would insert that as a new line 20 in the program:
20 PRINT RND (1)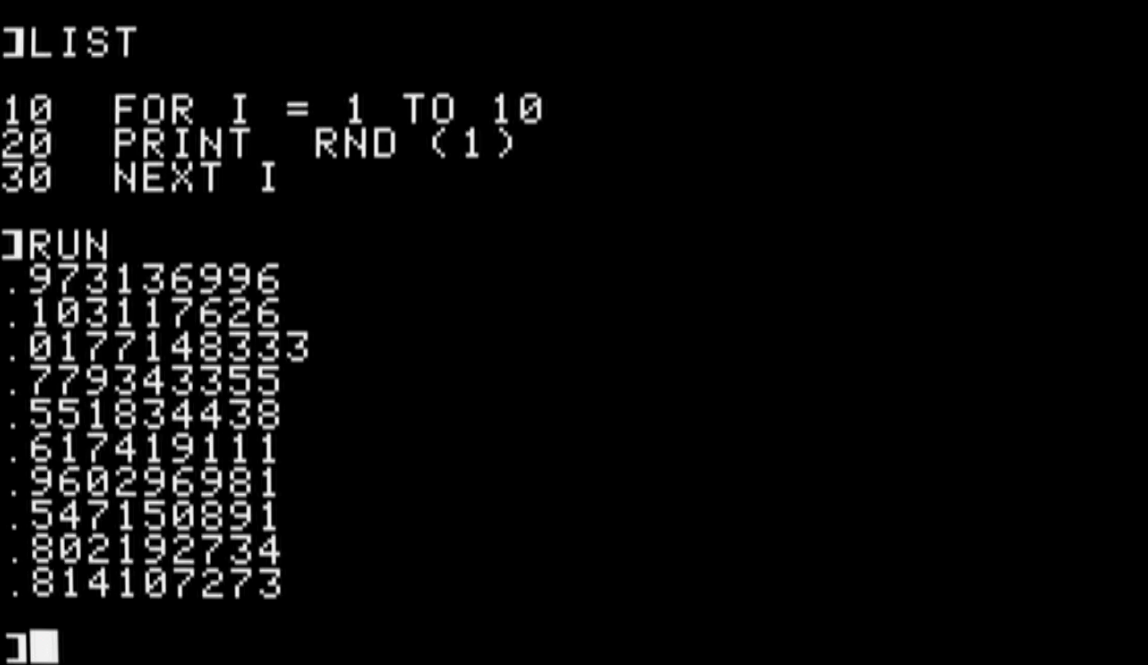
The RND(1) function generates a random value between 0 and 1, although it never quite gets to 1. The closest it can get is 0.999999. This feature of random numbers in Applesoft BASIC means you can “scale” the random number to fit any range.
Let’s see how to do that by updating the program one more time to print random numbers from 1 to 100. To do that, we need to write a new line 20 that multiplies the RND(1) function by 100, which gives a number between 0 and 99.999999. If we add the INT function to take the integer of that value, we are left with a number from 0 to 99. We can add 1 to the end, to get a random number from 1 to 100:
20 PRINT INT ( RND (1) * 100) + 1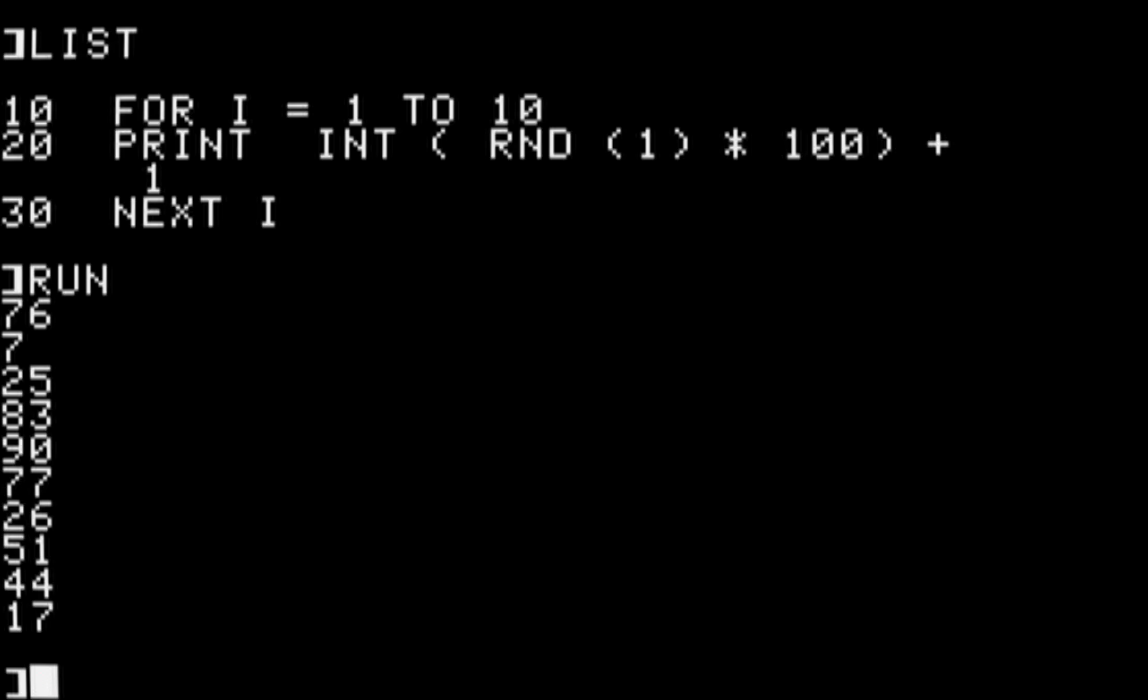
A random number program
One way to exercise random numbers in Applesoft BASIC is with a program to draw the Sierpinski Triangle. There are several ways to draw the triangle, but one method uses a chaos “game” that uses this process:
- Start with three points that define a triangle (I’ll use the upper-left corner of the screen, the upper-right, and the bottom-middle)
- Draw a dot at a random location anywhere on the screen
- Iterate by selecting a random corner of the triangle; draw the next dot halfway between the corner and the previous dot
- Repeat
When I started to write BASIC programs, I found it helped to write down a version of the program in plain text that described what that program would do. Another term for this is pseudocode, which might look like this to draw the Sierpinski Triangle:
set high resolution mode

define arrays to hold the 3 corners
  and set the x,y coordinates for the corners

pick a random x,y coordinate

loop:
  plot the x,y coordinate

  pick a random corner: 1, 2, or 3

  find the halfway x,y point between the old
    coordinate and that corner
And we could type in an Applesoft BASIC program to implement this routine:
10  HGR
20  DIM X(3): DIM Y(3)
30  LET X(1) = 0: LET Y(1) = 0
40  LET X(2) = 279: LET Y(2) = 0
50  LET X(3) = 140: LET Y(3) = 159
60  LET XA =  INT ( RND (1) * 280)
70  LET YA =  INT ( RND (1) * 160)
80  FOR I = 1 TO 100
90  HPLOT XA,YA
100 LET N =  INT ( RND (1) * 3) + 1
110 LET XN = (XA + X(N)) / 2: LET XA =  INT (XN)
120 LET YN = (YA + Y(N)) / 2: LET YA =  INT (YN)
130 NEXT I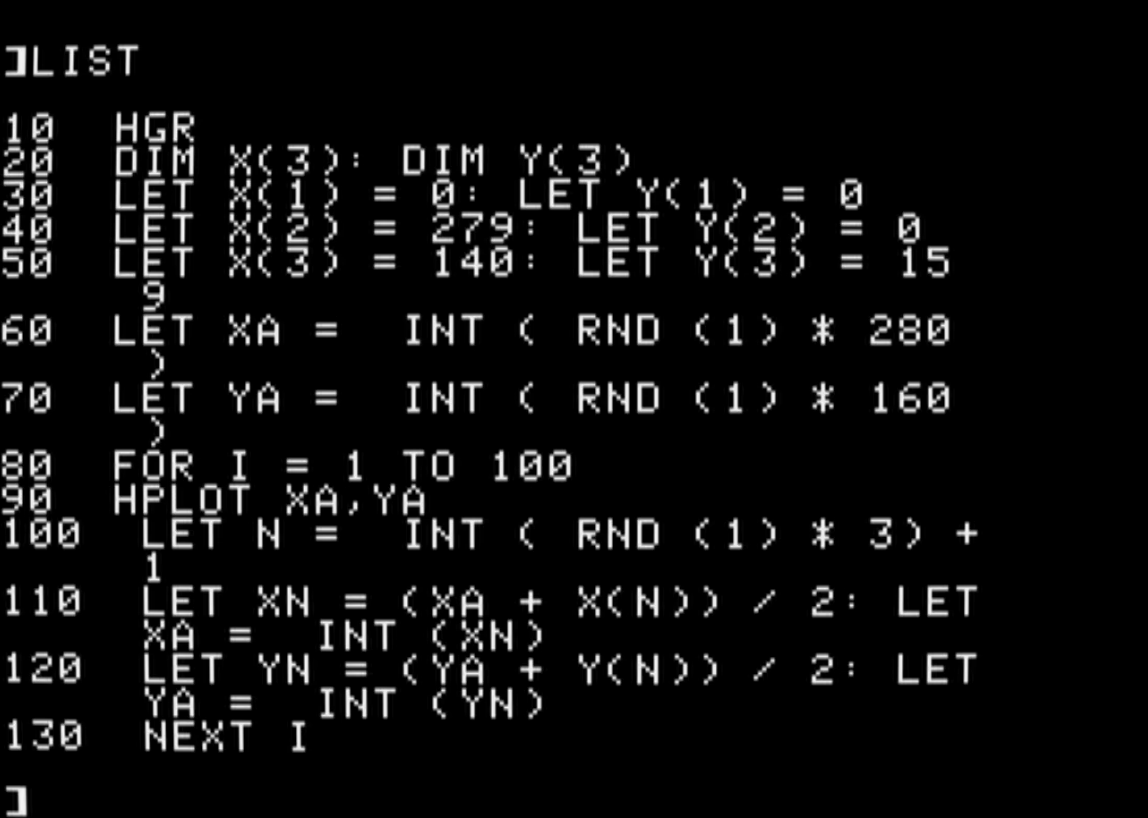
This program also demonstrates a few other features in Applesoft BASIC:
First, variables can only be one or two letters long, which is why I’m stuck using variables like XN where I might write x_new in a modern program. Note that BASIC used the LET statement to assign a value to a variable.
Also, arrays start at 1. This is different from the C programming language and other languages, which use 0 for the first array index.
The Apple II supported two graphics modes: GR for a low-resolution mode and HGR for a high-resolution mode. “High-resolution” is relative here; HGR was 280×160 pixels. Pixel coordinates started at 0, so the x coordinate could be 0 to 279, and the y coordinate could be 0 to 159.
You could get a few more rows of pixels by using HGR2, which eliminated the last few text rows, but I’ll use normal HGR mode so I can see what I might need to type after the program runs.
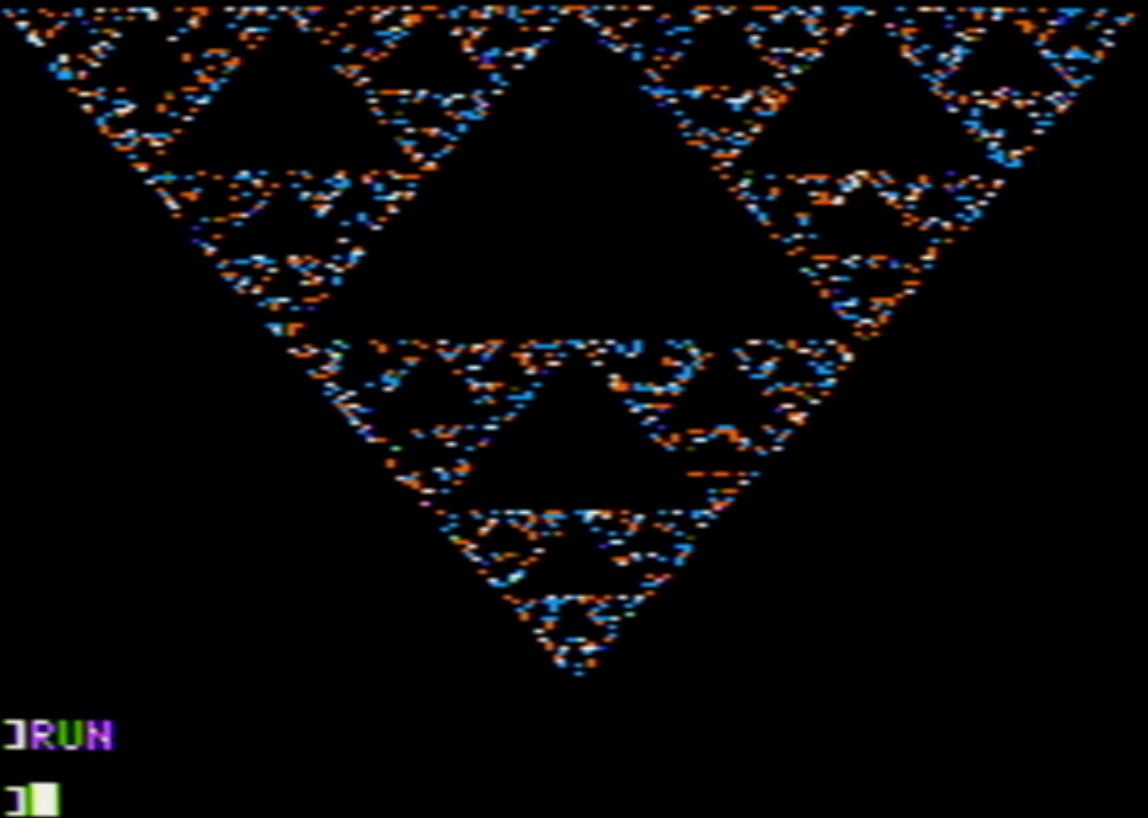
If you run the program on an Apple II computer, you’ll get 100 random points on the screen that start to approximate the Sierpinski Triangle. If you update line 80 to iterate through a much larger set of points, like 2000 points, you can see the triangle emerge from the chaos:
If you want to try it for yourself, type the program into an Apple II emulator and watch it run. Or you can see it in action by watching this video demonstration on my YouTube channel.